Hey guys, I am writing this post after getting a lot of requests to do one. So many of you reach out to me frequently on so many questions related to the Instant Pot so I thought it’s about time I do this post.
While I can’t promise that this post answers all the questions, I hope this will be of some help if you are new to it.
I have structured this post by answering questions which I most commonly get. But before I answer those, there has to be some introduction to the Instant Pot, right?
Disclosure: This post contains affiliate links. For more information on my Affiliate and Advertising Policy, please click here.
What Is An Instant Pot
Instant Pot is an electric multi cooker. It is a pressure cooker which also is as a rice cooker, steamer, yogurt maker and so much more. You can even sauté in your Instant pot! It’s also a food warmer.
In a nutshell it’s one cool gadget to have in your kitchen. Super useful, easy to use and there’s so much that you can do with just 1 pot.
The instant pot makes cooking convenient with its pre-set cycles. These cycles have been designed to especially cook lentils/beans/rice/yogurt/poultry/porridge etc. and that makes it very user friendly.
Since its electric so you can set the exact time and not have to do any guess work. It gives consistent results compared to a traditional pressure cooker.
Instant pot allows you to have hands-free cooking time. I think that’s one great advantage of this gadget. The fact that you can put your food inside the pot and then walk away from it while it gets done is a huge plus.
Once the food is cooked, the instant pot goes into warm mode, which means that it keeps the food warm until you want to eat it. Another plus especially during winters.
You can keep the food to cook in the morning before going to work and you will come back home to warm homemade meal.
And it’s one pot – less mess, less dishes and you gotta love that!
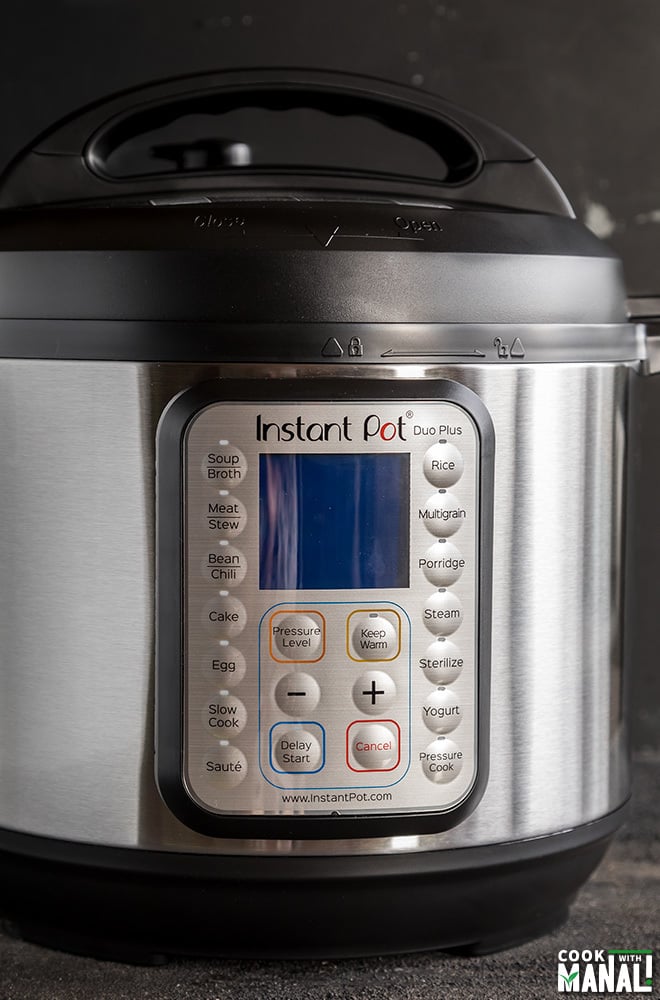
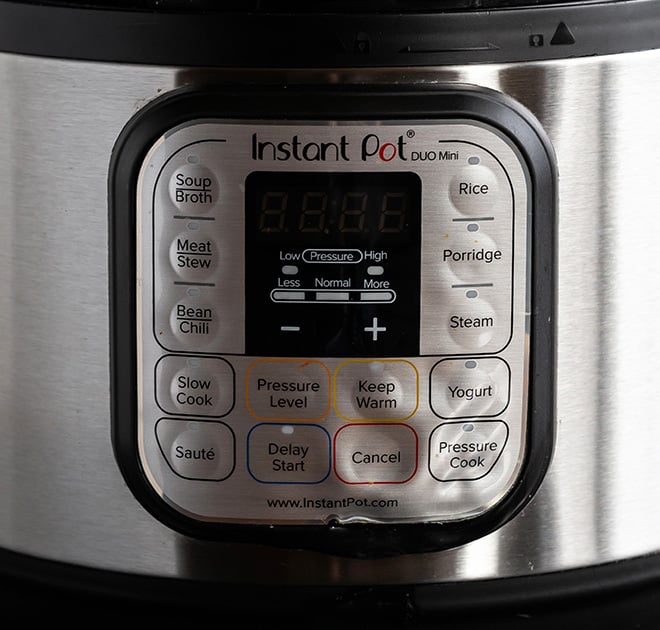
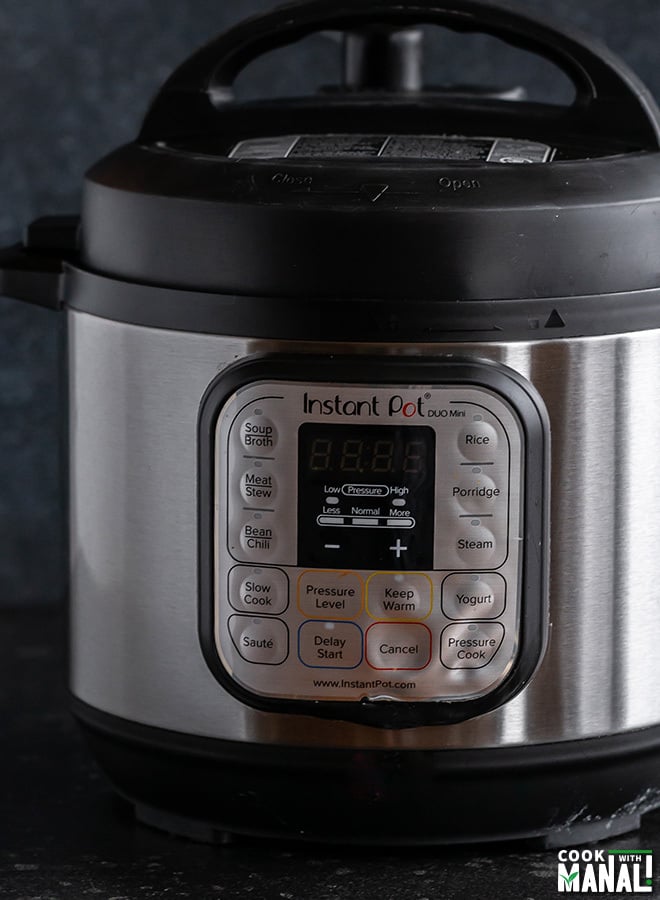
Buttons on the Instant Pot
The Instant Pot does have a lot of buttons on it and it can get confusing. Different models may have slightly different buttons but I will like to talk about the ones which we most commonly use.
These are also the ones that I have used for most of my recipes in my cookbook and on the blog.
Keep Warm/Cancel: This button is used to cancel the current program and choose the next one. You would use this button all the time to end the sauté function before choosing the next cooking program like manual or rice.
Once the food is cooked, the Instant Pot goes into this mode and keeps the food warm.
Sauté: The sauté button as the name suggests is to sauté things in the pot. 90% of the recipes on my blog and book would use this function.
Using the adjust button, adjust the sauté to “less” or “more” depending on how much heat you want for a particular recipe.
It can also be used to get rid of excess water from the pot.
Manual: The manual button which is also the pressure cook button on some models is the one you will be using all the time.
It lets you pressure cook at high or low pressure and this is the button that you will be using all the time.
Most recipes would call for cooking on high pressure but few might need the low-pressure cooking. You can use the adjust or pressure level button (depending on your model) to adjust the pressure to high or low.
Steam: This function has a default setting of 10 minutes on high pressure. Time can be adjusted using the adjust button. It’s great for steaming veggies or dumplings. Remember to use a steamer basket with this function.
Rice: Pre-set cycle of 12 minutes on low pressure for cooking rice.
Beans/Chili: Pre-set cycle of 30 minutes on high pressure for cooking beans/legumes. Time can be adjusted using the adjust button.
Yogurt: Pre-set cycles of 8 hours. Depending how tart you want your yogurt to be, you can increase or decrease this time. You can adjust yogurt to low or high which is “boil”.
Slow Cooker: Used for slow cooking the food. Time can be adjusted using the adjust button.
Soup: Pre-set cycle of 15 minutes on high pressure. Time can be adjusted using the adjust button.
Porridge: Pre-set cycle of 20 minutes on high pressure. Time can be adjusted using the adjust button.
Meat/Stew: Pre-set cycle of 35 minutes on high pressure. Time can be adjusted using the adjust button. I have never used this button for obvious reasons.
Multigrain: Pre-set cycle of 40 minutes on high pressure. Time can be adjusted using the adjust button. I don’t use this one much either.
And now coming to the frequently asked questions and some tips!
Which Instant Pot to Buy
Okay, one of the most common question that I get everyday is which Instant Pot to buy?
One common misconception that people have that there are different brands of Instant Pot and they ask me which brand they should buy.
Well, Instant Pot is the brand itself. There are different models which you can choose from.
Instant Pot comes in 3 different sizes– 3 qt, 6 qt and 8 qt. I personally own the 3 qt and 6 qt. The size you choose would depend on the size of your family. I would say a 6 quart is pretty decent size for most families.
Now there are DUO and LUX models in all sizes – so which one to go for? My recommendation is always to go for DUO. The LUX model doesn’t have the yogurt button and also there isn’t an option for low pressure.
So 6 Qt DUO 7-in-1 (9-in-1 or 10-in-1 are also good) is my recommendation! It’s the most basic model and does a good job.
How much time does the Instant Pot takes to come to pressure?
That depends on the amount of liquid your recipe has.
Say if your recipe calls for 4 cups of water, it might take 15 minutes or even more for the pot to comes to pressure.
On the other hands if your recipe has only 1/4 cup of liquids, the pot will likely come to pressure in 3 to 4 minutes.
And how much time does the Instant Pot takes to release pressure once the food is cooked?
Again, it depends on the amount of liquid present in the pot. If there’s too much liquid, it might take 15 to 20 minutes to release all the pressure.
Less liquid in the pot would mean a quicker release of pressure.
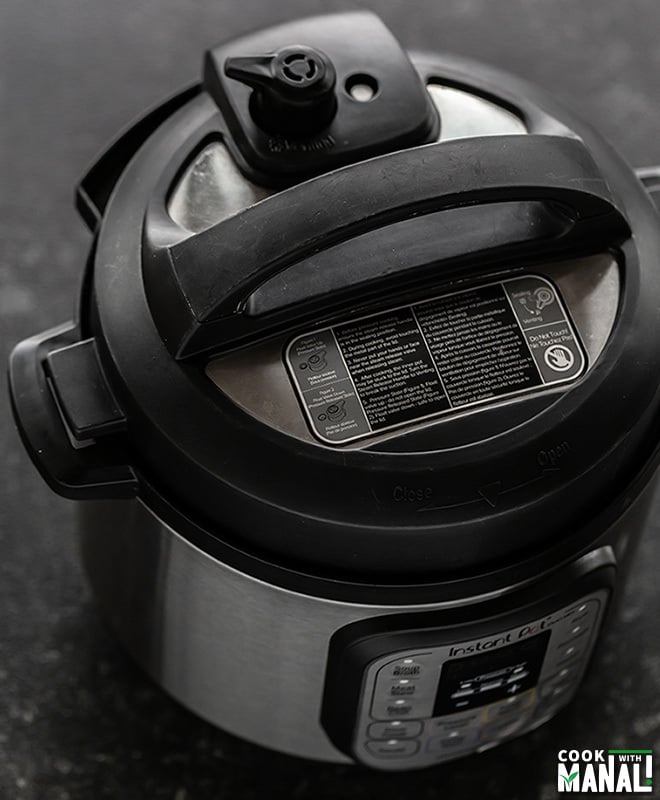
How to Release Pressure?
Once the cooking time is done in your Instant Pot, you hear a beep. You can do 2 things after this – either release the pressure manually or let the instant pot release the pressure naturally.
Natural Pressure Release (NPR): a lot of recipes call for NPR. This means that you allow the pot to release the pressure on its own.
Once the food is cooked, you don’t do anything and let the pot take its own time. The time may vary depending on how much liquid the pot has.
More liquid means it would take more time to release pressure. You would know the pressure is released when the floating silver pin comes down.
Quick Release (QR): when a recipe calls for QR, it means you release the pressure manually once the cooking time is up.
You do this by carefully moving the pressure valve from sealing to venting position. Always use a pair of silicone gloves while doing this just to be extra-careful.
Few minutes NPR and then QR: some recipes will call for 2 minutes NPR and then QR or 10 minutes NPR and then QR.
This means that you first let the pressure release naturally for a particular amount of time and then release the remaining pressure manually by moving the pressure valve from sealing to venting position.
What’s the minimum liquid needed for the pot to come to pressure?
The official Instant Pot manual says that you need at least 1 cup (8 oz) of water in the pot for it to come to pressure.
That however is not true, a lot of my recipes would call for much less water.
The reason? You have to see what’s in your pot. A lot of veggies like cabbage, spinach, tomatoes etc. release a lot of water when pressure cooked. So if you have those you don’t need to add tons of water.
I remember once cooking cabbage (Indian style) with 1/4 cup water and when I opened the pot, there was just so much water. It actually didn’t need any water.
Is There Magic in The Instant Pot?
No, it still takes time to cook!
Because instant pot has become so popular, I keep reading these articles claiming that food cooks in minutes and seconds in the instant pot.
While it’s true that cooking time is reduced when you pressure cook, but at the same time it is also true that instant pot takes time to come to pressure and then it also takes time to release pressure.
So, if a recipe says that it was cooked in 2 minutes, that is time that the Instant Pot counts after it comes to pressure.
It would take time first to come to pressure and then once those 2 minutes are up, it would also take time to release all the pressure.
I just want you guys to understand this, don’t expect food to cook literally in 2 minutes.
Why do I get the BURN message when making a recipe and how to fix it?
Okay, I get this so much and honestly it drives me little crazy too at times.
That’s because I have my 6qt DUO for 2 to 3 years and in all these years I must have cooked hundreds of meals in it and I have never got the BURN message ever once!
So when you guys ask me why I got the burn message, sometimes it’s really hard for me to answer because I have never faced it.
But after doing a lot of research, here’s what I have found out about the BURN problem-
✓ the burn issue is more prevalent with the newer models, especially the 8 qt. A lot recipes online (including mine) are developed using the 6 qt but since the 8 qt has bigger surface area, sometimes the liquid is not enough and hence the burn message.
So if you have a 8 qt, you might consider adding little more water than the recipe calls for especially while cooking rice, pasta etc. And make sure water is underneath the food.
✓ another reason why you get this is when you are using thick sauces like pasta sauce, canned tomatoes. Whenever you are using a thick sauce, add water first to the pot then add sauce at the end and after adding Do NOT stir!
✓ starchy food items like pasta, rice, spaghetti also cause the burn issue. In case you face the problem, simply layer things and add the rice/pasta etc. on top and do not stir after adding them if your model is prone to getting burn messages.
✓ Always de-glaze your pot after sauteing onions. After you have sauteed onions/garlic etc, there are brown bits at the bottom. You need to scrape them with water before putting the pot to pressure.
If you don’t de-glaze the pot, it will not come to pressure and you will get the burn message.
✓you can also get the burn message when you forget to move the pressure valve into sealing position. Make sure the pressure valve is in sealing position when pressure cooking.
Do I also double the water when doubling a recipe?
No, you should not double the water when doubling a recipe especially for curries etc. The reason is that Instant Pot is a closed environment. There’s no evaporation when the food gets pressure cooked (unlike a stove-top).
So when you double the liquid for chili, curries etc. you would just end up with a whole lot of liquid which will dilute the flavor. I would suggest to do it 1.5 times. You can always add more as needed.
But of course sometimes you can easily double the water like for rice – it should be fine.
What I want to say here is that there’s no hard and fast rule here but on an average do 1.5 times, just to be on the safer side.
Also with my recipes, always be careful about doubling hot spices like garam masala, red chili powder. Do them 1.5 times, you can always add more if needed.
Do I increase cooking time when doubling a recipe?
No, the cooking time should remain same. Pressure cooking time depends of the quality and size of the ingredients not the amount.
Dos & Don’ts with your Instant Pot
Do not overfill your instant pot. The content in the pot will expand when pressure cooked, always keep that in mind. So do not fill it more than 2/3rd full.
Do not add oil to the pot until it displays hot. The steel pot will last longer this way.
Do not take your face too close to the pot if you are trying to release the pressure manually. Always maintain a safe distance.
Do not try to cook food without any liquid in the pot. The pot needs some liquid to come to pressure.
Do not place the pot close to your gas stove. Constant heat from the stove can cause damage to your instant pot.
Do wear silicone gloves or use a kitchen towel when releasing the pressure manually.
Do wash the sealing ring after every use. It takes only few seconds to take it out.
Do make sure that the pressure valve is in sealing position every time you pressure cook else the pot will never come to pressure.
I hope this was somewhat helpful. If you have any more questions, please leave them in the comments section below and I will try to answer them as quickly as possible.

I’m looking for an instruction book for my 3 qt. Instant pressure pot
you might have to look for it on their official website
Hi Manali I have just purchased my first instant pot. I’m going to try a butter chicken recipe but I want to halve it, do I halve the liquid? It has 910g (2lb) chicken and 795g (28oz) can crushed tomatoes. I only want to use 405g (1lb) chicken so do I half the crushed tomatoes. That is the only liquid in the recipe
yes you will half in the ingredients but pressure cooking time remains same
Hey Manali! Your recipes have been my go-to for Indian cooking. I was never an expert, but I picked up elaborate cooking during 2020, and your recipes got me through it.
One question about instant pot – is there a way to boil rice/pasta in an instant pot? I like my rice and pasta with excess starch drained out, and was wondering if I can make that happen with the Instant Pot. Thanks in advance for your input!
I definitely have one-pot pasta recipes on the blog, and I have never used the IP to only boil the pasta separately. The fact that I make a one-pot pasta dish without boiling the pasta separately is what I like most about making pasta in Instant Pot! So I am afraid I have never tried boiling pasta alone, I would rather use a pot for that if I have to do that.
I tried making rice in my Instant Pot following the instructions in the manual and wasn’t impressed. I also attempted pasta the same way. Again not to my satisfaction. I have made other attempts after but added more water and just strained it after which was a better result. However I still prefer the stovetop mentioned for rice and pasta. Strangely I love making risotto in the IP. I love Risotto but it’s messy on the stove. But in the IP it is a dream.
Hi Greetings,
There is a spout like plastic on the outside and it collects some liquid. Should I force it to open and I clean it?? How do I operate that in a 6Qt IP?
My IP has a the seal switch which does not click like the vent side? should I be concerned?
Thanks
hmm I have never seen that plastic. I might have removed it. I think it must be detachable so you can remove and clean it.
My instant pot has the plastic attachment. Yes, it can be removed but you may need to add some pressure to detach it. It’s there to ‘catch’ any excess liquid but I found that mine only has a few drops in it at best and most time after cooking is completely dry. This may be due to the type of food I’m cooking but mostly I “forget” it’s there and only notice it when I clean my pot after use.
Hi Manali,
Thanks so much for this post. It answered almost every query I had. One more thing I wanted to know is, can you drain the water from the rice? I’m a South Indian and I eat red rice. We use a cooking method where the water needs to be drained out. Is that possible in instapot?
Hi Riya, I am sorry I am not sure if I understand your question as I am not familiar with this cooking method. You mean you drain the water before cooking? That you anyway do right?
I have a recipe that calls for NO water. I don’t know what to do should I had it anyway. It does have a 28 oz can of tomatoes but it says to drain it.. please i need help, what should I do!
I can’t say until I see the recipe
I made potato salad in my 6 at IP Duo. I had 1 cup of water, my cut up potatoes and eggs in the shell on top. I pressed steam, HP and 4 min. I never reached a countdown and my food/burn came on. The food turned out fine, but the bottom of my insert had dried/burned liquid. I called IP today and they said always put in 2 cups of liquid minimum. Do you agree I should have done that??
I don’t agree, I have made things with as less than 1/4 cup water, it all depends on what else you are adding to the pot. Some veggies release soo much water, you need to add like no water at all like spinach, cabbage. And 1 cup of water was fine in my opinion for cooking the potatoes. Maybe you have a faulty sensor or it’s way too sensitive, some newer models are like that.