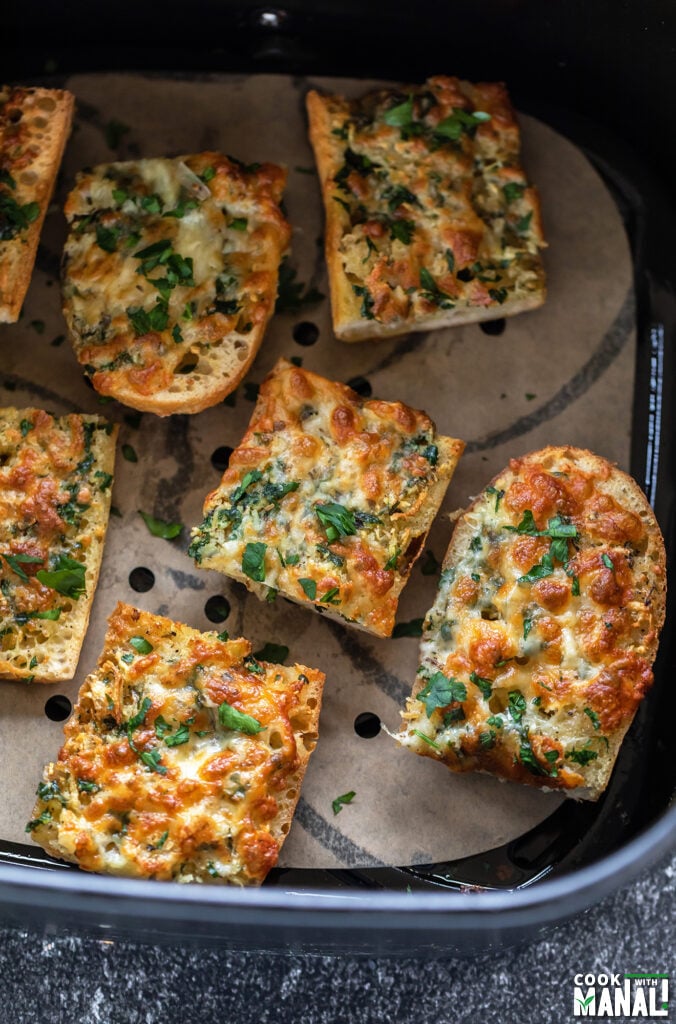
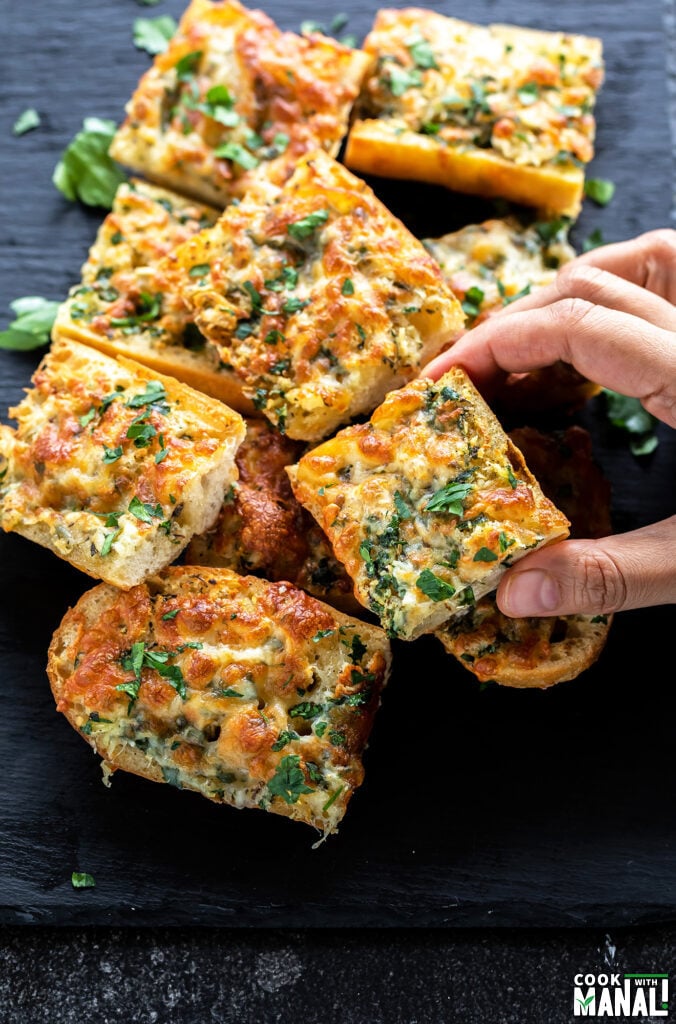
This Air Fryer Garlic Bread is the easier garlic bread that you can make! It’s cheesy with crispy edges, requires few ingredients and gets done in less than 20 minutes! Makes a great snack and the perfect side to your pasta and salads.
If you have never made garlic bread in your air fryer, then let me introduce to this amazingness! Spoiler alert: you might get addicted to it because it’s so good and so easy!
Garlic bread turns out so perfect in the air fryer and all you need is 15 to 20 minutes to put it all together. I have been making it so often just because it hardly takes any time. Earlier I would always make garlic bread in my oven, and because pre-heating oven takes long, I would not do that every other day to make garlic bread.
But air fryer makes it so convenient, the pre-heating (if your air fryer needs it) takes 2 to 3 minutes max and then the bread gets done in 5 minutes! This is my new favorite things to make in the air fryer these days along with onion pakoda.
Why We Love This Air Fryer Garlic Bread
- It’s super easy to make and takes only about 5 minutes in the air fryer!
- makes a great snack!
- also great as a side along with pasta or salad.
- is great with or without cheese.
- great for parties, game nights!
Ingredients

French bread/baguette: I have used French baguette from Trader Joe’s. I like using French loaf since they are easier to cut and also make amazing garlic bread. You can use Italian bread or any crusty bread of choice. You can even use toasts!
Salted butter: for this recipe, I really like using salted butter. You can use unsalted butter, but I recommend using salted butter for more flavor. If using unsalted butter, you should double up the salt. I also add little olive oil for flavor.
Garlic: since this is garlic bread, there’s obviously tons of garlic here. I like using a lot of garlic in my garlic bread, if you are not a fan you can cut down on it. You can either used minced garlic from a bottle or use fresh minced garlic (which I recommend for extra flavor).
Seasonings: the bread is seasoned with Italian seasonings, fresh parsley, salt and pepper.
Cheese: this garlic bread is topped with mozzarella cheese but you can use cheese of choice. You can definitely add some parmesan here.
Cheesy Garlic Bread
1- Take 1 stick (1/2 cup) of super soft salted butter in a large bowl and start mashing it with a fork. The butter needs to be really soft and you should ideally take it out of the refrigerator and put it on the counter for 2 to 3 hours before using. Although this time may vary a lot depending on how hot or cold it is where you live.
2- Keep mashing until the butter is really smooth.
3- Add in 1 tablespoon olive oil.
4- Then add the following:
- 3/4 teaspoon Italian seasoning
- 2-3 tablespoons chopped parsley
- 1/4 to 1/2 teaspoon salt (to taste)
- 1/4 teaspoon black pepper (add more to taste)

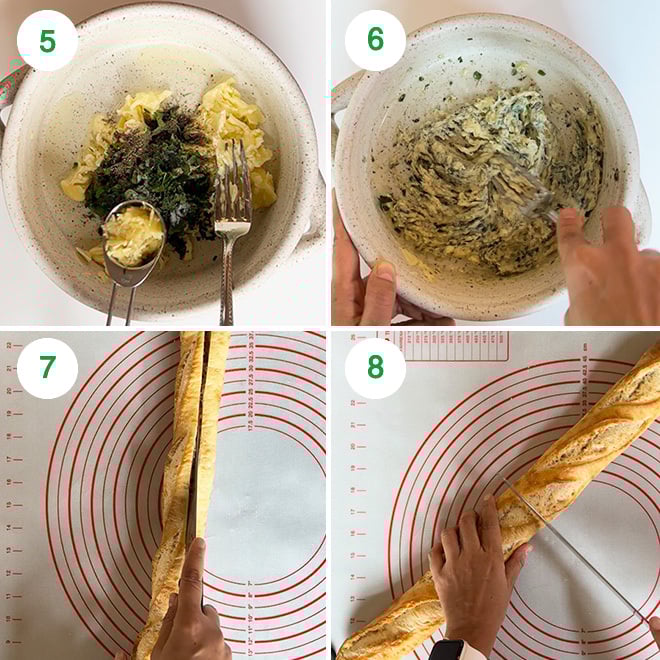
5- Followed by minced garlic. I added around 1 & 1/2 tablespoons of minced garlic here (from 7 to 8 large garlic cloves). If this is a lot of garlic for you, cut it down. I really like extra garlic in my garlic bread.
6- Now using the same fork, mix until everything is well combined. Your garlic butter spread is now ready. Set this aside.
7- Take the French loaf and slice it in half lengthwise.
8- Then cut it into 2 parts from the center, so you have 4 slices now.
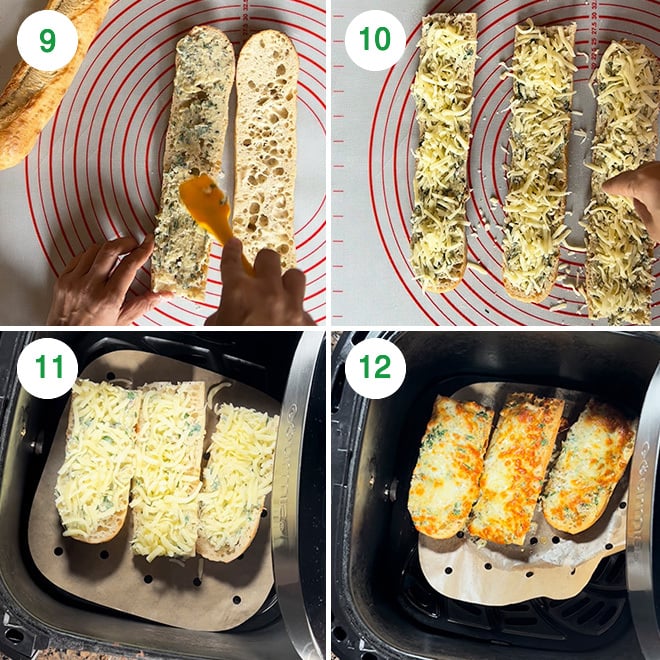
9- Apply the prepared garlic butter generously on each of the cut 4 slices.
10- Top with mozzarella cheese. I used around 1 cup of shredded cheese for the 4 slices.
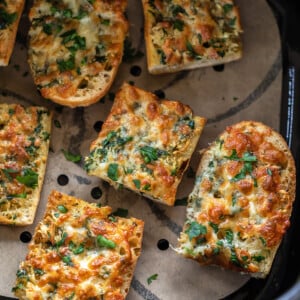
11- Pre-heat your air fryer according to manufacturer’s instructions. Place the prepared slices into the air fryer. I used a parchment paper below (which has holes and is especially made for air fryer), if you do not have this, spray the bottom with some oil spray so that the bread doesn’t stick.
I had to cut each slice further into 2 parts to fit into the air fryer (so I had total of 8 slices to air fry). I placed 3 cut slices into the air fryer at one time. Do not overcrowd the air fryer and place the slices in a single layer.
12- Air fry at 350 F degrees for 4 to 6 minutes until the cheese melts and the edges of the bread become crispy. You can add extra minute or two for crispier bread. Time may vary depending on the brand and model of air fryer. Remove from air fryer carefully and place on serving board. Air fry remaining slices similarly. The first batch take more time but the next batches cook faster as the air fryer is really heated up.
Wait for 3 to 4 minutes and then you can slice them into even smaller pieces before serving. Sprinkle with chopped parsley and serve warm.
Plain Garlic Bread
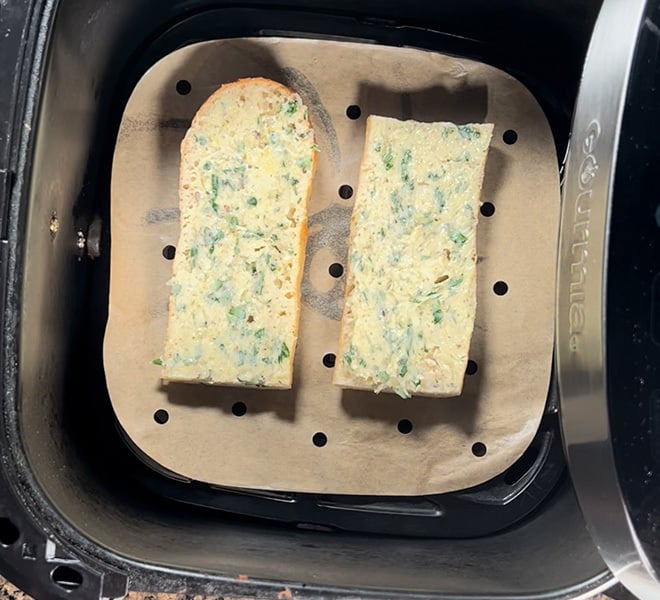
If you don’t want the cheese, you can make simple plain’ol garlic bread. The recipe remains same, just skip the cheese at the last stage. You will air fry for the same amount of time.
I actually baked few without the cheese!
Extra-Crispy Bread
If you prefer extra-crispy bread edges and you feel the cheese on top is getting browned too quickly, what you can do it that you can simply place the bread with garlic butter in the air fryer for 2 to 3 minutes and then add cheese and air fry for 5 minutes. That will make the edges crispier.
Oven Instructions
If you want to bake this in the oven, well first you don’t need to cut the bread into so many slices since a long loaf would also fit in the oven.
Bake at 400 F degrees for 8 to 10 minutes until cheesed melts and is browned.
Serving Suggestions
You can serve it as a snack or it also goes so well with pasta like this Rigatoni with Mascarpone Cheese and Creamy Tomato Basil Pasta.
You can definitely eat it with a salad as well.
Storing & Re-heating
Store leftover garlic bread in an airtight container, wrap them in aluminum foil before doing so. You can store these for up to 3 days in the fridge.
To re-heat just put them back in the air fryer. My air fryer has a re-heat button so I just press that (it has a timer of 15 minutes at 300 F degrees but it’s perfectly heated and warm in around 3 minutes).

Additional Toppings
What to jazz up your garlic bread, consider these toppings!
- Jalapeño
- Corn
- Mushrooms
- Green Onions
- Onions
Tips & Notes
- You can change the amount of garlic to taste. I definitely use tons of it but you can tone down.
- Use fresh garlic for best taste, I don’t like using bottled garlic.
- Make sure your butter is really soft before you start making the spread. It makes the mixing very easy.
- Consider using salted butter in this recipe for extra flavor.
- Top the garlic bread with crushed chili flakes to add a touch of heat.
- Place each layer of garlic bread in a single layer in the air fryer. Do not stack them.
- Every air fryer is different so keep an eye after 3 minutes, it make take more or less time than 5 minutes depending on the brand of air fryer you have. This recipe was tested in a Gourmia air fryer.
If you’ve tried this Recipe then don’t forget to rate the recipe! You can also follow me on Facebook, Instagram to see what’s latest in my kitchen and on YouTube to watch my latest videos.
Air Fryer Garlic Bread
Ingredients
- 1/2 cup salted butter, 1 stick, at room temperature. It needs to be super soft.
- 1 tablespoon olive oil, use light olive oil and not extra-virgin
- 3/4 teaspoon Italian seasoning
- 2-3 tablespoons chopped parsley, + more to sprinkle at the end
- 1/4-1/2 teaspoon salt, adjust to taste
- 1/4 teaspoon black pepper, or to taste
- 1 & 1/2 tablespoons minced garlic, from 7 to 8 large garlic cloves
- 1 French loaf/baguette, 11.5 oz/326 grams
- 1 cup mozzarella cheese, shredded, you can add more to taste
Instructions
- Take 1 stick (1/2 cup) of super soft salted butter in a large bowl and start mashing it with a fork. The butter needs to be really soft and you should ideally take it out of the refrigerator and put it on the counter for 2 to 3 hours before using. Although this time may vary a lot depending on how hot or cold it is where you live. Keep mashing until the butter is really smooth.
- Add in 1 tablespoon olive oil.
- Then add the Italian seasoning, chopped parsley, salt (to taste) and black pepper. Yes we are adding salt even when using salted butter.
- Add the minced garlic. I added around 1 & 1/2 tablespoons of minced garlic here (from 7 to 8 large garlic cloves). If this is a lot of garlic for you, cut it down. I really like extra garlic in my garlic bread.
- Now using the same fork, mix until everything is well combined. Your garlic butter spread is now ready. Set this aside.
- Take the French loaf and slice it in half lengthwise. Then cut it into 2 parts from the center, so you have 4 slices now.
- Apply the prepared garlic butter generously on each of the cut 4 slices. Then top with mozzarella cheese. I used around 1 cup of shredded cheese for the 4 slices. Skip adding the cheese if you want to make plain garlic bread.
- Pre-heat your air fryer according to manufacturer's instructions. Place the prepared slices into the air fryer. I used a parchment paper below (which has holes and is especially made for air fryer), if you do not have this, spray the bottom with some oil spray so that the bread doesn't stick.I had to cut each slice further into 2 parts to fit into the air fryer (so I had total of 8 slices to air fry). I placed 3 cut slices into the air fryer at one time. Do not overcrowd the air fryer and place the slices in a single layer.
- Air fry at 350 F degrees for 4 to 6 minutes until the cheese melts and the edges of the bread become crispy. You can add extra minute or two for crispier bread. Time may vary depending on the brand and model of air fryer. Remove from air fryer carefully and place on serving board. Air fry remaining slices similarly. The first batch take more time but the next batches cook faster as the air fryer is really heated up.Wait for 3 to 4 minutes and then you can slice them into even smaller pieces before serving. Sprinkle with chopped parsley and serve warm.
Notes
- You can change the amount of garlic to taste. I definitely use tons of it but you can tone down.
- Use fresh garlic for best taste, I don’t like using bottled garlic.
- Make sure your butter is really soft before you start making the spread. It makes the mixing very easy.
- Consider using salted butter in this recipe for extra flavor.
- Top the garlic bread with crushed chili flakes to add a touch of heat.
- Place each layer of garlic bread in a single layer in the air fryer. Do not stack them.
- Every air fryer is different so keep an eye after 3 minutes, it make take more or less time than 5 minutes depending on the brand of air fryer you have. This recipe was tested in a Gourmia air fryer.
Nutrition
Nutrition information is automatically calculated, so should only be used as an approximation.


Turned out amazing! I had to skip adding extra salt as it was too salty for me but apart from that , its soooo good. I have made it twice in a week. Need I say more?
Thanks Manali.
Glad to know Barkha! thanks for trying!