There’s something about baking breads, something so fascinating and so exciting. I often think how amazing is the art of making bread, how you add yeast to flour and it results in a soft and beautiful bread. Of all the things I bake breads fascinate me the most. They are also most challenging for me, the first few times I tried baking bread I failed miserably. I had no clue how to use yeast, not that I’m an expert now but after several failed attempts and lots of reading I can now make at least the basic breads correctly.
My experiments with yeast has made me realize that 2 things are very important if you want to perfect your breads.
1. Good quality yeast: I say this in every bread post but it really is that important. I say this because I have used random yeast packages before and they result in a hard brick like bread, seriously no kidding. I swear by the Red Star yeast , I have used their instant yeast and the active dry yeast both and they always work.
2. Candy thermometer: Yeast will work only when it mixed with water at the right temperature. Too high or too low temperatures will kill the yeast. Recipes often call for warm water but how warm is totally based on your judgement. You have to judge when the water is not hot enough but still warm and then add the yeast. To avoid all these confusions, get a candy thermometer. Yeast works best at temperature 110-115 F degrees. Once you have the thermometer it becomes really easy, you know exactly when to add the yeast so that it works perfectly. I strongly suggest buying a thermometer if you are serious about baking breads at home.
Coming to breads there’s always a lot of kneading involved. But I tried not kneading the dough this time around and it actually resulted in a beautiful, soft bread. Now I’m wondering do we really need to knead that much for softer breads? Maybe we have to knead for different breads textures but for softer breads, doesn’t look like it! My crazy experiments will go on till I find an answer to this.
To make these gorgeous garlic knots first of all activate the yeast by mixing it with warm water. Stir to dissolve and leave for around 10 minutes till you see foam on top. This is called “proofing” the yeast. If there’s no froth that means your yeast is dead. Throw it away and start again. This step is important as this can make or break the recipe. All the hard work will go waste if the yeast is dead and you use that to knead your dough.
Once the yeast is proofed add the flour, salt, sugar, oil and mix. There’s no need to knead, once the dough comes together cover it and place it in a warm spot to proof until doubled in volume. This may take 1-2 hours, mine doubled in 1 hour 15 minutes. Ideally the best way is put it outside on a hot sunny day but if you live in a place like Seattle (like me) then you know it’s not always possible. In that case this is what I do, preheat oven to 200 F degrees and then switch if off. I then place my bowl in it till it has doubled in volume. You can also place it inside the microwave or any other warm place.
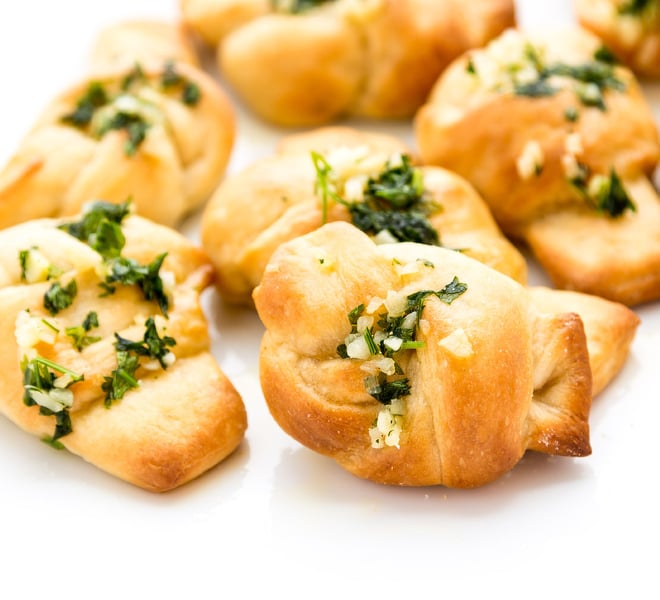
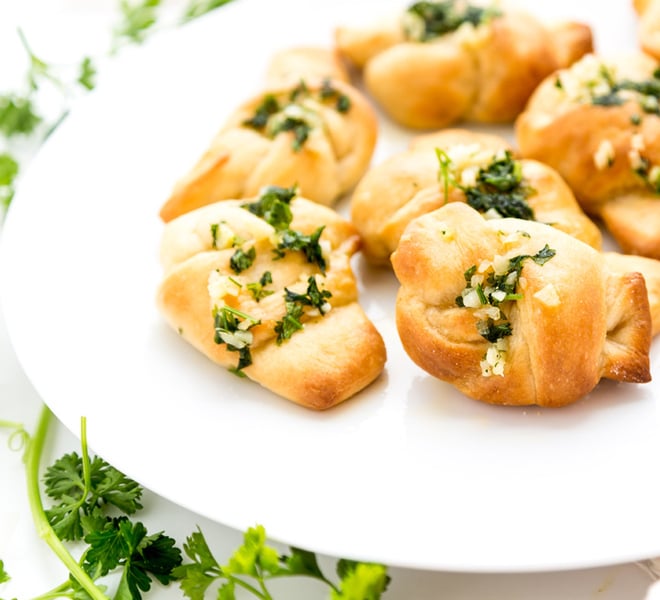
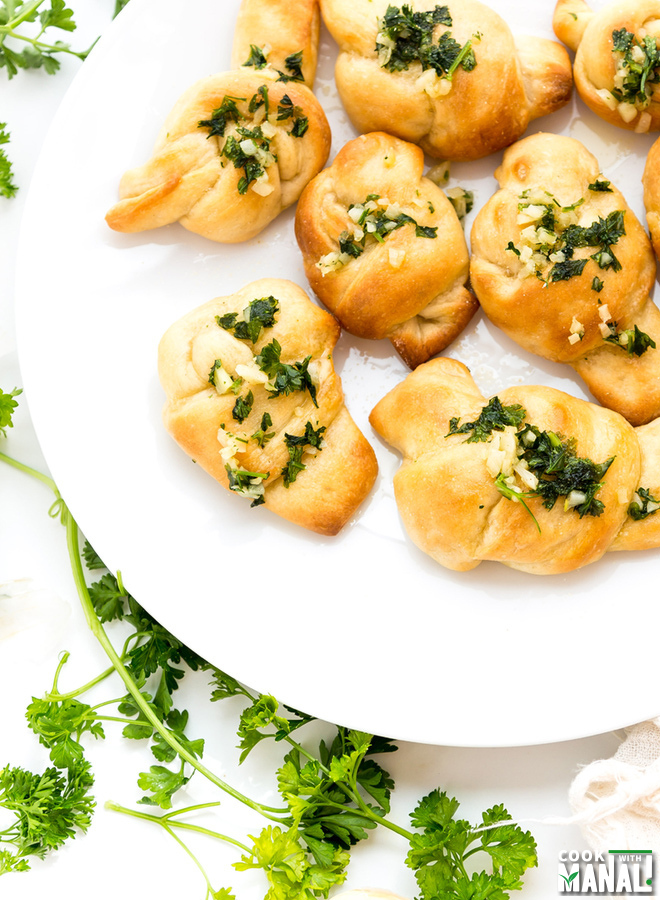
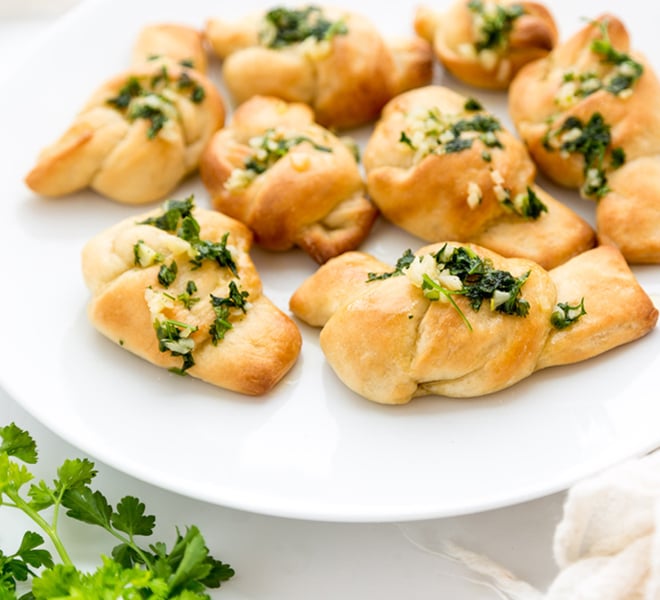
Then punch the dough to release the air. Prepare your working station by sprinkling some flour on the surface. Roll the dough into a rectangle using a rolling pin. Cut strips using a sharp knife. Take each strip and tie it like you tie a knot. My knots aren’t exactly perfect but it will definitely get better with practice. Brush them with little olive oil, cover and keep in a warm place till the knots double in size.
Preheat your oven to 400 F degrees. Once the knots have doubles, pop them in the oven and bake for 12-15 minutes or till they are light golden brown in color. Mine were done in 12 minutes. Do not over-bake them. Sometimes oven temperatures are way off and so it’s good to get an Oven thermometer to avoid over-baking things. I burnt quite a lot of my cookies and cakes before I got this thermometer and realized that the readings of my oven were 40 degrees off!!
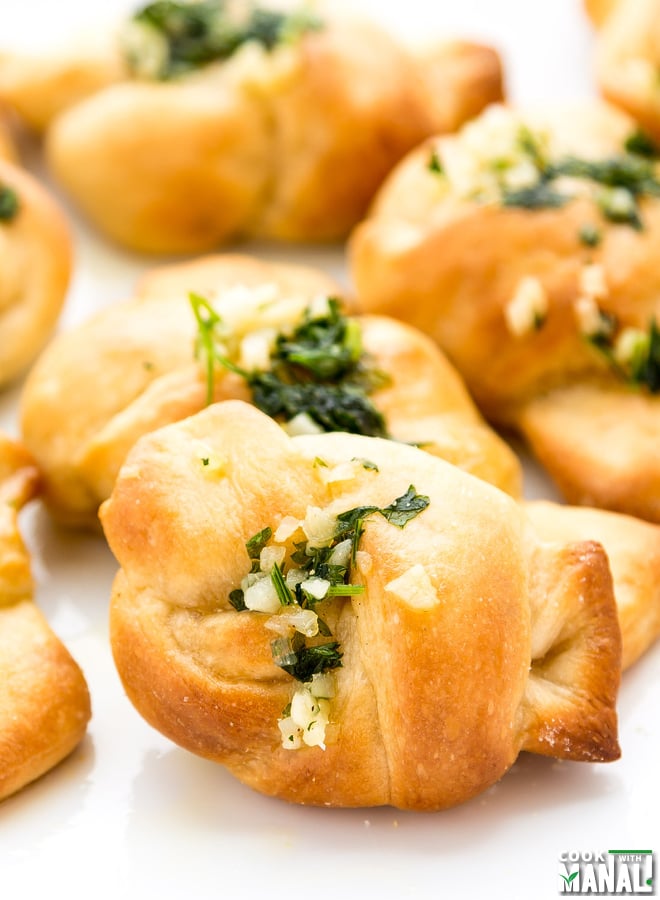
Anyway so while the knots are baking, prepare the garlic-butter mixture. Melt the butter in a pan, add finely chopped garlic and saute for 2 minutes and then add the chopped parsley. Take out the knots from the oven and pour the mixture immediately over the knots. Sprinkle some garlic salt on top and serve immediately. You can use regular salt if you don’t have garlic salt.
These garlic knots taste best when they are fresh out of the oven. Soft bread bursting with fresh garlic and parsley flavor, mmmmmmmm – instant love! But they will be ok to eat the next day too. Cover them with a cling sheet and when you want to eat just microwave them for 30 seconds and they are as good as fresh.
I hope you will enjoy making these garlic knots as much as I did : )

Garlic Knots
Ingredients
Knots
- 1.5 cups all purpose flour
- ½ teaspoon salt
- 1 tablespoon oil
- 1 teaspoon sugar
- ¾ cup warm water, at 110-115F
- 1.5 teaspoon active dry yeast
Topping
- 4 tablespoon unsalted butter
- 2 large garlic cloves, finely chopped
- ¼ cup fresh parsley, finely chopped
- garlic salt or regular salt
Instructions
- Proof the yeast by mixing it with warm water [100-115 F degrees]. Leave for 10 minutes till you see foam on top.
- To the warm water now add flour, oil, sugar, salt and mix till it comes together as a dough.
- Cover and keep in a warm place till the dough is doubled in volume. This may take 1-2 hours. There's no need to knead the dough.
- Once the dough has doubles, punch it to release the air.
- Sprinkle flour on your working surface and using a rolling pin roll the dough into a rectangle of around 1/2 inch thickness.
- Cut strips using a sharp knife or pizza cutter. Tie each strip like you tie a knot.
- Brush with little olive oil, cover and keep in a warm place till the knots double in size. This make take 30-40 minutes or even more depending on the temperature at your place.
- Preheat the oven to 400 F degrees.
- Place the knots on the baking tray and bake for 12-15 minutes or till light golden brown in color. Do not over-bake. I baked mine for 12 minutes.
- While the knots are baking, melt the butter in a pan. Then add the chopped garlic and saute for 1-2 minutes. Add fresh chopped parsley and switch off the flame.
- Take out the baked knots and pour the butter-garlic mixture over them while they are still warm.
- Sprinkle some garlic salt (or regular salt) on top and serve immediately. These taste best when they are fresh out of the oven.
Nutrition
Nutrition information is automatically calculated, so should only be used as an approximation.
 Your feedback is valuable!Please share your comments, ratings, and any suggestions or adaptations below to help us improve and make our recipes more successful.

Hi can I follow this recipe and instead of tie it as knot can I roll it in the form of ball which is filled with mozzarella cheese and and bake it and then apply garlic butter so that it will become cheesy garlic bread can I do it will it tastes good??
you can try