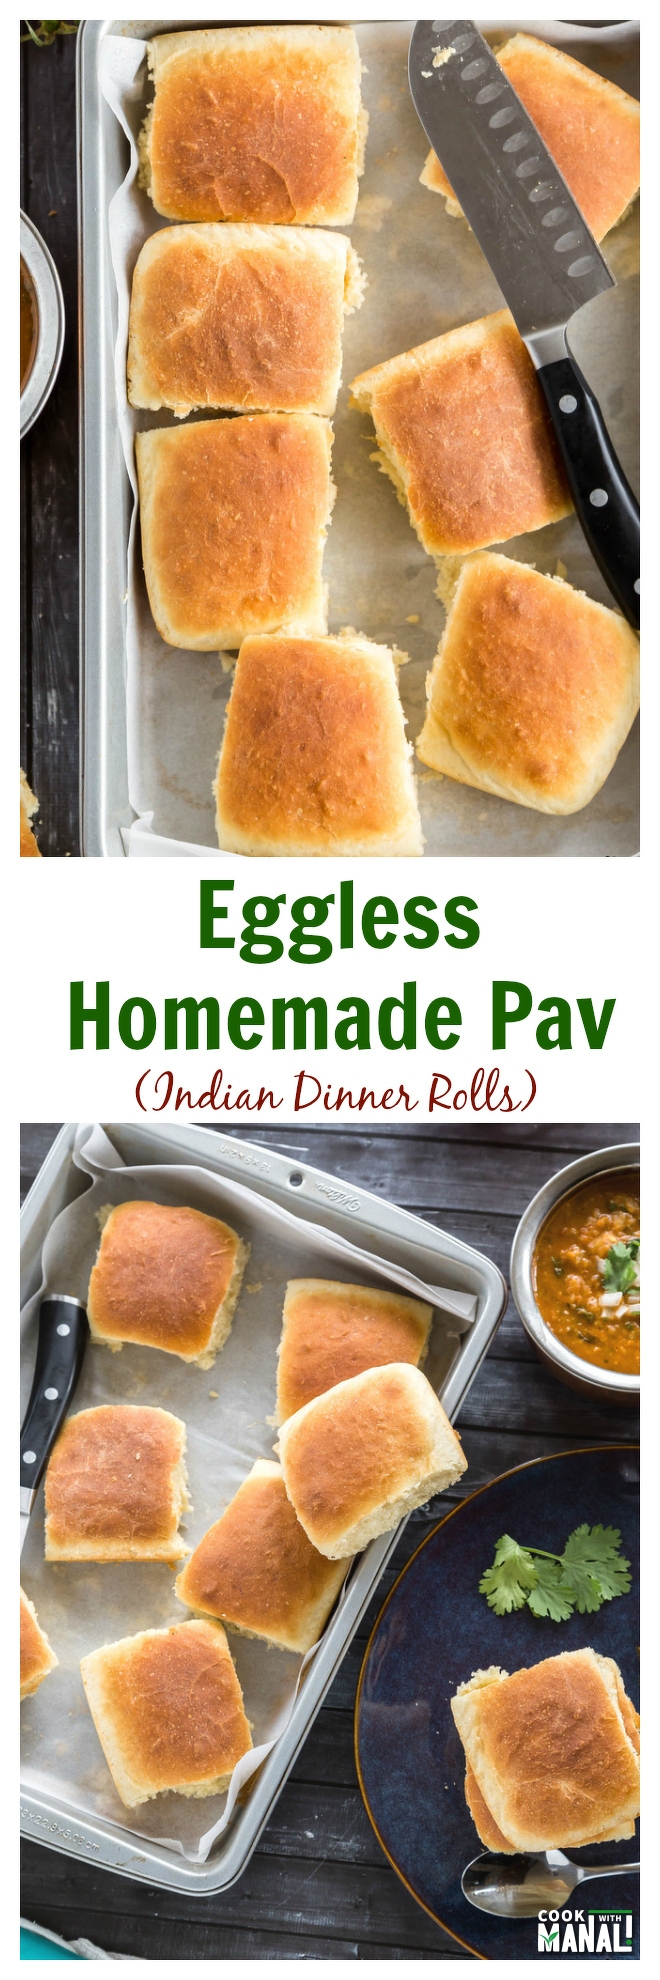
Homemade Pav
Oct 12, 2015, Updated May 07, 2023
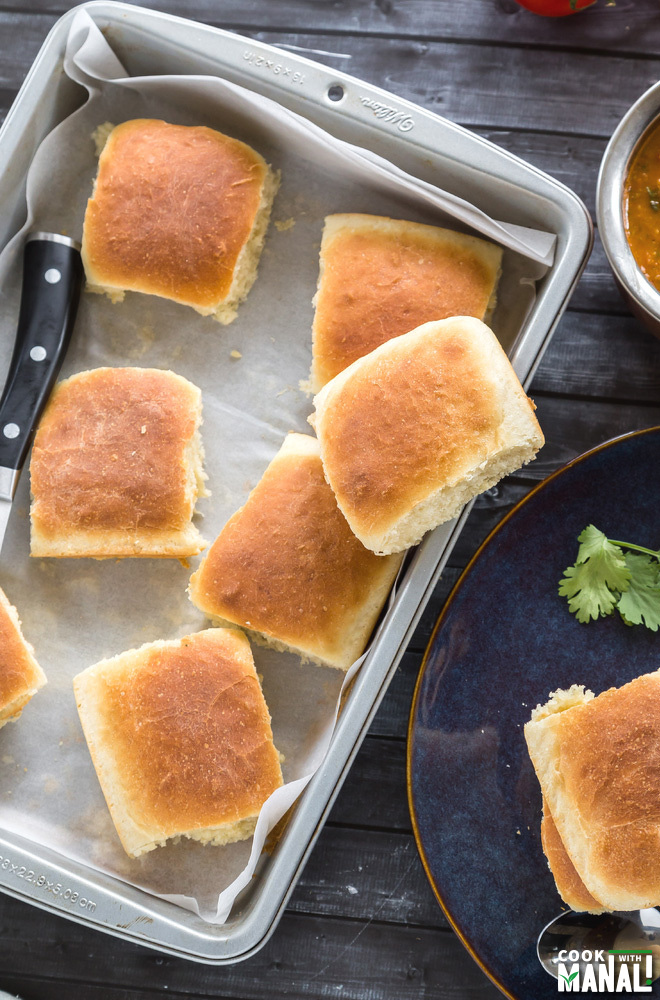
Eggless Homemade Pav (Indian Dinner Rolls). Enjoy them with some bhaji on the side!
This post may contain affiliate links. Please read our disclosure policy.
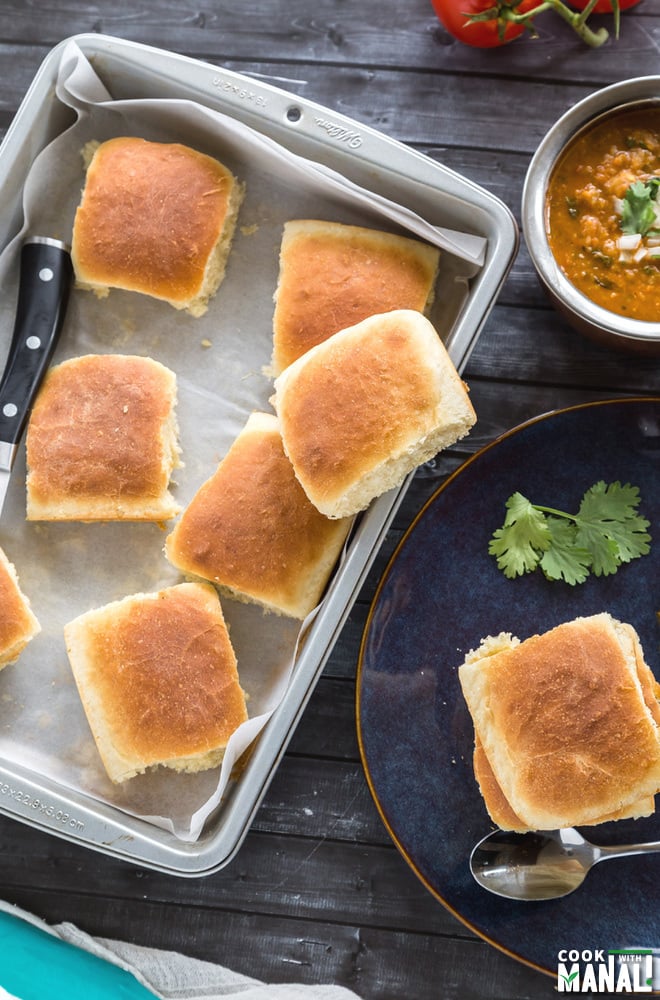
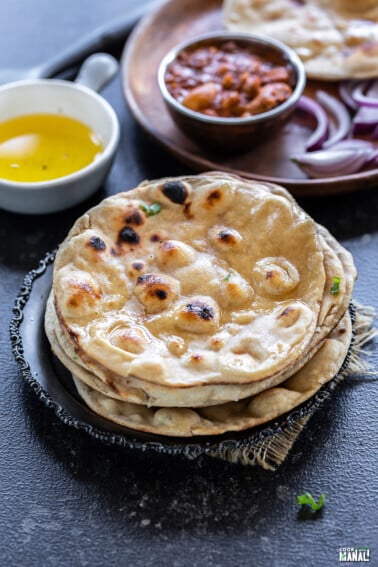
Soft Eggless Homemade Pav are meant to be enjoyed with Pav Bhaji! They taste best when fresh out of the oven.
If you were to ask me to make a list of my most favorite dishes in the world, pav bhaji will definitely make it to the list. In fact chaat (common term used for Indian street food) and pav bhaji will be there among the top 3 for sure. For those who don’t know pav = bread/dinner roll and bhaji = mashed veggies with spices. This is an extremely popular dish all across India, yes the dish is originally from Mumbai and I have to say you do get world’s best pav bhaji in Mumbai but it is extremely popular all through the country.
What makes pav bhaji so popular? I don’t know but as long as I can remember, I was always in love with it. Whenever we would eat in a restaurant, I would always check the menu to see if they had pav bhaji on it and if they did, then I knew what I was ordering. As the name suggests, there are 2 parts to pav bhaji .
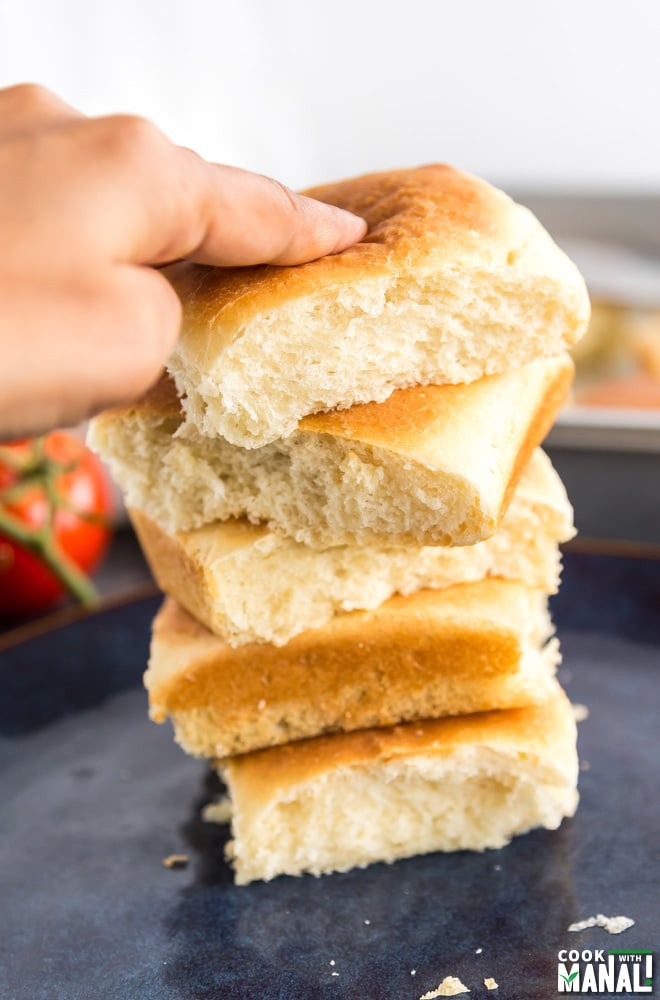
1. The Pav Bread , which is the bread that is served with the bhaji. Pav is almost like a dinner roll but made with few very simply ingredients. It’s actually what a common man in Mumbai eats almost everyday for breakfast. Pav is eaten with butter and also with vada (deep fried potato fritters). Vada pav is also extremely popular! This is also known as Ladi Pav.
2. The Bhaji, which is mashed veggies. Potatoes, bell pepper, beans, tomato and onion are commonly used. All the veggies are boiled and then mashed and cooked with a special blend of spices. It is so good!
I make pav bhaji at home once in a while and initially when I made it here it never tasted as good as back home. I figured the reason was the pav, store bought dinner rolls/hamburger buns here are not the same as the pav we get in India. We get some pav at Indian grocery stores, but I don’t like them either. And so it all came down to making pav at home. Like I always say, if you really love something and want to eat it, you just need to learn how to make it. And I am so super excited to share this recipe with you guys. These homemade pav turned out fabulous!
To make these homemade pav you only need flour, butter, milk powder, salt, sugar, water and yeast. These simple ingredients when combined together result in soft and delicious pav! You need to make this!
Method
In a bowl mix flour, milk powder and salt. Add melted butter to the flour and mix. Set aside.
In a mug/bowl, take warm water, add sugar to it and then add the yeast. Give a quick stir and let the yeast activate for 5-10 minutes. This is called proofing of the yeast.
You will know your yeast is proofed/active when it’s all bubbly and frothy on top. If your yeast doesn’t turn up the way it is in the picture, it is dead. Throw the water and start over again. Do not add this water to the flour, the yeast will not work and you will get hard pav buns.

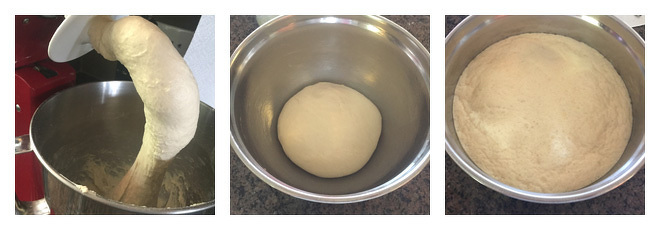
Transfer the flour mix to the steel bowl of your stand mixer or you can do this with your hands. Add the activated yeast liquid to the flour. Knead the dough for 7-8 minutes using the dough hook attachment (or knead for 10-12 minutes using your hands). At this point I added additional 3 tablespoons of flour as I felt the dough was sticking a lot. You can do the same.
Your dough is done when it looks smooth and springs back when you poke it. Transfer dough to a bowl and oil/butter it on top and on the sides as well. The bowl should also be coated with oil.
Cover with a damp cloth and let the dough rise for 1 hour in a warm place or till it doubles in size.
Once the dough has risen, transfer it to a floured working surface. Punch to release the air and let the dough rest for 10 minutes.
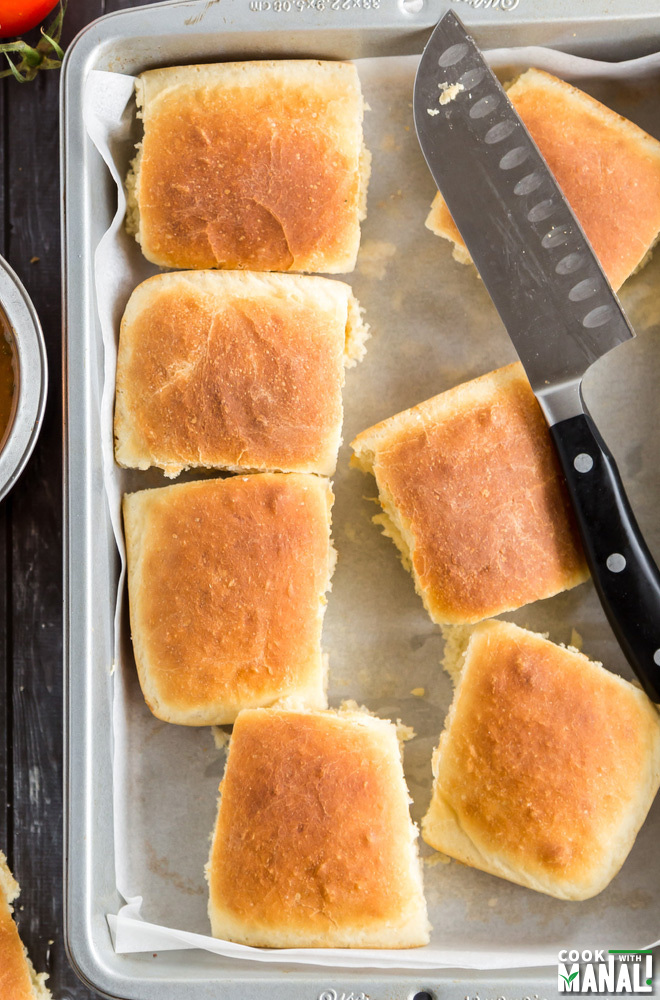
Divide the dough into 13 equal parts. I used my kitchen scale to make sure they were all same size. Make round balls, smooth each ball and place in a 9 x 13 inch baking tray. Leave a little space between each dough ball as they will expand.
Cover and keep the pan in a warm place for 30-45 minutes. The pavs will expand.
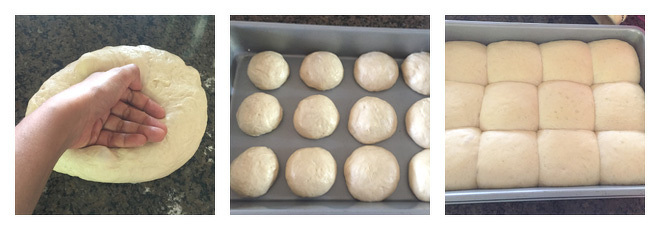
Bake at 400 F degrees for 12-14 minutes. Remove from oven and if you want, brush some melted butter on top as soon as they are out of the oven! Enjoy these delicious homemade pav with bhaji!
* The total time includes the resting time for the dough, during which it rises.
* Always use a good quality yeast for best results.
Homemade Pav
Ingredients
- 2¾ cup + 3 tablespoons all purpose flour
- 3 tablespoons milk powder
- 1¼ cups warm water
- 2¼ teaspoon active dry yeast
- 3 tablespoons butter melted
- 1 tablespoon sugar
- ¾ teaspoon salt
Instructions
- In a bowl mix flour, milk powder and salt. Add melted butter to the flour and mix. Set aside.
- In a mug/bowl, take warm water, add sugar to it and then add the yeast. Give a quick stir and let the yeast activate for 5-10 minutes. This is called proofing of the yeast.
- You will know your yeast is proofed/active when it's all bubbly and frothy on top. If your yeast doesn't turn up the way it is in the picture, it is dead. Throw the water and start over again.
- Transfer the flour mix to the steel bowl of your stand mixer or you can do this with your hands. Add the activated yeast liquid to the flour.
- Knead the dough for 7-8 minutes using the dough hook attachment (or knead for 10-12 minutes using your hands). At this point I added additional 3 tablespoons of flour as I felt the dough was sticking a lot. You can do the same.
- Your dough is done when it looks smooth and springs back when you poke it.
- Transfer dough to a bowl and oil/butter it on top and on the sides as well. The bowl should also be coated with oil.
- Cover with a damp cloth and let the dough rise for 1 hour in a warm place or till it doubles in size.
- Once the dough has risen, transfer it to a floured working surface.
- Punch to release the air and let the dough rest for 10 minutes.
- Divide the dough into 13 equal parts. I used my kitchen scale to make sure they were all same size.
- Make round balls, smooth each ball and place in a 9 x 13 inch baking tray. Leave a little space between each dough ball as they will expand.
- Cover and keep the pan in a warm place for 30-45 minutes. The pavs will expand.
- Bake at 400 F degrees for 12-14 minutes.
- Remove from oven and if you want, brush some melted butter on top as soon as they are out of the oven! Enjoy these delicious homemade pav with bhaji!
Nutrition
Nutrition information is automatically calculated, so should only be used as an approximation.
Homemade Pav

How can we store these and for how long ?
best consumed within 2 days!
I love your North Indian recipes, they always turn out very well, but this pav didn’t work for me. Before making the recipe, I have read the comments, and all were raving about it. I lived 7 years in Mumbai, my husband is Maharashtrian, and unfortunately this recepie turned out to be a big disappointment for both of us. If I didn’t know Mumbai ladi pavs, then I might be satisfied with it. The taste is okay, but it lacks the real soft fluffiness. It turned out to be way too dense for a good pav.
Why do you make 13 balls? And what do you do with the 13th? Without greasing the baking tray how doesn’t your dough stick to the tray while baking? (Mine did) During second proofing it’s not mentioned and showed in the pictures if the dough needs to be covered or not. (I covered, otherwise it would have dried out.) For how long do you wait before you remove the pavs from the tray?
sorry you had problems Krisztina. This is an old recipe (2015), I was very new to blogging then and clearly my recipe writing skills were not the best back then. That’s why I have missed mentioning that you have to cover the dough (yes you definitely have to else dough dries out). I apologize for the confusion. You can remove the pavs from the tray within 5 minutes of taking them out of the oven.
Do you grease or line the 9×13 pan? Looks like the latter from the photos.
you can, I didn’t line it. Only placed parchment for pictures
could you share the ingredients in grams?
I have used a standard US size cup- 8 oz/240 ml. 1 cup flour is 130 grams. When I make the recipe again, I will measure everything and update but until then hope this helps.
This looks so yummy! will try this for sure. What type of milk powder do you suggest? I live in US. So please let me know what can I buy from Walmart or Safeway.
Thanks!!
Nestle NIDO
How much should we bake it for experimenting with just 2/4 pav instead of 13?
baking time remains same whether you can 2 or 13 pav!
Hi Manali, what speed should the mixer be at for the 7-8 minutes of kneading time.
3-4
I have made these many times now and my husband and I love them! Super easy recipe and great with some bhaji!
Tried it today, easy to follow instructions, definitely a keeper recipe (keep coming back).
Quick question: how to store it if I’m making a big batch? Please let me know.
Thanks.
if it’s just for overnight, I would leave them at room temperature (cover with something) and re-heat in oven next day.
Hi Manali,
I use a microwave which has convection mode. I bake bread and cake in convection mode. So could you help me with the temperature settings for the same please.
then maybe follow the same temperature? The temperature mentioned here is in Fahrenheit since I live in the US, it will be 200 C if you convert it into Celsius. Unfortunately I have no experience with microwave baking, I don’t even have a microwave (I know surprising but true!) so can’t be of more help here. I have always baked in a traditional oven.
Thank you so much Manali.
Hi Manali,
If I wanted to bake the pav in the convection mode, what should be the temperature set to and for how long should I bake it.
Hello shabnam, I quite not understand your question. The temperature and time is given for a traditional oven.
Hi Manali, this is a pretty time consuming recipe but o my God so worth it. I followed the recipe line by line and the end result was perfect pav. Thank you so much for the recipe!!!
yay 🙂
Hi Manali
Can we use whole wheat flour to make the pav?
you may but the pav will be denser. I will share a whole wheat pav recipe too.
Hi Manali, do these measurements for ingredients work for bread machine dough cycle?
I don’t have a bread machine so can’t comment.
hi Manali
Tried this pav recipe. everything worked, the yeast was fluffy, dough doubled up but it came out little bit dense. Not as soft as bakery buns. i replaced milk powder with milk as i didnt had. Do you know why it came out dense and what mistake did i do?
milk powder definitely helps in making them softer. Also, was your yeast fresh?
Hi manali,
What dimensions of pan can be used for the samw quantity as yours?
mentioned in the recipe “Make round balls, smooth each ball and place in a 9 x 13 inch baking tray. Leave a little space between each dough ball as they will expand.”
Hi Manali, I tried making these and they turned out amazing but there was some room for improvement. After reading the comments I realized the amount of instant yeast is not the same as active yeast so will be altering that. Can you tell me what is the ideal speed on the dough hook for kneading this dough? Thanks so much!
medium speed for 7-8 minutes should be good.
I want to try this recipe but I don’t have dry milk what do I need instead
skip!
Hi –
I tried making these today and my dough, once cut into 13 pieces did not rise much at all. The rolls came out fairly dense and did not look like yours at all. (Yours look insanely delicious!)
I noticed an earlier comment mentioning a stick of butter while the recipe mentions 3 tbsp. Same with yeast.
Do you know where I might’ve gone wrong? Also, what is the replacement ratio for milk powder with milk?
Thanks for your help!
Hi Shruti, it looks like either your yeast was old (expired) or it didn’t proofed well. Maybe the water temperature was not correct for it to proof. That would explain the bread not rising and being dense.
Thanks for the response. I used instant yeast instead of active. And milk instead of milk powder. I used an online conversion calculator. Do you know what the right conversations would be for your recipe? Really want to get them to look like yours and try again this week 🙂
I will probably use 1 1/2 to 1 3/4 teaspoon of instant yeast, you will skip the proofing part since instant yeast doesn’t need proofing. Add it straight to the flour mix. You have to make sure the water temperature is correct (around 110 degrees). If your dough doesn’t double in size, the bread won’t come out good. It means the yeast wasn’t active.
Thanks for sharing the recipe!! Can I also make it without the yeast?. Please help. Thanks in advance.
Sorry this recipe hasn’t been tested without yeast so you will need yeast for this.
I baked it but it didn’t turn out brown as shown in the picture. What am I doing wrong ?
Brush it with milk or use an egg wash!
What did you do with the 13th dough ball? You only ended up with 12 pavs ?
there was the 13th one, just baked it separately since it didn’t fit into the pan 🙂
Can we use instant yeast?
yes you may!
How many days can it b stored at room temp
4-5 days!
Hello Manali !
Your recipes are awesome. Recently my daughter Vrinda( already ur fan) gave me the link to follow your recipes. I tried Pav, Naan Khatai , cake rusk n cinnamon cookies. Every thing turned out so well n classy .Every one in the family enjoyed n appreciated. Thank you so much for sharing such wonderful recipes with all.
I have two doubts in some recipes you have mentioned 1 stick of butter. Can you tell me how much 1 stick will be in grams. I plan to make whole wheat bread n in that you have mentioned 1/2 tbsp instant yeast. I have dry active yeast .So if I put that how much quantity should I take. Do clarify please.
Thank you so much for the support & encouragement Renuka 🙂 To answer your questions – In United States, butter sticks are usually sold in 4-ounce sticks and there are 4 sticks in every pack [the pack has total 16 oz/1 pound of butter]. So, 1 stick of butter = 113 grams or 1/4 pound or 1/2 cup or 8 tablespoons or 4 ounces. And For 1/2 tbsp instant yeast, use around 2.25 teaspoon of dry active yeast. Hope that helps! 🙂
Thank you! These turned out great!
Pav bhaji is the first treat I indulge in every time I go back home to Bombay! Thanks for sharing the pav recipe, it looks very authentic. Will certainly try it!
I know right, nothing like Bombay Pav Bhaji! Thanks Bach!
Thank you Shweta and I will do it very soon!!
Thanks Cheyanna! Hope you give these a try! xoxo
Thanks Padma!
Thank you Harriet, I think you will love pav bhaji 🙂 make sure to try it on your India trip!
Thanks Sarah!
Mine too! thanks Kelly!
Thanks Kathy!
Thank you Annie!
Thanks Anu! Pav bhaji is the best!
Thanks Angie!
You need to try pav bhaji Alice, it’s so so good!!
It definitely would!
Thanks Jen! You will love these 🙂
You must try these!!
Thanks Dannii, these are really good!
I adore pav bhaji too – but never ever had homemade Pav before – yours looks wonderful Manali! My daughter would eat all these up before I could even think of making the bhaji 🙂
Thank you Shashi! haha I wouldn’t blame her, it’s difficult to stop eating these!
Very well explained Manali, it’s been on my to do list forever.
Thank you Remya, you need to make these!