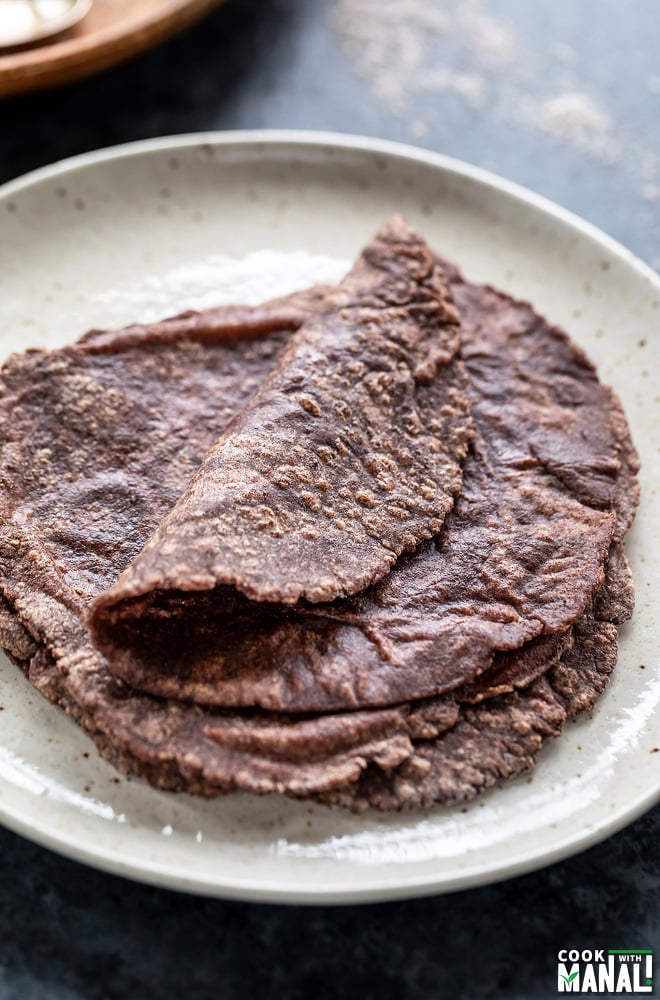
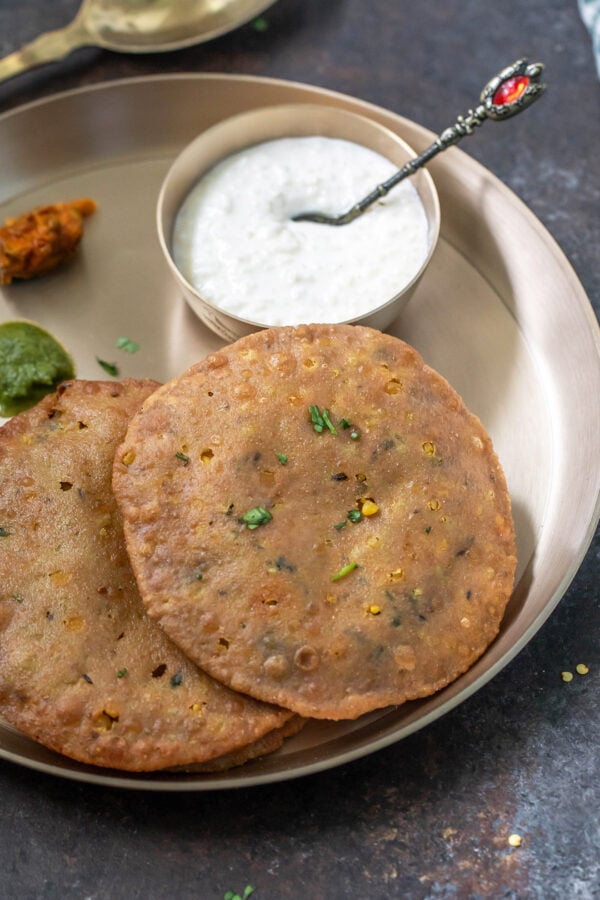
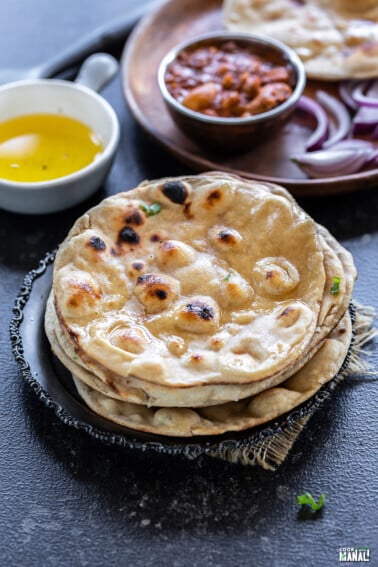
Plain Ragi Roti made with ragi flour (finger millet flour).
These rotis are rich in protein, calcium and also gluten-free. They are also known as Nachni Roti.
Growing up in North India, I mostly ate wheat and rice, that’s what was on the menu everyday for lunch and dinner.
I was not very aware of different grains then. Maybe it was just the time, back then in the 90s in India people mostly ate what they grew up eating and were comfortable cooking. At least that was the case in north India.
Things have changed a lot today, people are health conscious and including different grains in their diet. One of the most popular ones are millets.
And there’s a good reason why millets have gained so much popularity over the years. They are packed with fiber, nutrients, antioxidants and have several health benefits.
They are also gluten-free and an interest in gluten-free diet has definitely resulted in greater interest in millets as well. There are so many varieties of millets though and I am slowly learning all about them.
One of my favorites recently has been Ragi (finger millet). Remember when I shared these ragi cookies earlier this month, I said that I have been eating a lot of ragi these days and will share more recipes using it.
Well, so here’s how I have been eating ragi regularly, as Ragi Roti (which is also known as nachni roti).
These rotis are super easy to make with the technique that I am going to share and they make a really wholesome and hearty rotis.
Ragi rotis are popular in Karnataka and Maharashtra however they were not something I ate when I was little. Growing up I knew of one type of roti – the basic wheat roti/chapati. I didn’t even know that you could make rotis with other grains.
But now I try to include more grains in my diet and this ragi roti is definitely a favorite these days. Sarvesh also enjoys eating them which is a huge plus!
These Ragi Roti
✔perfect for gluten-free diet.
✔they are rich in calcium, iron and protein.
✔can be eaten with any curry or dal.
Several studies also show that these rotis can help control blood sugar, cholesterol and weight gain.
These rotis are made in different ways. There’s one where chopped onions, chilies etc. are added to it and it’s usually eaten as a breakfast (this type is common in Karnataka). They are a little bit thicker.
I personally make these plain ragi chapatis/roti more because they seem like a more practical replacements for the wheat rotis that I grew up eating.
And also these turn out thin which is how I like my roti with dal and sabzi.
How do these rotis taste: they have a very earthy, rustic taste.
It definitely can take some time to get used to the flavor. These rotis are also quite dry so it’s definitely a good idea to apply some ghee or vegan butter on top once they are cooked.
One thing which I have to mention here is that these rotis feel very light on your stomach when you eat them. Unlike wheat roti, I can eat like 3-4 of these and not feel heavy or full.
So that’s definitely been a huge plus for me.
Rolling the rotis: since these are gluten-free, you might have some trouble rolling them. Honestly, if you follow this technique of boiling the water and adding flour to it, then why roll very easily.
Honestly, I roll them as it is on my chakla (rolling board) and face no problem. However, if you are having problems rolling the rotis, then you can always use parchment paper or plastic sheet to roll them.
Ingredients
These rotis do not require a ton of ingredients. Only 4!
Ragi flour: this is a flour made with ragi which is finger millet. You can find this flour at most Indian grocery stores.
You can also find it online. This flour has a dark color and that’s why the rotis appear quite dark in color.
Water: so to make these plain rotis we use hot water.
Since the flour is gluten-free, hot water helps in brining the flour together and the rotis are so much easier to roll this way.
Oil: I like adding a little oil to the water, but that is optional, you can skip it.
Salt: for flavor, I do add a pinch of salt but again it’s up to you.
So basically, you need only 2 basic ingredients- ragi flour and hot water. The rest 2 ingredients are optional but recommended.
Another optional ingredient is ghee, which you would apply on the rotis once they are cooked. This helps in keeping the rotis soft.
Since these rotis are quite dry, it’s a good idea to apply some ghee on them or vegan butter (if you are vegan).
Serving Suggestions
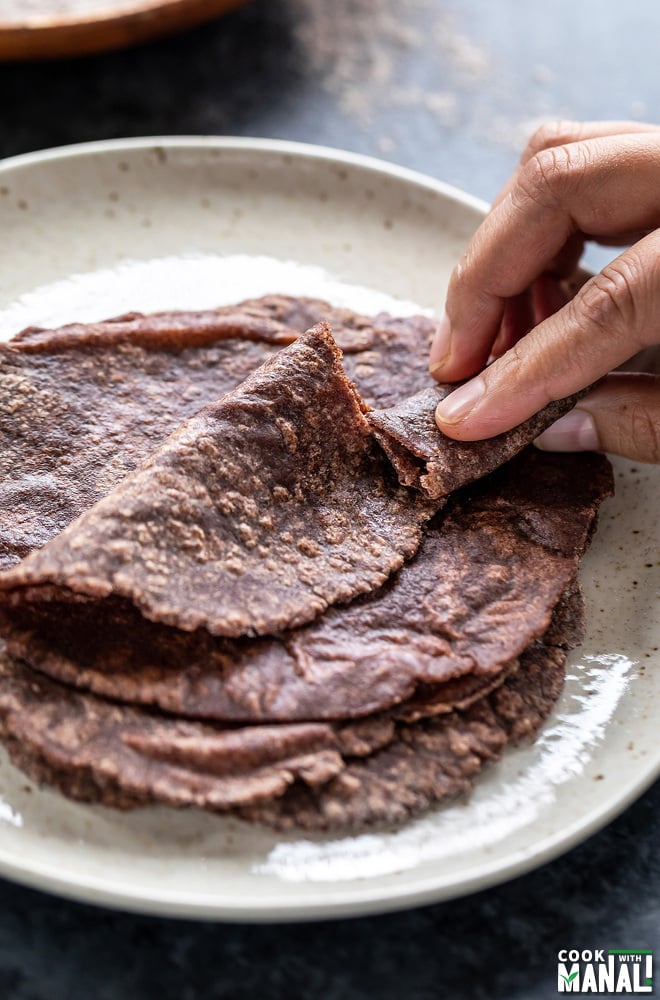
These rotis are best enjoyed hot. I would really recommend eating them right away once they are cooked.
They dry out later, especially if you have not applied any ghee or butter on top. So, eat them as soon as you cook them.
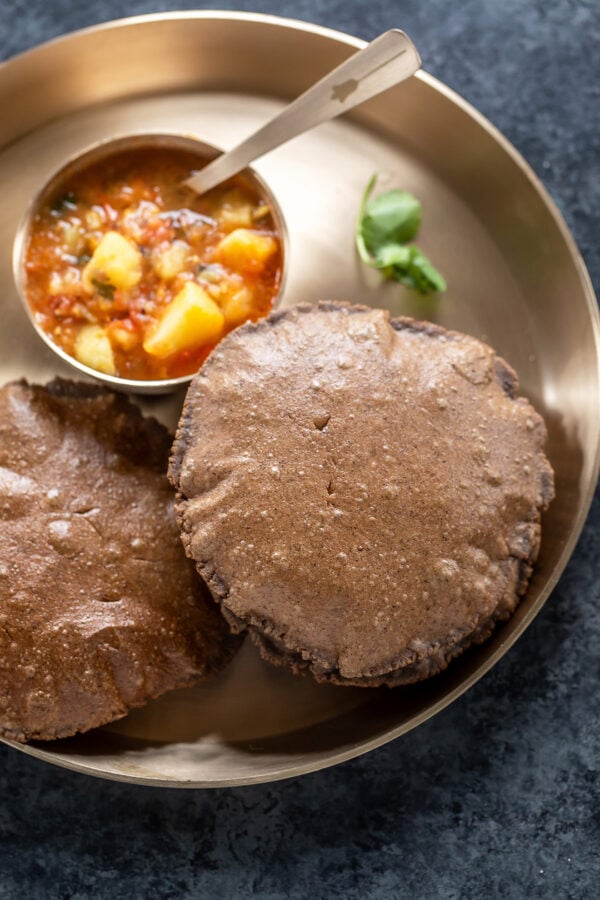
The ragi roti are best enjoyed with dals like masor dal and sabzis like aloo gobi!
Frequently Asked Questions
Is ragi roti gluten-free?
Yes, these rotis are gluten-free.
Can I add wheat flour to these rotis?
Yes if you want, you can make these with 50% whole wheat (atta) and 50% ragi. These won’t be gluten-free then.
Can I make the rotis oil-free?
Yes, you may skip the oil in the recipe. I do like adding it though.
Are these rotis vegan?
Yes, they are. If you apply ghee on them after they are cooked, they won’t be vegan then.
Method
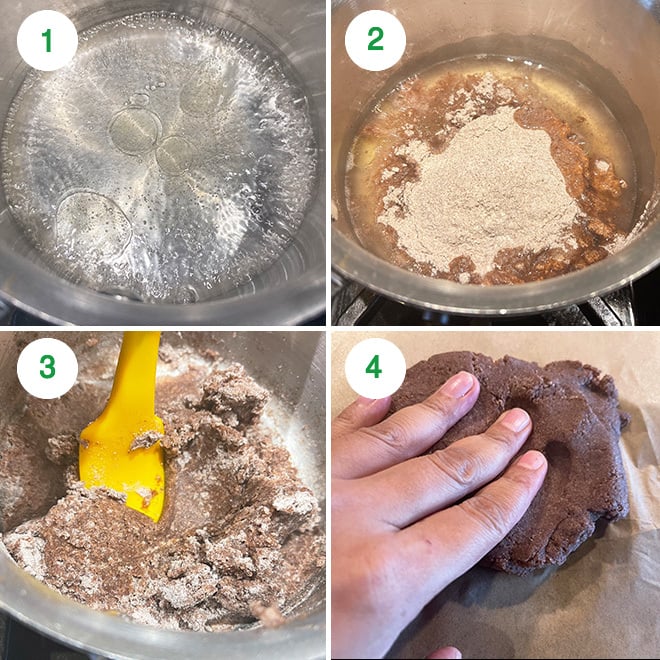
1- Add water to a pan and put it on medium-high heat. Add oil, salt and let it come to a full boil.
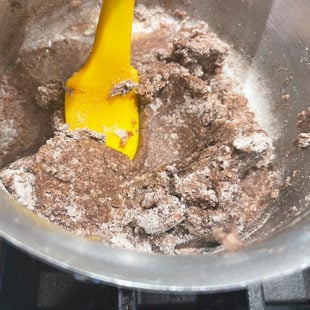
2- As soon as it comes to a boil, add the ragi flour and turn off the heat.
3- Remove pan from heat and with a spatula mix the flour. It will feel very stiff at first but keep mixing and it will mix eventually.
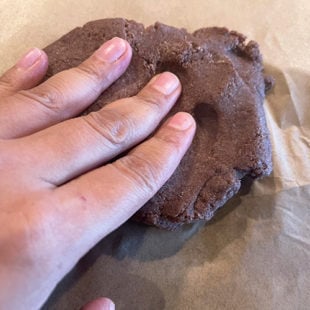
4- Transfer to a sheet of parchment paper, and give a good mix. Be careful if the dough is very hot use the sides of parchment paper to knead. You don’t really need to knead here (since there’s no gluten), just making sure everything is mixed well.
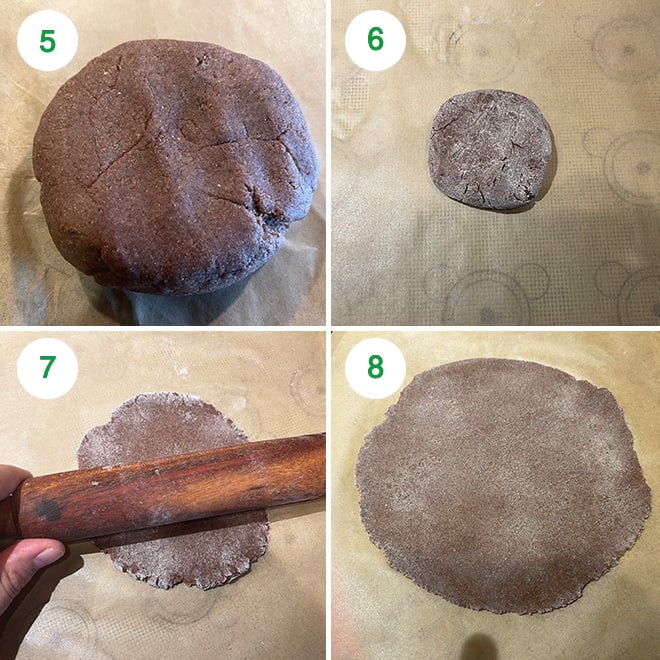
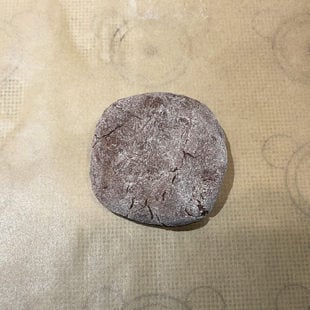
5- Let the dough cool down for 10 minutes and then divide into 4 parts- 42 grams each.
6- Take one part, roll it between your palms to a round and then flatten it and dust it with ragi flour.
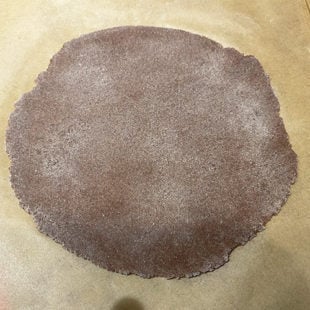
7- Now start rolling the dough using a rolling pin. You can roll on the parchment paper or it will also easily roll on rolling board (chakla). Usually gluten-free flours are harder to roll but with this method, ragi rotis roll very easily.
If you are having trouble, then yes use parchment paper to roll. Meanwhile heat a tawa or skillet on medium-high heat.
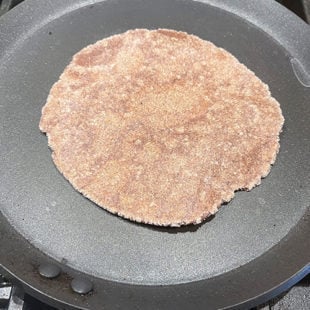
8- Roll to a thin circle of around 5 to 6 inches diameter.
9- Place the rolled roti on the hot tawa.
10- Cook for around 40 seconds on one side, then flip and cook the other side.
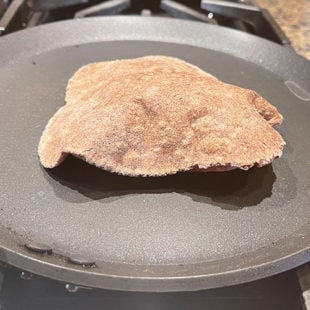
11 & 12- Flip again and apply pressure on the roti using a paper towel or napkin, it will puff up. Turn other side and cook for few more seconds. You can also place them directly on heat and and cook them like you would cook a phulka/roti.

Apply ghee (if using) and serve ragi roti immediately with any curry or dal of choice.
If you’ve tried this Ragi Roti Recipe then don’t forget to rate the recipe! You can also follow me on Facebook, Instagram to see what’s latest in my kitchen!

Ragi Roti
Ingredients
- 1/2 cup ragi flour, 75 grams, finger millet flour
- 1/2 cup water, 120 ml/4 oz
- 1/2 teaspoon oil
- pinch salt
Instructions
- Add water to a pan and put it on medium-high heat. Add oil, salt and let it come to a full boil.

- As soon as it comes to a boil, add the ragi flour and turn off the heat.Remove pan from heat and with a spatula mix the flour. It will feel very stiff at first but keep mixing and it will mix eventually.
- Transfer to a sheet of parchment paper, and give a good mix. Be careful if the dough is very hot use the sides of parchment paper to knead. You don't really need to knead here (since there's no gluten), just making sure everything is mixed well.
- Let the dough cool down for 10 minutes and then divide into 4 parts- 42 grams each.Take one part, roll it between your palms to a round and then flatten it and dust it with ragi flour.
- Now start rolling the dough using a rolling pin. You can roll on the parchment paper or it will also easily roll on rolling board (chakla). Usually gluten-free flours are harder to roll but with this method, ragi rotis roll very easily.If you are having trouble, then yes use parchment paper to roll. Meanwhile heat a tawa or skillet on medium-high heat. Roll to a thin circle of around 5 to 6 inches diameter.
- Place the rolled roti on the hot tawa. Cook for around 40 seconds on one side, then flip and cook the other side.
- Flip again and apply pressure on the roti using a paper towel or napkin, it will puff up. Turn other side and cook for few more seconds. You can also place them directly on heat and and cook them like you would cook a phulka/roti. Apply ghee (if using) and serve ragi roti immediately with any curry or dal of choice.

Notes
- Ragi rotis are best enjoyed immediately. So serve them as soon as you make them. They become drier as they cool down.
- Apply ghee before serving to keep them soft and moist.
Nutrition
Nutrition information is automatically calculated, so should only be used as an approximation.
 Your feedback is valuable!Please share your comments, ratings, and any suggestions or adaptations below to help us improve and make our recipes more successful.

Can you make the dough, chill and roll it out a couple of days later- or will flavor/texture change?
I have not tried doing that, but it should be okay. Bring it to room temperature before rolling.
Had been trying so hard to make the ragi roti. Almost all recipes I was given , required putting stuff in it which was beating the purpose of just having plain ragi roti. Your simple method helped me to make the roti with so much ease, thank you so much!
Welcome Priti!
Thank you for this simple recipe. It came out very well. I just doubled the quantity.
Hi, Just need to confirm is it 60 calories per roti or in total 4 roti’s made from half cup Ragi flour and 75 gm millet flour .
Thanks.
per roti
Very soft Ragi roties! Amazing!
Why are we not applying water like we do for jowar roti on the tava.
I don’t know? this is how I make it so sharing my way. You apply water if you want to.
The recipe worked out very well. Followed the ratio and heat level instructions, the roti came out perfectly. Thanks
awesome!
I have always tried making ragi rotis and this is the first time they puffed up and were soft to eat! Thank you !!
awesome!
Hi Manali, these are so good but I made them with pearl millet instead of finger Millet. They didn’t puff up like yours. Wondering if that’s because of the different type of millet that I used. Thanks!
yes they are different and I haven’t tried this way with pearl millet.
Thanks for sharing this recipe. It used to be a big task for me to roll out Raagi rotis but this one was so smooth. Just one small question, when I added Ragi flour in hot water. It becomes sticky and hard to mix unlike yours as its so smooth. Is ot due to oil and salt?
Thanks
it is little tough to mix, just mix as much as you can and then transfer to a parchment paper or any plate and mix well using your hands. use the sides of the paper if the dough is very hot. It does become smooth eventually. and yes a little oil helps!
Thank you for your amazing recipes. I tried Gur para and it was a big hit among my friends.
Thanks for the recipe. I was wondering if I can make a batch and consume it over 3-4 days…will they still be soft?
Hi Avani, in my experience these taste best when consumed fresh!
First try last night and it was a wonderful foundation for what you have on hand. I’ve been looking for a recipe like this. Thank you!