This post may contain affiliate links. Please read our disclosure policy.
Happy Easter guys! Hope you are all having a wonderful day!
Rather than sharing a recipe, today I am sharing with you some tips and tricks about Food Photography that I have learnt on my way. Now, I don’t think that I am qualified enough to teach someone food photography, I consider myself a beginner and I am still learning. But I thought it will be a good idea to share few tips which have been useful to me in improving my photography. I’m far from being a good food photographer but I have improved and I just want to share what helped me get here.
If you are interested in starting a food blog, food photography is very important. You might not realize it’s importance in the beginning, after all most of us start with the thought process that if my food tastes good nothing else matters. The problem though is that readers on the internet cannot taste your food, so what do you do then? You of course need to make it look good because people might not be able to taste it but if they like what they see, they will give the recipe a try. Good looking food grabs eyeballs and no wonder food photography has become such a hot topic these days!
When I started my thoughts were the same, recipe and taste is important, the pictures don’t matter. But soon I found myself drooling at all the wonderful pictures on different blogs and realized that if I want people to drool over mine, I need to improve my photography. I am sharing with top 10 tips which I found useful in improving my skills, I hope this will be of some help to you especially if you are new to food photography.
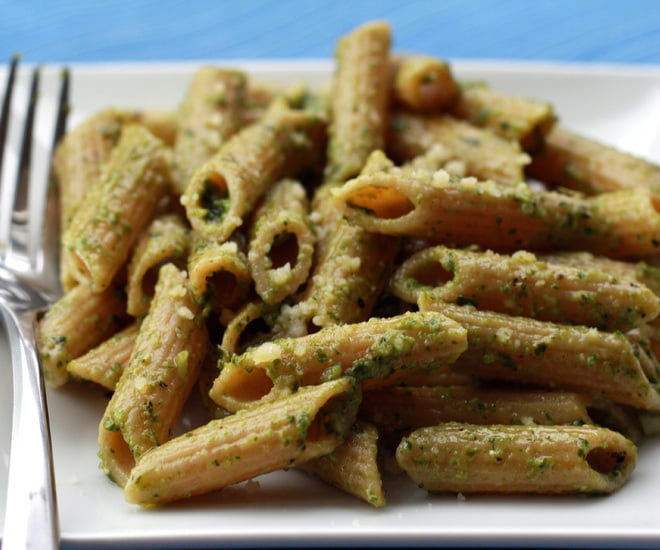
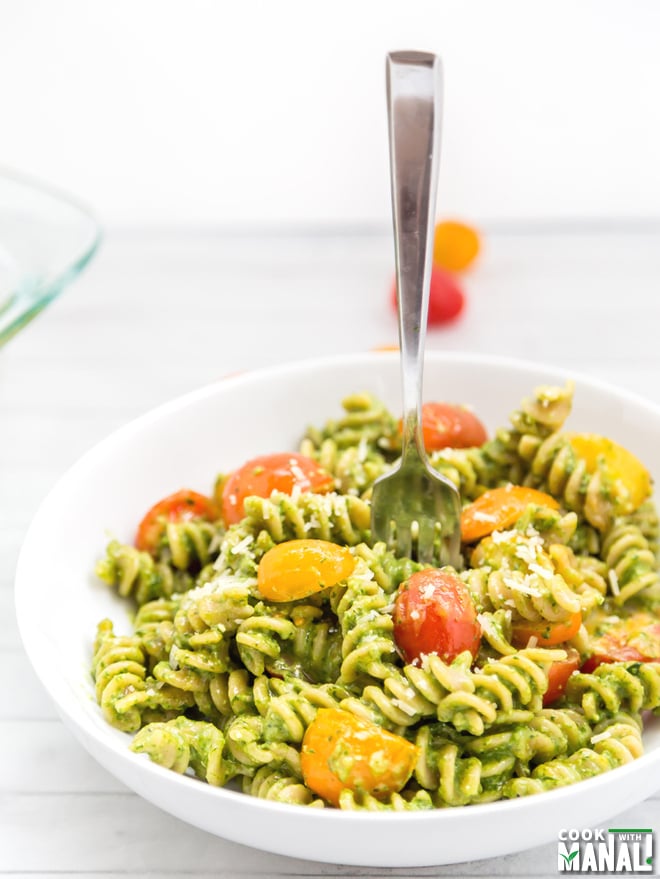
Let’s take the example of this Pesto Pasta.
Picture no.1 – clicked in 2013.
Picture no. 2 – clicked in 2015
Almost same pasta but a big difference in the way these pictures look. Agree? So what exactly is this difference? It is nothing but learning few basics of food photography. Here are my top 10!
1. Get a good camera
First things first, you need a good camera to take good pictures. It doesn’t necessarily have to be super expensive but a basic DSLR might be a good investment if you are serious about food blogging. I have a Canon 6D and all my pictures are shot using EF 24-105mm f/4L IS USM Standard Zoom Lens . It is not the best lens for food photography but a good over all lens. I want to invest in a new lens but for now this is good. It does a decent job with food pictures.
So the bottom line is that you need a basic DSLR for good food photography. A iPhone might not be able to do the same for you!
2. Shoot in natural light
I had no idea about how important light is in photography. I used to click in evening/night, basically I would click whenever my food was ready and that could be anytime of the day. But during course of learning I realized that there’s nothing better than natural light. You get the best pictures when you have abundance of light. Back lighting, side lighting, they all work well. My personal favorite is back lighting.
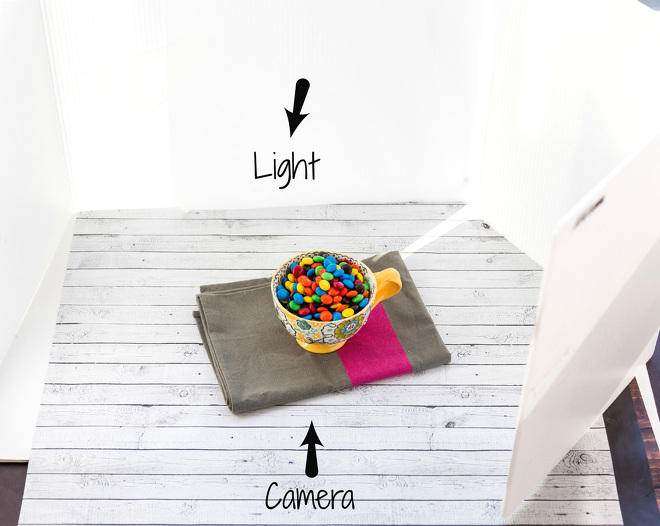
–> Choose a window in your house where you have maximum sunlight coming in. Place your table as close to the window as possible. Place your food on top of the table and click.
–> Click during the day when there is lots of sunshine. I think the period between 11am-1pm is best but it depends as everyday is different.
–> Use reflectors, yes you need to use them. Sometimes the light it too harsh and you need a reflector to tone it down. Sometime one side appears dark, you then reflector to bounce the light and brighten the other side as well. I will do a separate post on how to use reflectors.
A usual set up in which I click pictures. Notice the light was too bright on this day so I have used reflector on all the sides. This changes depending on how the light is!
3. Shoot in Manual mode
I think this is most important thing that you have to learn if you want to be good at food photography. Forget all other modes, you need to click your pictures on manual mode. There are a lot of modes in your camera I stuck to the AV mode [“A” or aperture priority mode on other cameras] on my canon camera for a very long time. The AV mode allows you to set aperture (the f-spot) and the ISO. The camera automatically sets the shutter speed for you so that the picture is exposed properly. I would suggest to start shooting with AV mode when you begin because it’s quick and easier to understand. Once you get a hang of it, switch to Manual Mode.
There is this triangle of 3 things which you need to understand in order to get the correct exposure for the pictures in manual mode. I am just touching the basics here because this a big topic in itself and I would do a separate post on this someday.
–> ISO: The ISO number determines the sensor’s sensitivity to light. Lower the ISO number, lower is the sensitivity to light. With sun shining bright, I usually keep my ISO between 100-400. The lower the better because you can increase ISO as much as you want but there’s a problem. With increase in ISO, there’s an increase in image noise/grain. But obviously you have to bump up the ISO at times when there isn’t much light. Actually there’s a whole lot I want to say here but I will reserve that for another post which I will do only on this exposure triangle.
–> Aperture: If I put it simply, aperture is an opening in the lens. The larger the hole, the more light gets in the camera. It is measure in ‘f-stops’. The confusing thing here is that larger apertures [where more light gets in] are given smaller numbers for example f/3 is a bigger aperture than f/11. It will be confusing at first but as you practice, you will get used to it.
Aperture controls the depth of field. I am sure you all love those blurry background food pictures where the food is the focus and everything else is blurred. That is shallow depth of field and is achieved by a larger aperture like a f/2.8. If you want your foreground as well as background to be in focus you will a larger depth of field which is achieved by a small aperture like a f/22.
Simply remember!
*smaller f number = smaller depth of field [only a part of image in focus, background blurred]
*larger f number = larger depth of field [more things in focus].
–> Shutter Speed: It is the length of time the camera shutter is open to expose light into the camera sensor. Shutter speed is measured in fractions of seconds. For most pictures, you would be shooting at shutter speed of 1/60 or higher. Below that you will need a tripod. I can keep my hands still till 1/40th of a second, it starts becoming shaky after that.
Simply remember!
lower shutter speed = shutter is open for a longer time = more light
faster shutter speed = shutter is open for a smaller time = less light
To make sure your picture has the correct exposure these three parts of the exposure triangle need to be adjusted accordingly. If you adjust one, you will most likely need to adjust the other 2 as well. It will all depend on what you want in your picture. More on this in another post.
4. Click vertical Images
I got into this pretty late. For the longest time, I used to click horizontal images. I didn’t see as to why it should make a difference but it does! It makes a big difference to how the pictures appear not only on your blog but also on Pinterest. We all know how important Pinterest is to food bloggers and for your pictures to work there you need big vertical images.
I realized the importance of vertical images only after I started looking at my own pictures on Pinterest. They looked so tiny and not appealing at all. The food looks better and more appealing in vertical pictures.
5. Edit your pictures
Yup there’s no running away from this. You need to edit your pictures. Popular software tools are Photoshop and Lightroom. I use Lightroom 5 to edit all my pictures. I follow a basic sequence of editing my pictures in Lightroom and I will do a separate post on it later. If you don’t want to buy Lightroom/Photoshop then PicMonkey is your next best bet. It’s a free editor and you can pretty much do the basic editing stuff in there.
But if you ask me, the 150$ that I spent on my Lightroom 5 is probably one of my best investments ever! If you are serious about blogging, then you might need to invest in one of these software.
6. Click pictures in RAW
RAW v/s JPEG. Okay if you have told me these 2 words a year back, I would have given you this blank look. Like what are you even talking about! If you are a beginner this information is for you – RAW and JPEG are the two formats in which you can shoot your pictures. RAW is a file format which basically captures all the image data recorded by the sensor. It is unprocessed in comparison to the JPEG format.
If you need really high quality pictures then you have to shoot in RAW. Because there’s so much additional information available in RAW files, it’s easier to make changes. Adjusting white balance, highlights, shadows etc. are easier done in RAW files. There’s a downside though, RAW files are huge, they take a lot of space. It was for this reason that I kept shooting in JPEG for a very long time. But once I realized how awesome RAW is, I never looked back. I now shoot all my images in RAW + JPEG format.
7. Stick to basic colors for food photography backdrops
I think this is one mistake which everyone makes when they start shooting food. I went crazy buying all multicolored backdrops. Lines, checks, squares, patterns in different color I got them all. And now they are all sitting in my cupboard! Sure I do use them sometime but over the time I have realized that my best friend in food photography is a plain white cotton kitchen towel or a white parchment paper.
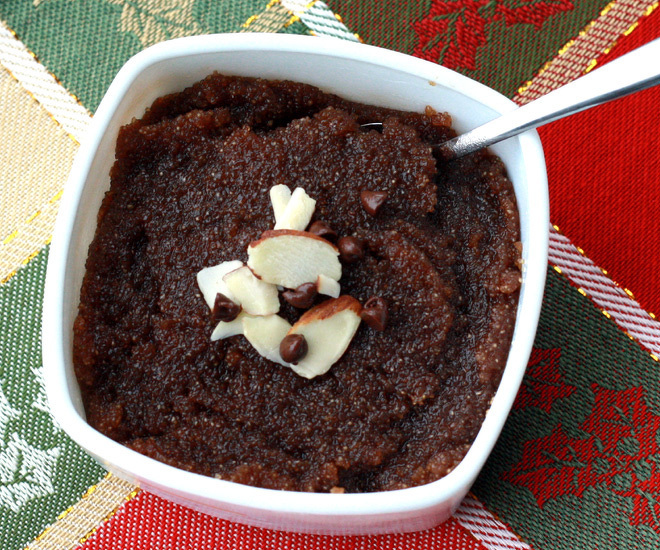
The food needs to stand out. Food should be the focus and not the colorful background. Let’s see one example. This picture of Sooji Chocolate Halwa (semolina chocolate pudding) was clicked in 2013. There are a lot of problems in this pictures, but first of all the background is all wrong. I mean my eyes first go to the bright background. The food is lost in the bright colorful background.
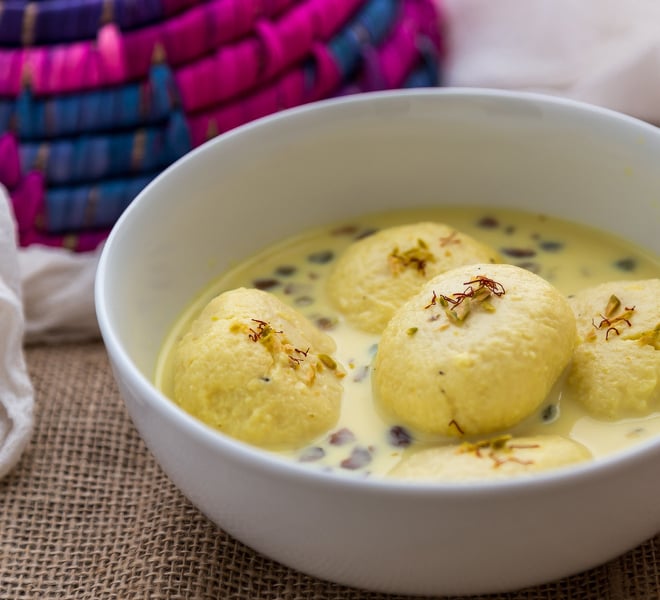
And now this pictures of Rasmalai, clicked in 2014. Notice the focus is on the food. Yes I did place a colorful basket in the background but it’s just to add some colors, it doesn’t take the focus away from the food.
My 2 cents: avoid patterns, stick to solid backdrops. Colors like white, grey and black often work best in food photography. Don’t get me wrong, it’s not bad to use patterns and other colorful backdrops but make sure they don’t take away the focus from the food.
8. Use complimentary props
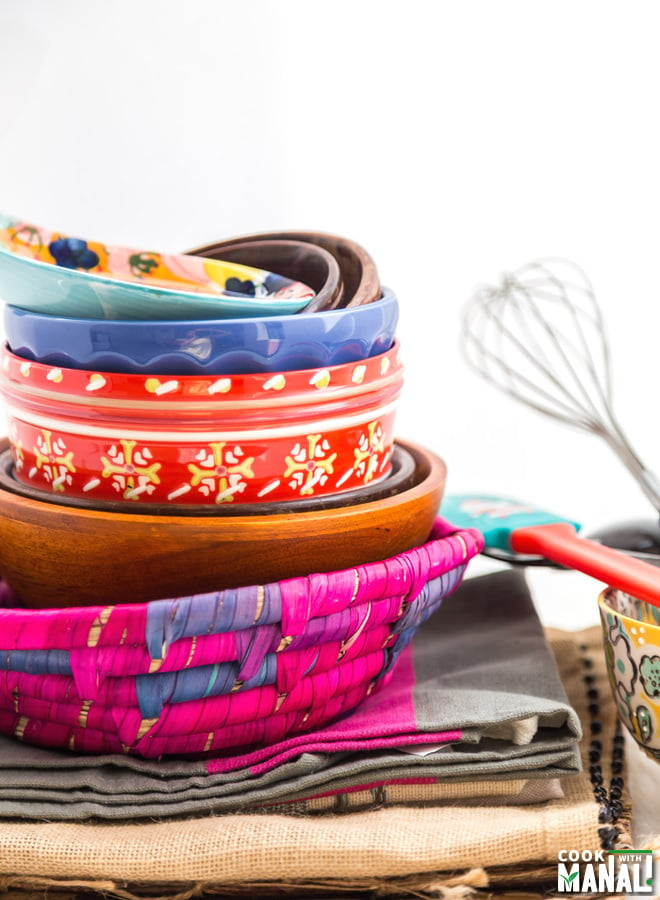
Use lots of props and make sure they complement the food. Most commonly used props are:
–> plates, cups & mugs, spoons, forks, straws etc.
– like the backdrops, white and black work best here too. White bowls & plates are my favorite.
– round bowls and plate look better in food pictures. There is no hard and fast rule here but this what I have observed.
– also pay attention to the size of the your bowl or mug or plate. Medium and small sized bowl and plates look better in food photography. It is also not important to fill your containers completely with food. A half filled glass may look better in pictures!
– odd numbers appear better in food pics, now don’t ask me why but they certainly do! Like a picture with 3 cupcakes always looks better than a picture with 4 cupcakes. This is again what I have observed
– colorful straws with dots and line work very well in the background. I often throw them in the background when I’m running out of ideas.
–> kitchen towels, napkins, other fabrics.
– white cotton kitchen towel is a must have.
– stick to basic colors in bold.
– you can buy professional wooden and other backdrops from Etsy but I would not recommend it in the beginning. Start with a basic white and black paper board or a wooden tray. That is enough to get you started.
9. Make the food look pretty
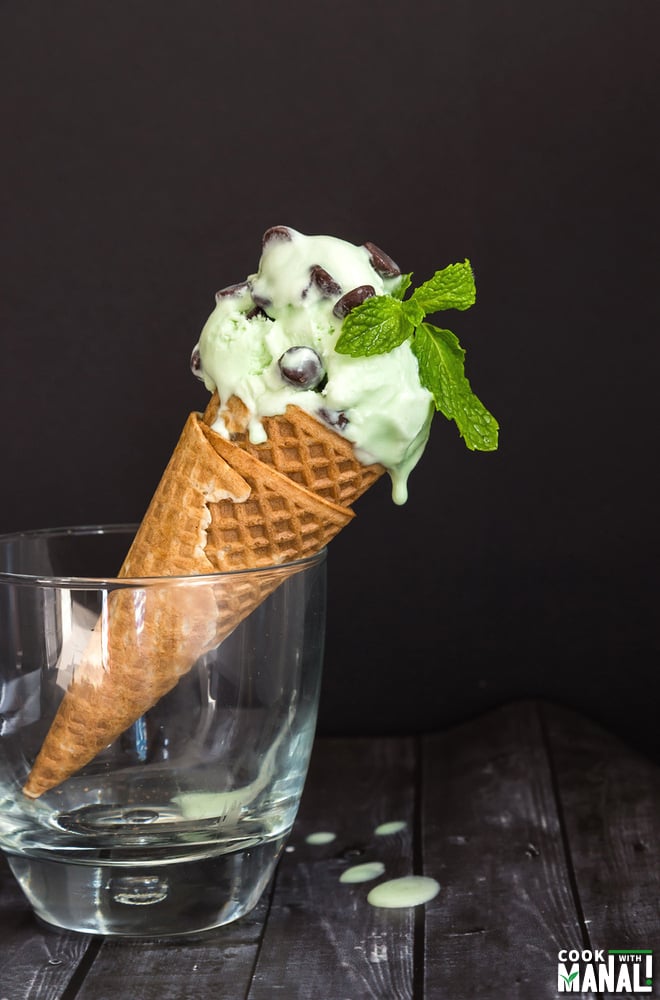
–> Click the food in it’s most appetizing form. Like a shot of dripping ice cream looks more appetizing than a simple shot of ice cream in a cup.
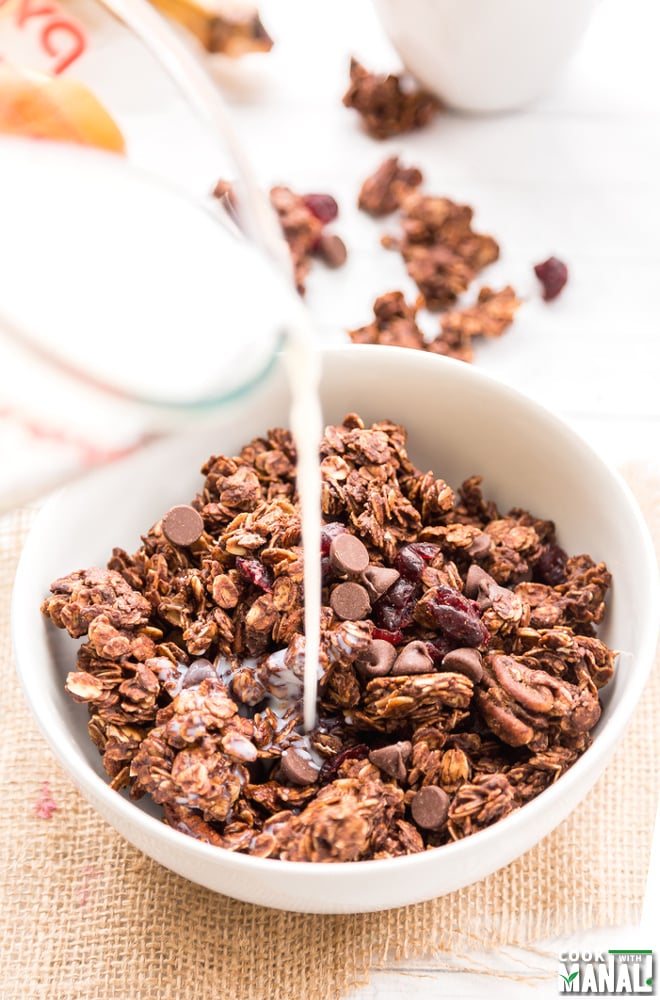
–> Click action shots like pouring sauces, milk etc. over your food. It adds a lot of depth to your pictures.
–> Garnish you food with herbs like cilantro, mint, parsley, basil whenever possible.
–> Glazes, drips on your baked good make them look more appealing.
10. Practice & keep improving
And last but not the least, practice and practice some more! There are tons of information available online. I have learned so much in the last 1 year and there’s still so much more to learn. Look out for books on food photography. A book that I read and recommend is Food Photography: From Snapshots to Great Shots . It’s a really good book to understand the basics.
Again I would like to say that I am not a professional photographer and not an expert at all. These are little tips and tricks which have helped to become a better food photographer in the last 1 year or so. The learning continues and I hope to share more as I gain more knowledge about food photography! Please let me know if you found this helpful. I am planning to do 1 food blogging post every month and your feedback would really help. Please feel free to ask any questions and I will try to answer them as soon as possible.
Thank you for reading!
Manali



Loved all that you shared. Great tips and lovely images. Keep it up!
Thank you so much for great tips Manali. Which platform do you suggest for food blogging?
WordPress!
Thanks so much Manali! What do you think of square space?
No idea, never used!
Thanks for your reply!
Very informative post for beginner blogger like me, thanks dear. Congratulations to you on 3rd birthday of your blog. Wish you all the best!!!
Thank you Ragini, I am glad you found the post helpful!
Great tips and thanks for sharing.
Great tips and thanks for sharing.
Very useful write up! Gonna use all the tips very soon. Thanks a lot 😀
I’m glad you find the tips helpful Sangini! 🙂 All the best!
Hi Manali,
This is Amazing share, very informative post with useful tips! Thank you so much dear for this excellent share. God bless you. (love and hugs)
Thank you so much dear and you are very welcome! 🙂
Thanks shweta, glad you find the post helpful! You mean manual mode or focus? I always shoot in manual mode and adjust the ISO/Shutter Speed & aperture myself!
Thanks Ami!
Nice breakdown!
Thanks Emma!
Thanks Savita! I love your pictures too, it’s always good to share and learn 🙂
Thanks Jen! I will definitely share once I learn more!
Thanks Anu! Would love to read your take on food photography too, I love your pictures 🙂
Great complication!
Thanks Shreya! 🙂
Thank you for sharing such a detailed, professional post! I have so much to still learn when it comes to photographing my food. Great tips and tricks! 😀
Welcome Jess! 🙂
Too good .. M a beginner so its of grt use to me .. M still confused bout RAW and JPEG. Format .. I mean how to change d format of pics ..
Thanks Shreya! Glad to hear that! I can tell you how to do this in Canon. Click on the “Menu” button on your camera > then click on image quality (click set)> now you will see two rows RAW & JPEg. With that semi-moon shape button that you have on top move the cursor on the right to select RAW > click set again. For both RAW+JPEG select RAW and then also select the first option in JPEG. I know this sounds confusing, a video on this would be better. Try to watch a video on youtube for this, I am sure that will be more clear!
Hello Manali, a informative post , I am a 6 month old blogger, in the process of learning food photography. …hope to see much more from you regarding shutter speed and iso. Thankyou for sharing☺
Thanks Nusrath! Glad you find it helpful 🙂
Thank you Mira! You are too kind my friend! Oh I love Canon 6D, I think it’s fantastic! I love my lens too, it’s not the perfect one for food photography but it’s so awesome overall!
That was a simple and wonderful article. Thanka for sharing.
Thanks anu! Glad you like 🙂
Thanks Stacey! There’s always so much to learn, it’s overwhelming at times. I feel like a beginner too 🙂 Yes RAW is so much better!
Hello Manali!
First time here….
Very useful writeup and tips! (y)
I am a new blogger who doesn’t owns a DSLR right now but love taking good pictures.
Do hop on my blog and see what better can I do!
Thanks for sharing this useful post for beginners like me.. 🙂
Hi Farheen! thank you so much for your kind words 🙂 definitely going to check your blog!