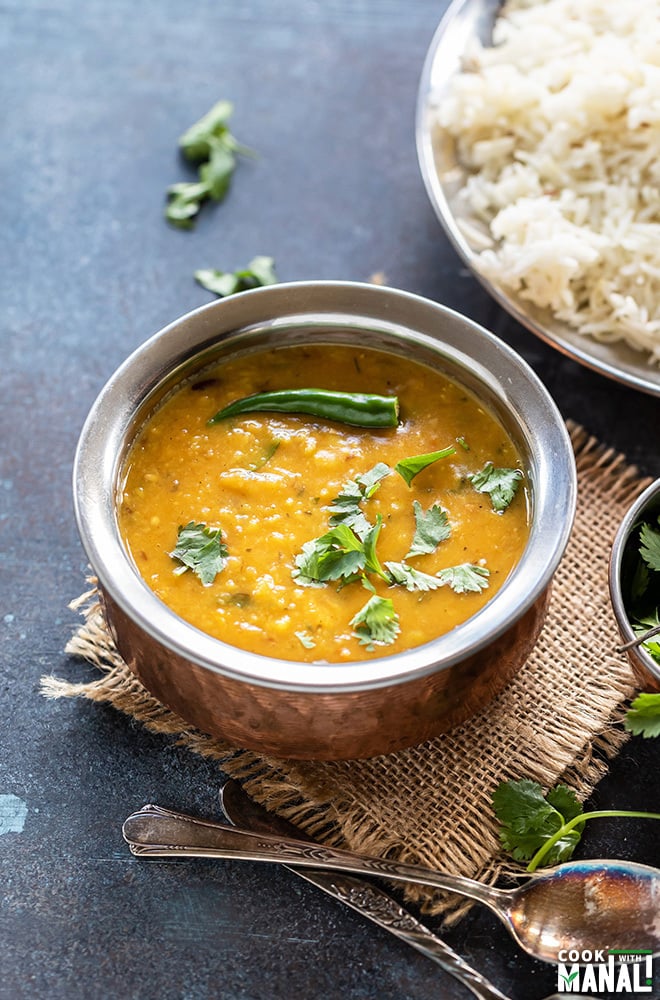
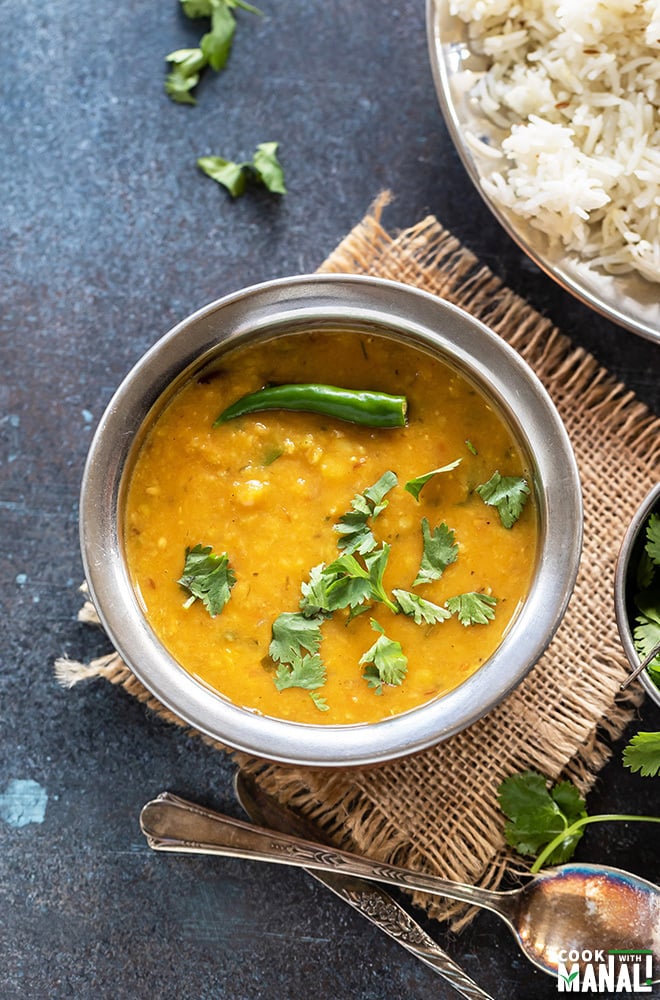
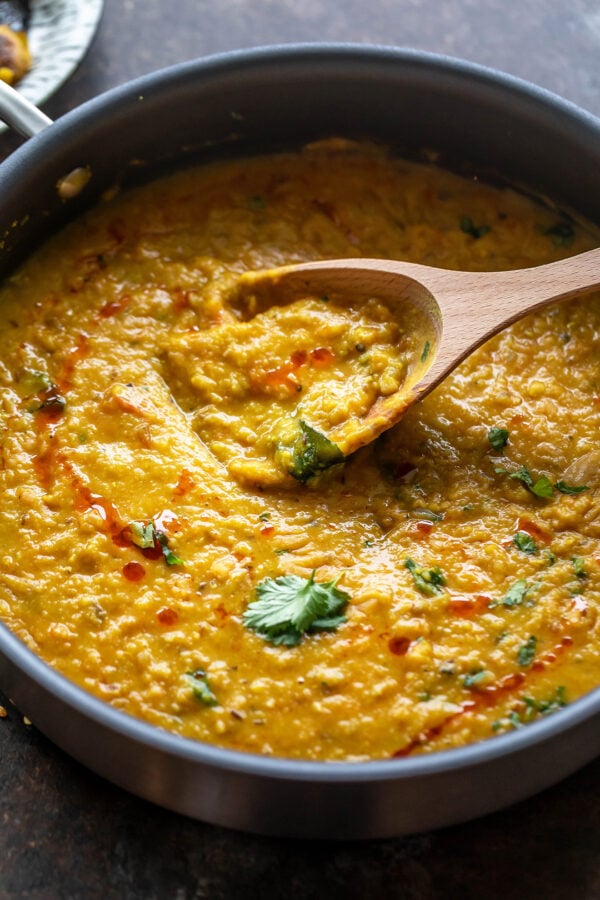
Easy Dal Fry which goes so well with boiled rice or tandoori roti.
I use a mix of toor (pigeon pea lentil) and masoor dal (red lentil) for the dal which is then tempered with onion, tomatoes and lot of ginger, garlic and cilantro!
An Indian can never have enough of dals. And I hope you guys aren’t bored of my dal recipes because they will be here all the time. No escaping!
This Dal Fry recipe is one of my absolute favorites. It’s packed with flavor, really easy to make and tastes so good with rice.
It’s Sarvesh favorite. Just give him this dal and rice, and he will be the happiest. He can pretty much eat this combo everyday and not complain.
One can make dal fry with toor dal only. However, for this dal fry recipe, I have used a mix of toor and masoor dal.
Either way you make it, the end result will always be delicious!
This Dal Fry
✓ makes a comforting meal
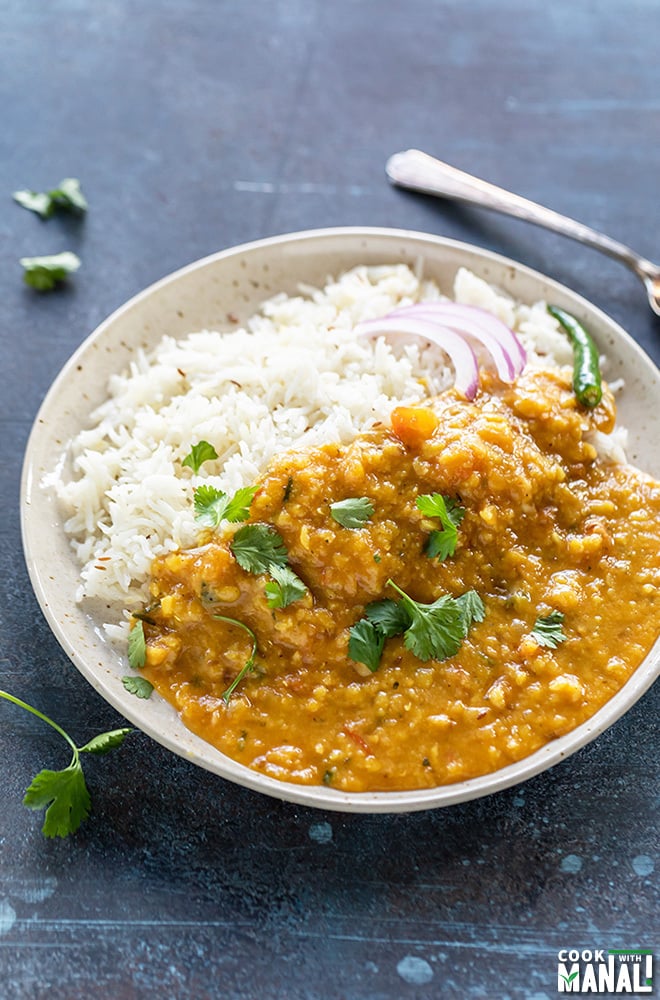
✓ pairs well with boiled rice or quinoa
✓ vegan and nutritious
✓ makes a good protein packed meal for vegetarians/vegans
To make the dal fry, I first boil the dal with turmeric and salt and then make the masala in a separate pan.
Most of the flavor of this dal comes from using fresh onion, tomatoes, ginger and garlic. So you don’t need a ton of spices here.
I have just used a bit of garam masala, chili powder and kasuri methi for that fragrance at the end. Trust me, you don’t want to go overboard with the spices here.
The flavor of the dal really come through with using fresh ingredients. Sometimes, less is more!
I have kept this recipe vegan but of course you can use ghee here.
Ghee does give the dal a beautiful flavor and aroma. I ran out of ghee the day I made this dal so I have used oil to cook the masala.
How to Make Restaurant Style Dal Fry
To make a good dal fry, start with fresh ingredients.
Like don’t use ginger-garlic paste, in stead crush some fresh ginger-garlic in mortar and pestle and use in the recipe.
You will notice a difference!
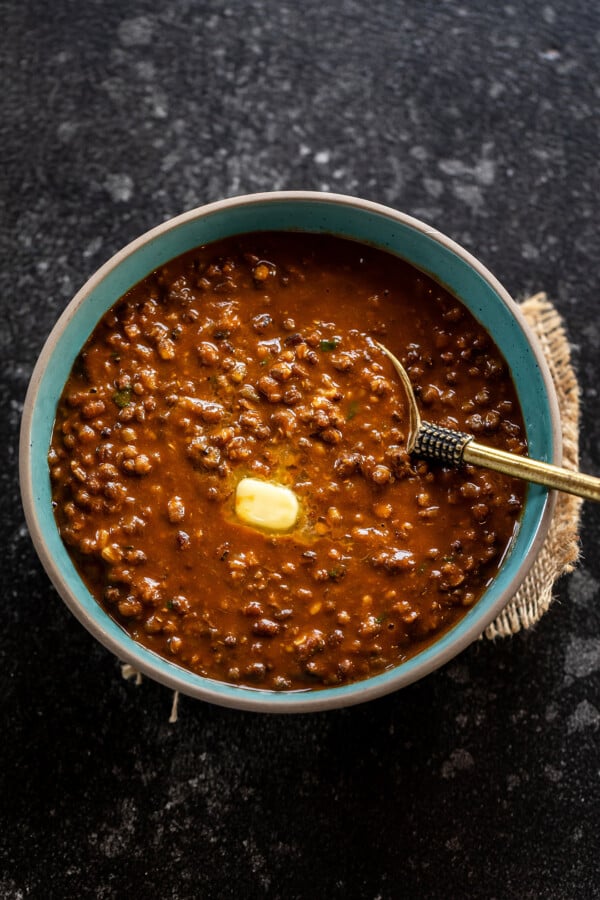
The second thing that you do to take your dal to that restaurant level is infuse some smokey flavor into it!
This method of infusing the food the smokey flavor from the charcoal is called dhungar method.
It is a pretty straight forward method where you heat a piece of charcoal until it’s really hot and then place it in a bowl and then place that bowl into your dish.
Then pour, ghee or oil over the charcoal. As soon as you pour the oil, you will see fumes rise from the charcoal.
Immediately cover the pan to trap that smokey flavor. The key though is to not smoke for a very long time.
I usually don’t do it for than 5 to 7 minutes. The longer you will keep the lid on, the smokier the dal will get so don’t over do it.
There is no right or wrong way of making this dal fry (or any dal for that matter) so you can definitely add ingredients as per your taste.
I am just sharing a version I like. Hope you guys enjoy this one!
Method
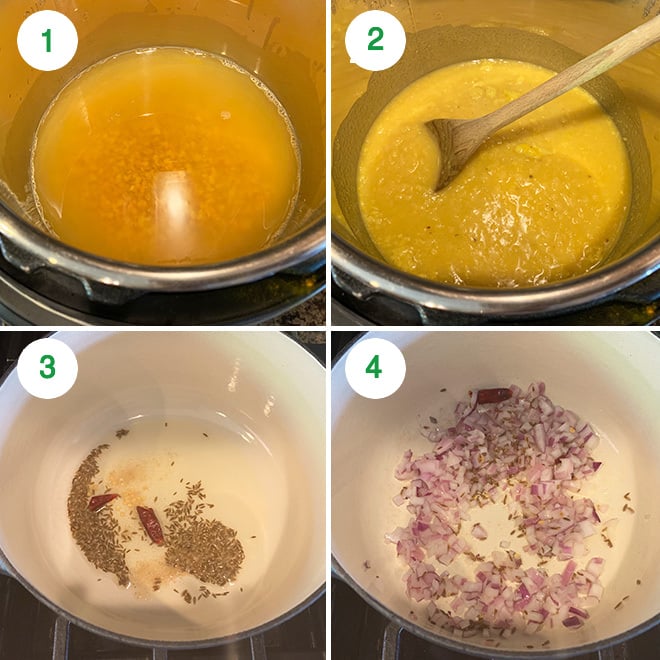
1- Rinse the dal (I used mix of toor and masoor) and transfer to an instant pot or pressure cooker. Add 1/2 teaspoon turmeric, 1/2 teaspoon salt and 3 cups water. Stir.
2- Boil the dal using either-
Instant Pot: cook on high pressure for 8 minutes with natural pressure release.
Stove-top pressure cooker: cook for 4 to 5 whistles on high then lower the heat and let it cook for 3 to 4 minutes. Set aside.
3- Heat oil in a pan on medium heat. Once hot, add the cumin seeds and let them sizzle. Then add dried red chili and hing and saute for few seconds.
4- Add onions (also add 1/4 teaspoon salt for the onions to cook faster) and cook for around 4 minutes until soft and light golden brown in color.
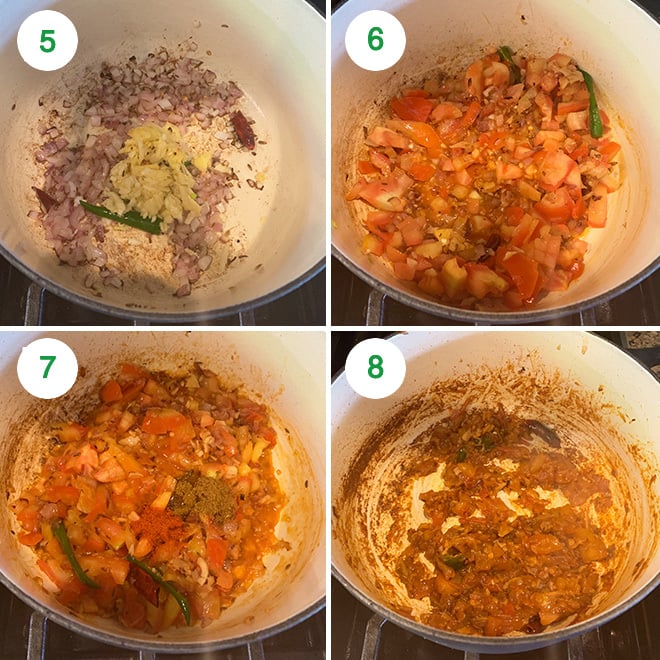
5- Add crushed garlic-ginger and sliced green chili. Cook for 1-2 minutes until the raw smell goes away.
6- Add chopped tomatoes and stir.
7- Then add the garam masala, red chili powder and mix. Cook for 6 to 7 minutes until tomatoes are very soft and cooked and oil oozes from the side of the masala.
8- This step is important, don’t rush it. Stir in between and I also added around 2 tablespoon water so that the masala doesn’t burn.
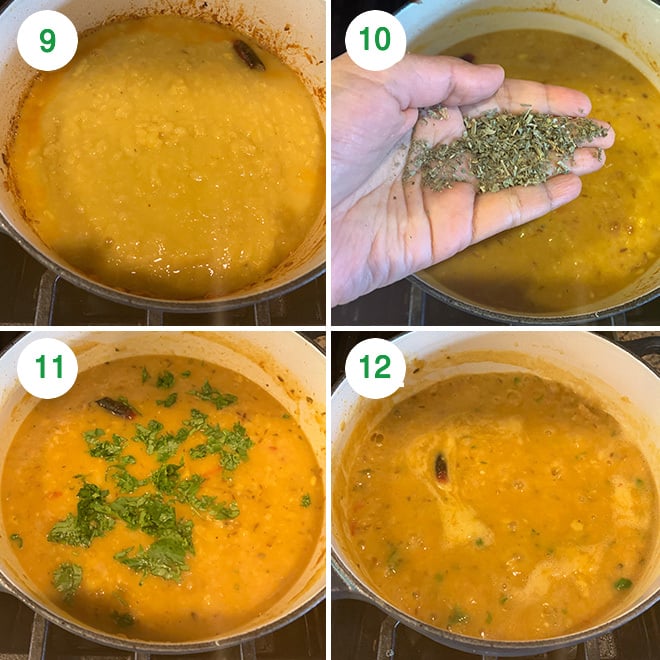
9- Now add the boiled dal to the pan and mix. Add water to thin out the dal at this pont, I added 1 cup water here, you can add as per your taste.
10- Add kasuri methi,
11- Also add the chopped cilantro. Add the remaining 1/4 teaspoon salt and mix.
12- Let the dal simmer for 3 to 4 minutes on low-medium heat.
You can serve the dal at this step or do the extra step of giving it a smokey flavor (dhungar method).
Dhungar Method (Optional)
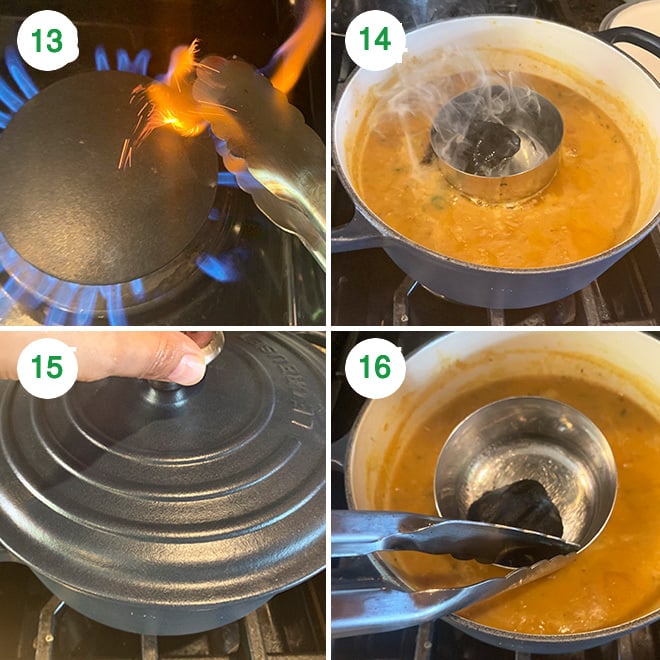
13- For the dhungar method, place a steel bowl on top of the dal. Meanwhile heat a piece of charcoal over direct heat until it’s red hot.
14- Place hot charcoal in that steel bowl on top of trivet. Pour oil on top of charcoal. You will immediately see fumes coming out of charcoal.
15- Immediately close the pot with a lid. Let it remain like this for 5 to 10 minutes.
16- Then open the lid and remove the bowl from dal.
The longer you keep the lid closed, the smokier dal will get, so don’t do more than 10 minutes. I did for 7 minutes.
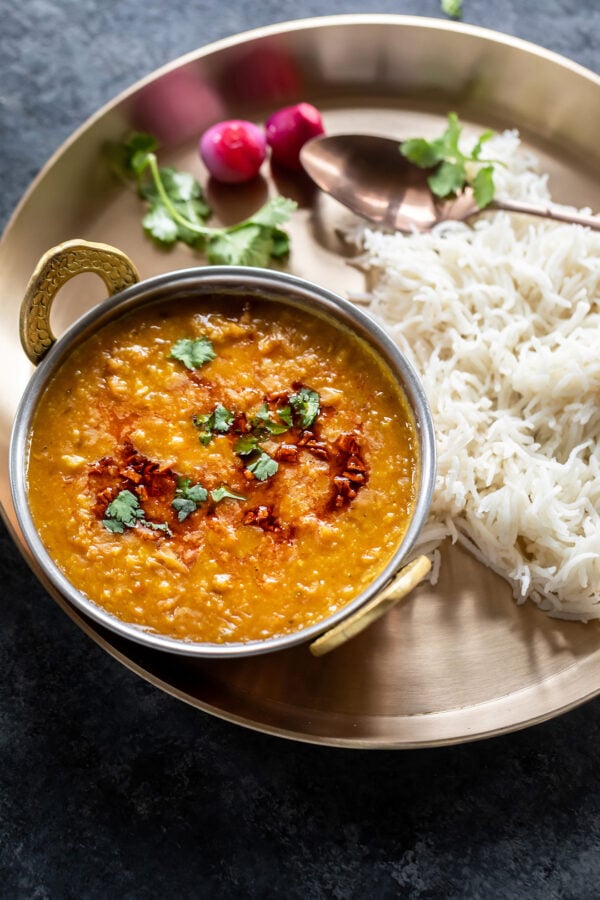
Garnish with cilantro and serve dal fry with tandoori roti or rice!
More Popular Dal Recipes
If you’ve tried this Dal Fry Recipe then don’t forget to rate the recipe! You can also follow me on Facebook, Instagram to see what’s latest in my kitchen!
Easy Dal Fry Recipe
Ingredients
- 3/4 cup toor dal, pigeon pea lentil, 150 grams
- 1/4 cup masoor dal, red lentil, 50 grams
- 1/2 teaspoon ground turmeric
- 1 teaspoon salt, divided
- 4 cups water, divided
- 1 tablespoon oil, or can use ghee
- 1/2 teaspoon cumin seeds
- 1 whole dried red chili, broken
- 1/4 teaspoon hing, asafoetida
- 1 medium red onion, finely chopped
- 7-8 large garlic cloves, crushed using mortar & pestle
- 1.5 inch ginger, crushed using mortar & pestle
- 1 green chili, sliced, or more to taste
- 2 medium tomatoes, chopped
- 1/8 teaspoon garam masala
- 1/8 teaspoon red chili powder, or to taste
- 1 teaspoon kasuri methi, dried fenugreek leaves, crushed
- 1 tablespoon chopped cilantro, + more to garnish
Instructions
- Rinse the dal (I used mix of toor and masoor) and transfer to an instant pot or pressure cooker. Add 1/2 teaspoon turmeric, 1/2 teaspoon salt and 3 cups water. Stir.
- Boil the dal using either-Instant Pot: cook on high pressure for 8 minutes with natural pressure release.Stove-top pressure cooker: cook for 4 to 5 whistles on high then lower the heat and let it cook for 3 to 4 minutes. Set aside.
- Heat oil in a pan on medium heat. Once hot, add the cumin seeds and let them sizzle. Then add dried red chili and hing and saute for few seconds.
- Add onions (also add 1/4 teaspoon salt for the onions to cook faster) and cook for around 4 minutes until soft and light golden brown in color.
- Add crushed garlic-ginger and sliced green chili. Cook for 1-2 minutes until the raw smell goes away.
- Add the chopped tomatoes and stir.
- Then add the garam masala, red chili powder and mix. Cook for 6 to 7 minutes until tomatoes are very soft and cooked and oil oozes from the side of the masala. This step is important, don't rush it. Stir in between and I also added around 2 tablespoon water so that the masala doesn't burn.
- Now add the boiled dal to the pan and mix. Add water to thin out the dal at this pont, I added 1 cup water here, you can add as per your taste.
- Add kasuri methi, chopped cilantro. Also add the remaining 1/4 teaspoon salt and mix.
- Let the dal simmer for 3 to 4 minutes on low-medium heat. You can serve the dal at this step or do the extra step of giving it a smokey flavor (dhungar method).
Dhungar Method
- For the dhungar method, place a steel bowl on top of the dal. Meanwhile heat a piece of charcoal over direct heat until it's red hot.
- Place hot charcoal in that steel bowl on top of trivet. Pour oil on top of charcoal. You will immediately see fumes coming out of charcoal. Immediately close the pot with a lid. Let it remain like this for 5 to 10 minutes.
- Then open the lid and remove the bowl from dal. The longer you keep the lid closed, the smokier dal will get, so don't do more than 10 minutes. I did for 7 minutes.
- Garnish with cilantro and serve dal fry with tandoori roti or rice!
Video
Notes
- You can use ghee in place of oil. It will give a wonderful flavor and aroma to the dal.
- I have used a mix of toor and masoor dal here. You can use toor dal only or use a combination of toor, moong and masoor dal too.
- To make this gluten-free, skip the hing (asafoetida) or use a gluten-free hing.
Nutrition
Nutrition information is automatically calculated, so should only be used as an approximation.
 Your feedback is valuable!Please share your comments, ratings, and any suggestions or adaptations below to help us improve and make our recipes more successful.
Hi Manali! Just wanted to share that this has become one of my go to recipes! It is absolutely delicious, nourishing, and healthy! Thanks for sharing!
Thank you Jigna, appreciate the feedback.
I’d hesitated trying this recipe as it looks very similar to your great dal tadka.
Curiosity got the better of me so gave it a try last night.
This is exceptionally good! There is a uniquely delicious difference between this dish and dal tadka that I can’t put my finger on. I will say this recipe has bumped dal tadka into second place among my favourites of your lentil dishes.
Served with murgh boti, hariyali paneer tikka, fried patra (store bought), rice and the ever-present hot lime pickle.
*** Miss Manali, do you have a recipe for fried patra? My family loves it and I hate having to settle for frozen from a store when all of your recipes are so good!
glad you like it Dave! I will try to share a recipe for patra 🙂
I just order this dish at an Indian restaurant and came to the Internet looking for its recipe! I see now the charcoal was what that flavor I couldn’t put my finger on! I don’t have a gas stove- not sure I could do the charcoal😅 Would not adding that step make a big difference in taste?
It gives a Smokey flavor. Some of my US readers have tried adding liquid smoke so maybe you can try that? here’s another dal recipe that you might enjoy: https://www.cookwithmanali.com/dal-tadka/
When you say 1tsp or 1tbsp , do you actually use measure,or its just approximation.
Also 1 Cup and 1/2 cup.
Just clarify this for me.
Thank you.
nothing is an approximation. It’s measured and tested recipe in my kitchen and that’s what I share on the blog
Hi Manali, your blog is a life saver for me. This is a very good and quick recipe for a super busy and messy mid-week. Thank you for all your tips!! God Bless you.
Thanks Shruti, I am glad it’s helpful to you!
Hi Manali,
Can ginger-garlic paste be used as a substitute for crushed ginger and garlic. If yes, what is the equivalent quantity?
I would like to use this as an opportunity to thank you for all the wonderful recipes. As a 40yr old Indian man, whose mommy did everything when growing up, I had to learn to cook during a difficult year. Your website is where I come to for all the veggie Indian recipes, and I have never been disappointed.
Thank you once again,
–abhijit
Hi Abhijit, yes use 1 tablespoon of ginger-garlic paste in this recipe in place of the fresh ginger-garlic. I am so glad that my recipes have helped you cook, appreciate your support 🙂
I have tried this recipe along with your other recipes. It really tastes awesome. My hubby and son just loved the dal. Thanks for your recipe.
Wow I made this Dal Fry and it was very tasty! It’s just like the one I buy at the restaurant. Thank you very much for this recipe!
glad you liked it!
What kind of charcoal do you use for the dungar method?
it’s the type which isn’t self ignited, check BBQ section..
I like trying out new dal recipes so I follwed your recipe step by step. It’s written in a very easy way and the pictures help immensely.
I doubled the recipe, so I think I had too many tomatoes and at step 8 it looked more like a tomatoe sauce with bits than what you show in your picture. Although I liked its taste, the end result didn’t please anyone in my family. I am sure your dal tastes much better than what I cooked
Sorry your family didn’t like it, there’s always a chance of something doing wrong when you double, maybe more water or more tomatoes. Thanks for trying.
Can I make Dal Fry if I don’t have an instapot or a pressure cooker?
yes, soak the dal for couple of hours, then cook the dal in a pan until it’s completely cooked. It will just a much longer time
Hi Manali!
I don’t have a pressure cooker or instapot…is there another way to cook the dal? Thanks for your help!
cook on stove-top, it will just take longer to cook but will cook. Add dal to a pot of water, bring to boil and lower the heat to medium and simmer until dal is cooked through.
Hi Manali!
When cooking on the stove top, should the individual lentils be completely soft, or should they have a bit of texture (at the end of step 2)? When adding the dal to the rest of the ingredients, should I add the water left with the dal, or should I drain it first?
Thanks again 🙂
I prefer completely soft but some prefer texture, so up to you 🙂 I grew up eating completely soft lentils. No you don’t drain anything, the dal is boiled and completely mixed with the water so you add the whole thing to the rest of the ingredients.
Thanks for your help with my questions, Manali. I made this for the first time last time, and it turned out exactly as I expected! Hot spicy without being too hot, very satisfying. Nice and flavorful.
Another winner! Thanks Manali 🙂
Hello Manali…
I’m a “meatatarian”, and I happily enjoy cooking with animal products in my recipes. However, this doesn’t mean that all of the recipes I cook must have animal products – which means I can find vegan recipes just as interesting as any other kind.
I found your blog after I saw a bag of moong dal in my pantry, and searched for “recipes with moong dal”. Google gave me a bunch of links, but your recipe looked the most interesting. So…
I’ve just come home from purchasing the last few ingredient I’m missing. I will be making Dal Fry tomorrow or maybe the day after, and I’ll let you know how it turns out. As someone who enjoys animal products in my food, I’m excited to find out how this tastes. Thanks for posting recipes which help keep me interested in cooking creatively…
Hello Jon, hope you enjoyed cooking the dal fry 🙂