Rasmalai is my favorite Indian sweet by miles. As a kid I wasn’t very fond of sweets but Rasmalai was my absolute favorite. Maybe because it’s so delicious or maybe because we didn’t get to eat it that regularly compared to other sweets. Rasmalai is a royal sweet often served in weddings and eaten on special occasions. I already have a rasmalai recipe on my blog but I thought of making a separate post to talk about how to make perfectly soft rasmalais at home. I hope it will be of some help to the readers.
There are two parts to Rasmalai – the rasmalai balls and the thickened milk.
Rasmalai balls: To make rasmalai balls the milk is first boiled and and then curdled by adding lemon juice or vinegar. After draining the water from the curdled milk, the protein that is left is called the “chena” or “paneer”. The chena is then mashed till it becomes smooth. Small balls are then made from that chena and dropped in boiling sugar syrup till cooked.
The thickened milk or the ras: The rasmalai balls are finally dipped in thickened milk and chilled before serving. To make the “ras” [syrup] full fat milk is boiled till it thickens slightly. It is then flavored with saffron and cardamom.
So now that we know what rasmalai is let’s talk a bit about how you can make them perfectly at home. The biggest problem that people face while making rasmalai at home is that the rasmalai balls often turn out hard whereas they should be totally soft and in fact melt in your mouth – that’s when you know you have made the perfect rasmalai. During my trip to India this time I made it so many times that now I feel confident in sharing these little tips which will make sure that your rasmalais turn out perfectly every time.
I will talk about these tips as we go through the step by step picture for this recipe
Method
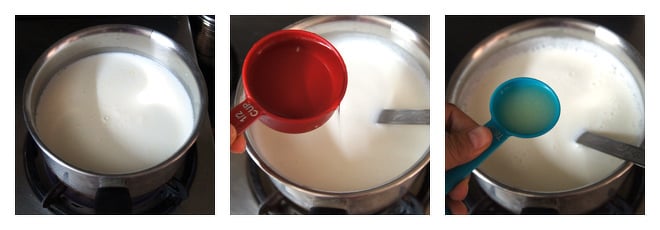
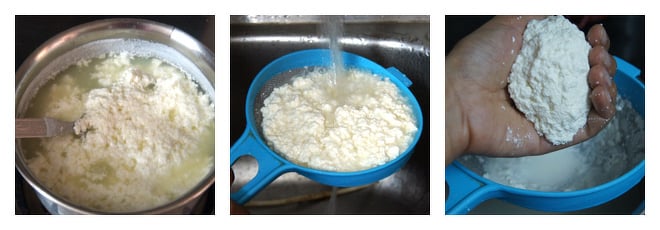
Boil milk in a heavy bottom pan. Once it comes to a boil, switch off the flame and add 1/2 cup of water to bring the temperature of the milk down a bit. Wait for 5-10 minutes and then start adding lemon juice till milk curdles.
Point No.1 : Use full cream/whole milk to make rasmalai. Low fat or fat free will not give good results. The rasmalai balls are nothing but milk fat so you need to use full fat milk for making this sweet.
Point No. 2: Don’t curdle the milk as soon as it comes to a boil. Add 1/2 cup water and wait for 5-10 minutes till the milk temperature comes down a bit. If you curdle the milk when it’s not “super hot”, the resulting chena will be softer.
Add lemon juice till the milk curdles completely. Using a strainer drain the water and collect the chena. Rinse it under tap water so that there’s no trace of lemon juice in it. Leave it in the strainer for 10-15 minutes and then take the chena in your hand and squeeze out remaining water slowly.
Point No. 3: Even though you have to squeeze out the water completely from the chena, make sure that it’s not completely dry. The chena should feel soft and moist even after you have squeezed out the water. So don’t press it too hard else it will become dry and resulting rasmalai balls will not be soft. This step is important so do leave little water in the chena so that it feels soft and moist when you mash it.
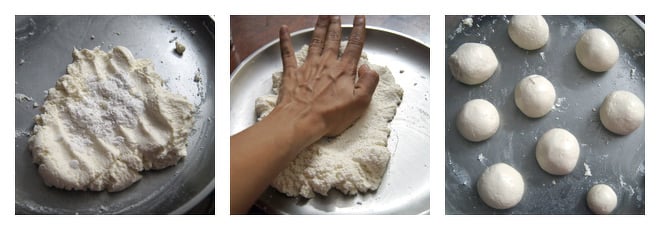
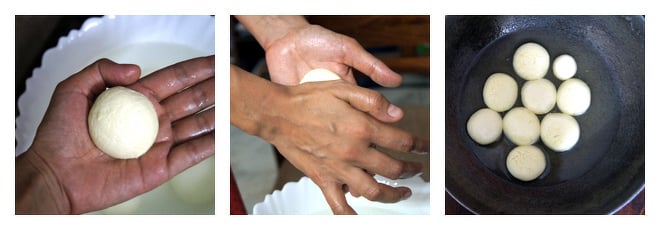
Add cornflour and start mashing the chena till it’s smooth. Set the clock to 10 minutes and mash constantly for 10 minutes using your palm. Once it’s smooth, make small balls out of it.
Point No. 4: Mash the chena for 10 minutes, the time is crucial so don’t try to cut it down. When the chena is smooth you should be able to make smooth balls out of it.
Point No. 5: The balls when dipped in sugar syrup double in size so make the balls accordingly. I got only 8-9 balls because I was trying to make big rasmalai balls. Usually I get 16-17 balls from 1 liter of milk but of course they are smaller in size.
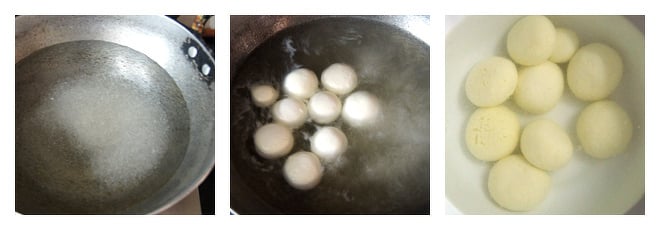
Heat 1 cup sugar and 4 cups water in a wide pan and wait till it comes to a full boil. Drop the balls in boiling sugar syrup and cook for 15-17 minutes. The balls will double in size by then. Take out the balls from the syrup and drop them in fresh water. If they sink to the bottom, the balls are done. They are always done by 15-17 minutes so you can skip this step if you want.
Point No. 6: Use a wide pan to cook the rasmalai balls. The balls double in size so there should be enough space in the pan for them to cook. Don’t overcrowd the pan with too many balls.
Point No. 7: The water to sugar ratio is 4:1. So for every 1 cup of sugar we add 4 cups of water. This ratio is important to get the right syrup consistency. Drop the balls in the syrup only when it comes to a full boil and the heat should be set to maximum throughout the duration of 15-20 minutes till the balls are cooking.
Point No. 8: If you feel the sugar syrup is getting thicker and balls are sticking to the bottom of the pan, then keep adding little water constantly. The balls should not touch the bottom of the pan. The syrup should always be thin in consistency. With 4:1 ratio, you will hardly need to add any water. That’s why I said this is the perfect ratio for maintaining the correct syrup consistency.
Point No. 9: Once the balls are cooked, let them cool down to room temperature. While the balls are cooling down make the thickened milk.
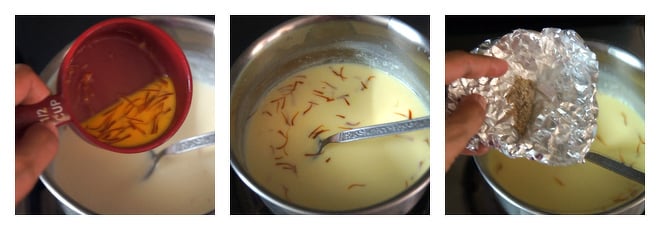
In a heavy bottom pan, boil 500 ml of milk. Soak few strands of saffron in a tablespoon of warm milk and set aside.
Once the milk comes to a boil, lower the flame and continue to stir the milk at regular intervals. After 10 minutes add sugar and mix.
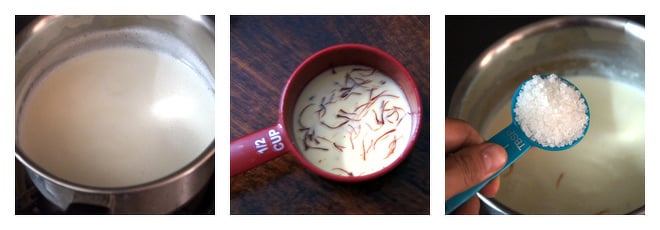
After 20-25 minutes the milk will thicken to desired consistency, add soaked saffron and crushed cardamom. Also add finely chopped pistachios [if using]. Mix and switch off the flame.
Take out the cooled down rasmalai balls from the fresh water bowl. Squeeze and flatten lightly using your hands and put in sugar syrup for around 10-15 minutes [so that they absorb the sugar] before transferring them to milk. Squeeze the balls carefully as they are very soft and can break easily. I like to flatten the rasmalai at this stage rather than flattening them in the beginning. I feel they get cooked evenly in the sugar syrup when the balls are round in shape.
You can let the balls cool down in sugar syrup itself and then you can skip this step and transfer the balls directly to milk.
After 10-15 minutes transfer the balls to thickened milk. Chill in the refrigerator overnight or for 5-6 hours. Garnish with chopped pistachios and few saffron strands before serving.
Point No. 10: The milk should be warm when you add the rasmalai balls to it. So the balls should cool down to room temperature but the milk should be warm.
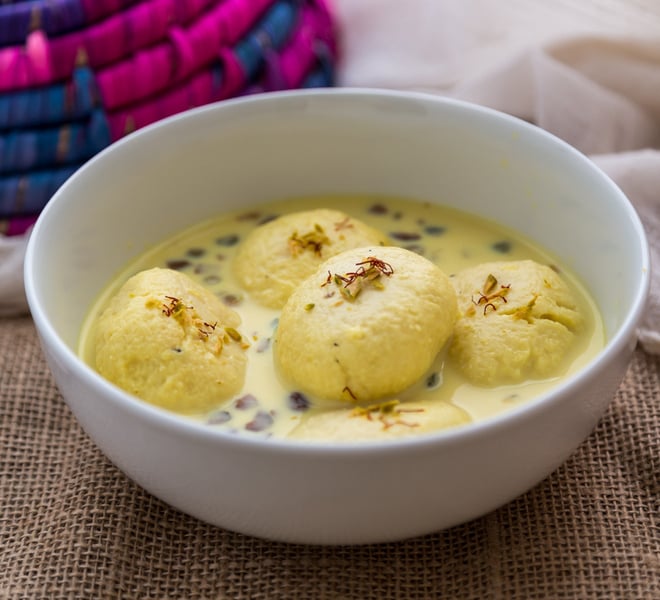
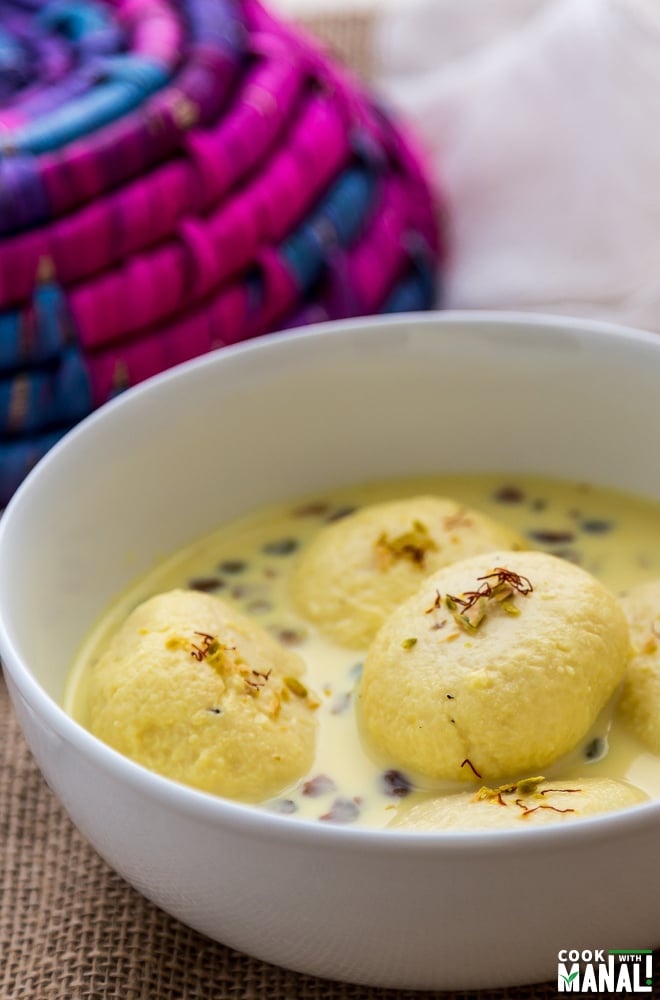
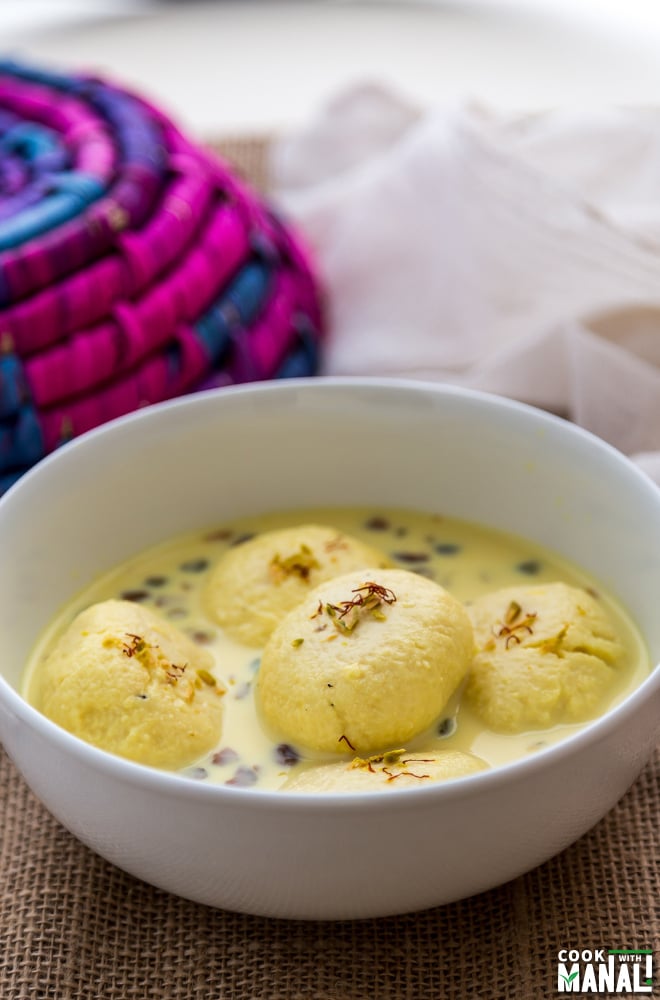
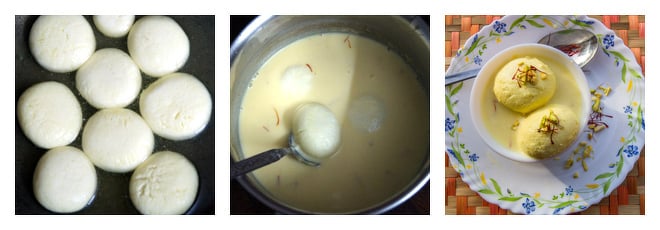 Enjoy soft melt in your mouth rasmalai!
* Use real cardamom pods to get the crushed powder. Do not use the ready made cardamom powder that we get in stores, it doesn’t have the same taste as the real one.
* Rasmalai taste best when chilled overnight. Also the balls soak the milk and all flavored get intermixed well in 8-10 hours. So to serve the next day, make them a day in advance.
I hope these 10 tips help in making you the perfect soft rasmalai at home.

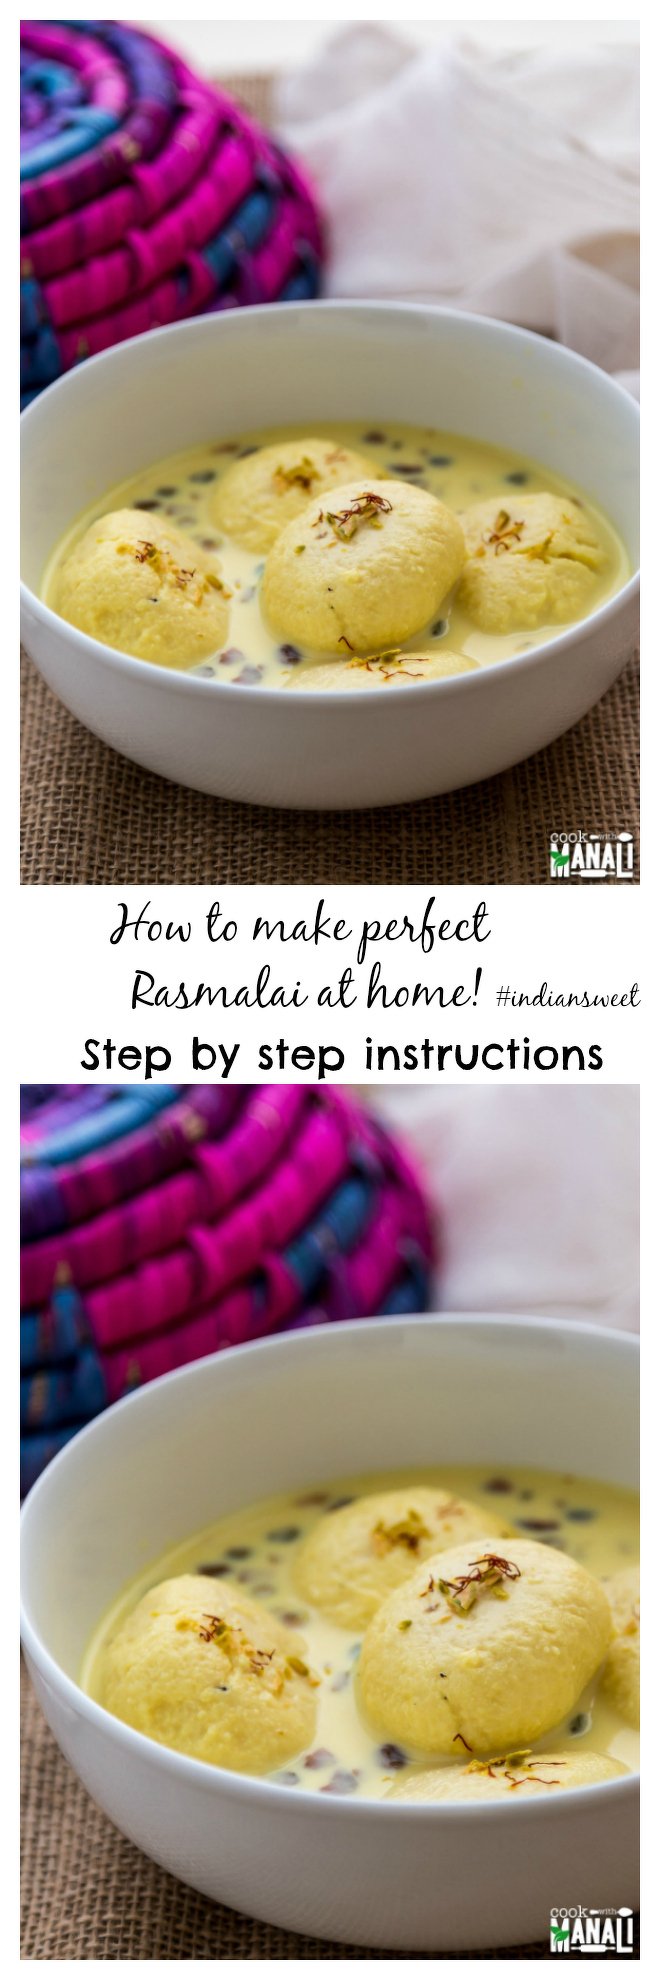
How To Make Soft Rasmalai At Home
Ingredients
For the rasmalai balls
- 1 liter whole milk
- 4 tablespoons lemon juice
- 1 teaspoon cornflour
- 4 cups water
- 1 cup sugar
For the ras [syrup]
- 500 ml whole milk
- 5-6 green cardamom pods, peeled and crushed to get the powder
- saffron, a pinch
- 3-4 tablespoons sugar
- finely chopped pistachios
Instructions
Rasmalai Balls
- Boil milk in a heavy bottom pan.Once it comes to a boil, switch off the flame and add 1/2 cup of water to bring the temperature of the milk down a bit.
- Wait for 5-10 minutes and then start adding lemon juice till milk curdles.
- Add lemon juice till the milk curdles completely.
- Using a strainer drain the water and collect the chena.
- Rinse it under tap water so that there's no trace of lemon juice in it.
- Leave it in the strainer for 10-15 minutes and then take the chena in your hand and squeeze out remaining water slowly.
- Add cornflour and start mashing the chena till it’s smooth.
- Set the clock to 10 minutes and mash constantly for 10 minutes using your palm. Once it’s smooth, make small balls out of it.
- Heat 1 cup sugar and 4 cups water in a wide pan and wait till it comes to a full boil. Drop the balls in boiling sugar syrup and cook for 15-17 minutes. The balls will double in size by then. Take out the balls from the syrup and drop them in fresh water. If they sink to the bottom, the balls are done. They are always done by 15-17 minutes so you can skip this step if you want.
Thickened Milk
- In a heavy bottom pan, boil 500 ml of milk.
- Soak few strands of saffron in a tablespoon of warm milk and set aside.
- Once the milk comes to a boil, lower the flame and continue to stir the milk at regular intervals. After 10 minutes add sugar and mix.
- After 20-25 minutes the milk will thicken to desired consistency, add soaked saffron and crushed cardamom.
- Also add finely chopped pistachios [if using]. Mix and switch off the flame.
- Take out the cooled down rasmalai balls from the fresh water bowl. Squeeze and flatten lightly using your hands and put in sugar syrup for around 10-15 minutes [so that they absorb the sugar] before transferring them to milk. Squeeze the balls carefully as they are very soft and can break easily. I like to flatten the rasmalai at this stage rather than flattening them in the beginning. I feel they get cooked evenly in the sugar syrup when the balls are round in shape.
- Transfer the balls to thickened milk [milk should be warm].
- Chill in the refrigerator overnight or for 5-6 hours. Garnish with chopped pistachios and few saffron strands before serving.
Nutrition
Nutrition information is automatically calculated, so should only be used as an approximation.
How To Make Rasmalai at Home

This recipe seems good and easy to make . I have tried this yet and will be using this soon. I believe it will come out great.
This rasmalai recipe is so easy and simple. I will surely try this as i Like rasmalai very much. ThAll the steps to prepare perfect rasmalai are clearly explained.
Hii just wanted to share my experience when boiling the rasmalai balls in sugar water they do puff up but after removing them from the water n pitting them in milk they start flattening means the puffed up balls shrink.what could be the reason pls help
try cooking them in a larger pot, they need more space
I have only ever tried this recipe for Ras Malai and it turned out well from the start! The detailed notes were the reason I actually tried even making Ras Malai for the FIRST time 😉 I am overdue writing this 5-star review because after making it 3-4 times, I must say it only gets better with time – amazing in fact (and my family thanks you)! This is mostly because it is a great recipe and is explained so meticulously. Kudos!
Thank you Hovaida, so glad to know you love the recipe 🙂
Hey you explain really well in the article. I’m trying your Soft Rasmalai recipe and some of my parties and our guest will really appreciate for this. Just because of your recipe so thanks a lot for this.
Please make a YouTube video covering all points…because it’s confusing at some points. Please mention the link also.