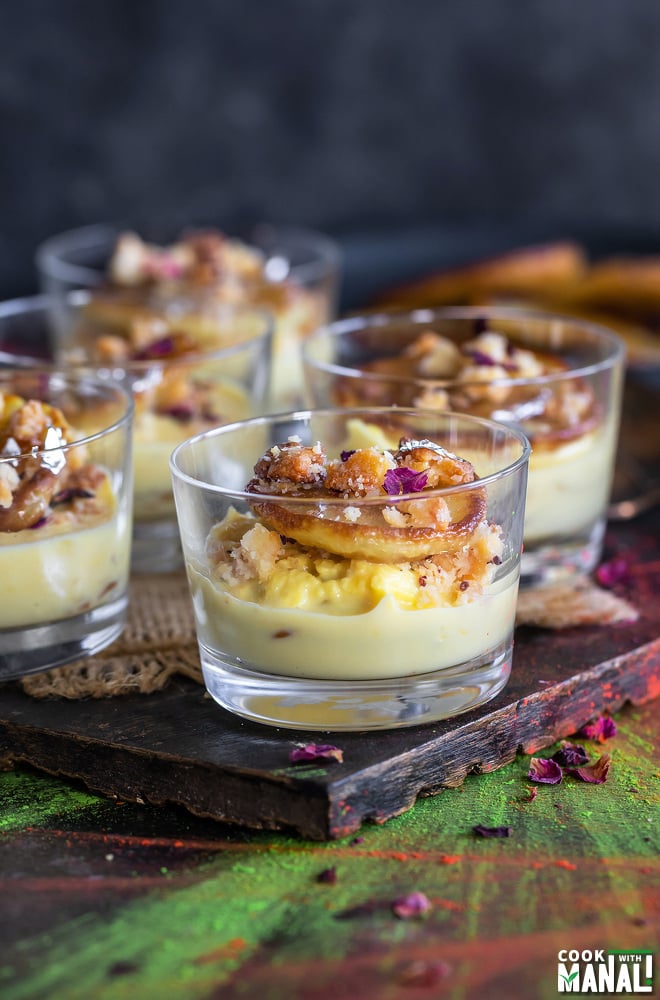
Malpua Rabdi Bites with Gujiya Crumble, a fun fusion dessert which combines 2 of my favorite Holi desserts- malpua and gujiya!
Soft malpua, creamy rabdi and topped with a crumble made of khoya and nuts (which tastes just like Gujiya filling). Serve these in short glasses and they make the perfect dessert for your Holi party.
Indian festivals give me the chance to create fusion desserts. Honestly, they are my favorite.
Over the years, I have shared so many Indian fusion dessert recipe with you guys on the blog and I cannot seem to stop.
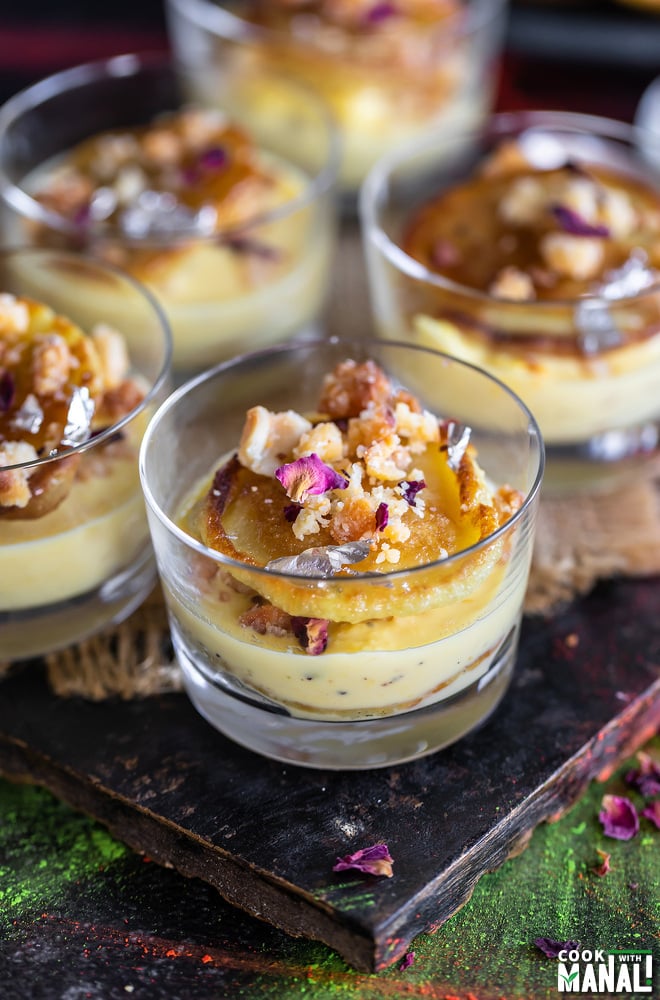
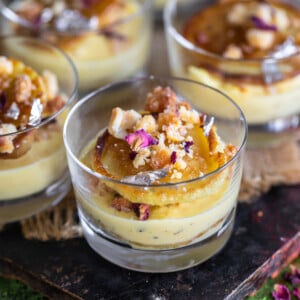
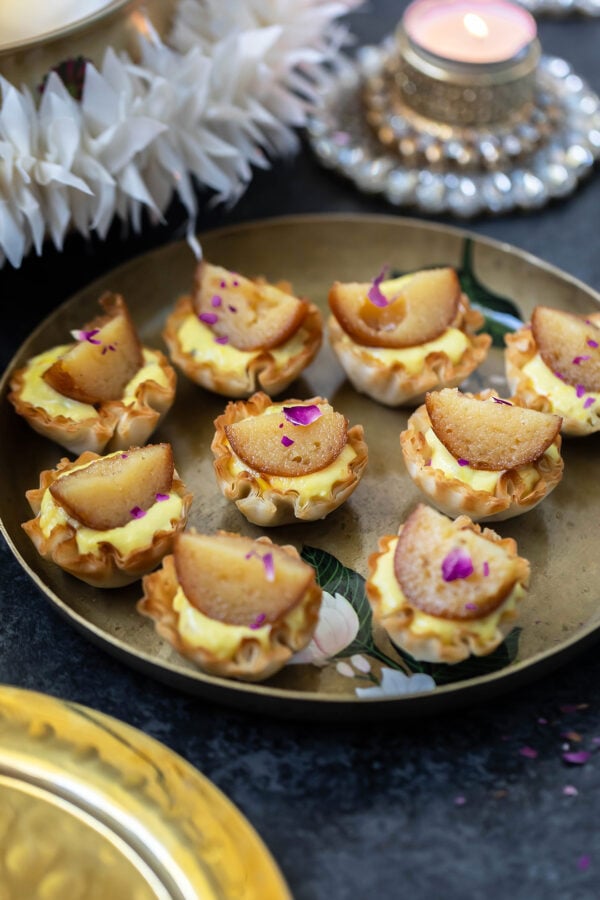
For Holi this year, I made these Malpua Rabdi Bites and then topped them with a crumble made of khoya (so it tastes exactly like gujiya) and served them in these short glasses.
Don’t they look pretty? Desserts in jars are always so appealing to the eyes and also so much easier to serve, especially if you are making these for a party.
And not to forget, these are small jars so the portion size is also perfect. Everyone can enjoy a jar, satisfy their sweet tooth without going overboard with it.
This dessert is easy to assemble once you have all the components ready for it. With some planning and prep work, these jars can be easily made for your Holi party!
These Malpua Rabdi Bites
✔are a fun dessert to make for Holi!
✔a new way to enjoy the malpua and rabdi.
✔great to serve at parties.
✔combines the flavor of the favorite Holi sweets- malpua, rabdi and gujiya.
This recipe has three parts to it- the malpua, rabdi and the gujiya crumble.
Malpua: this is like a pancake (egg-free) which is popular in India and made with flour and often flavored with cardamom, fennel.
Malpua is made in different ways in different parts of the country. My mom would make it for breakfast every Holi and she would not dunk it in a sugar syrup. We would eat it with red chili pickle (achar).
I have relatives from Bihar who add mashed banana and coconut to their pua and it turns out so soft. Some people make it thick and fluffy, some make it thin with crisp edges.
So, there’s no right or wrong way, just depends on how it’s made in the region where you are from.
For this recipe, I made mini malpuas since we were making them bite-size. The process to make the batter remains same, the only difference is that you pour only a little amount of batter onto the pan and make small malpuas.
You can also use small round cookie cutter and then pour the batter inside it to get the perfect round shape.
If you don’t want to make malpua from scratch, then look out for malpua mix in Indian stores. That will cut down on the prep time.
Rabdi: the second key component of this recipe is rabdi, I recently shared the recipe for rabdi, so you can either follow that and make rabdi from scratch.
Or you can also get those rabdi mix packets and make rabdi from that or you can also make quick rabdi using ricotta cheese.
Whatever works for you, use that method and have the rabdi ready to go before assembling this dessert.
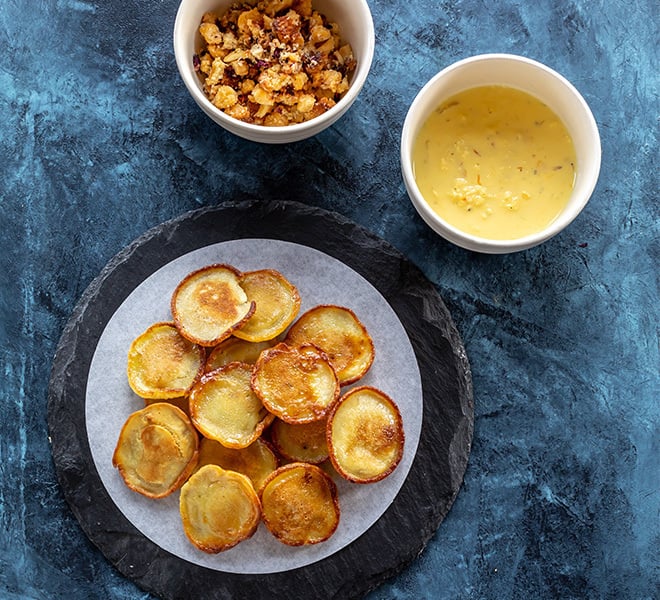
Gujiya crumble: this is a super simple topping made with khoya, sugar and nuts. Everything is mixed with ghee and then baked in the oven until it turns golden brown.
It tastes exactly like the inside of the gujiya!
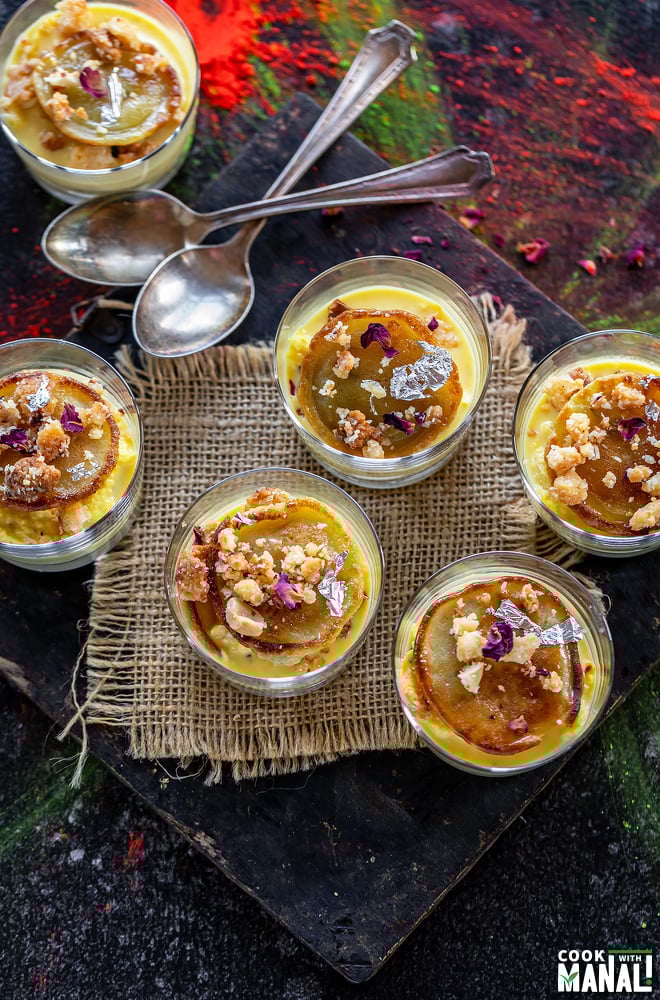
Once you have these 3 components ready to go, you only have to assemble the jars. And I do that in this order-
1- layer of malpua
2- followed by rabdi layer
3-topped with some gujiya crumble
4- another malpua on top
5-and final topping of crumble
I like having 2 layers of malpua so that you get a mouthful of it when you dig into the dessert.
Also the layer of malpua at the bottom gives the dessert a solid base which I like rather than just having rabdi at the bottom.
I have used 4 oz short glasses for this dessert from Crate & Barrel.
Making Ahead
I would suggest making the rabdi and crumble in advance.
These can easily be made 2 days ahead and refrigerated. You can warm up the crumble in the oven before layering in in jars. I would suggest making the malpua on the day you plan to serve them.
In fact you can even make crumble the same day since it doesn’t need any monitoring or prep work but definitely make the rabdi in advance.
I made these jars and had some immediately and refrigerated some for the next day. The malpua soaks up the rabdi and so rabdi becomes quite thick when refeirrerated overnight. I definitely preferred the version which I assembled and served immediately.
So, I would say that have all the components ready and then just assemble the jars few hours before your party.
But the overnight refrigerated version works too. If you are keeping this overnight, then make sure to have rabdi on the thinner side as the malpua soaks the rabdi.
I am all for desserts that look super fancy, so why not give the humble malpua and rabdi an upgrade this Holi and try these malpua rabdi bites? I am sure you and your guests will love these!
Method
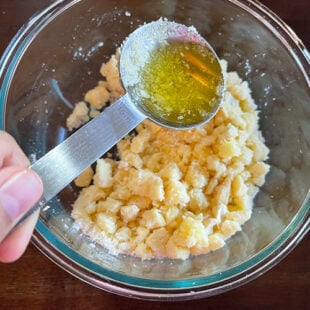
1- To a bowl add crumbled khoya, chopped cashews, desiccated coconut powder and sugar. Mix it well.
2- Then add melted ghee to it and mix.
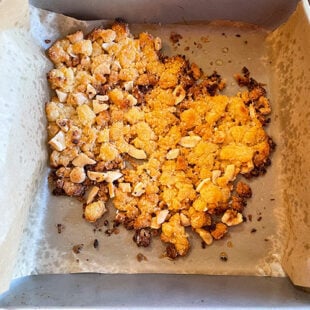
3- Transfer mixture to a baking pan lined with parchment paper.
4- Bake at 400 F degrees for 10 to 12 minutes until the crumble turns golden brown.
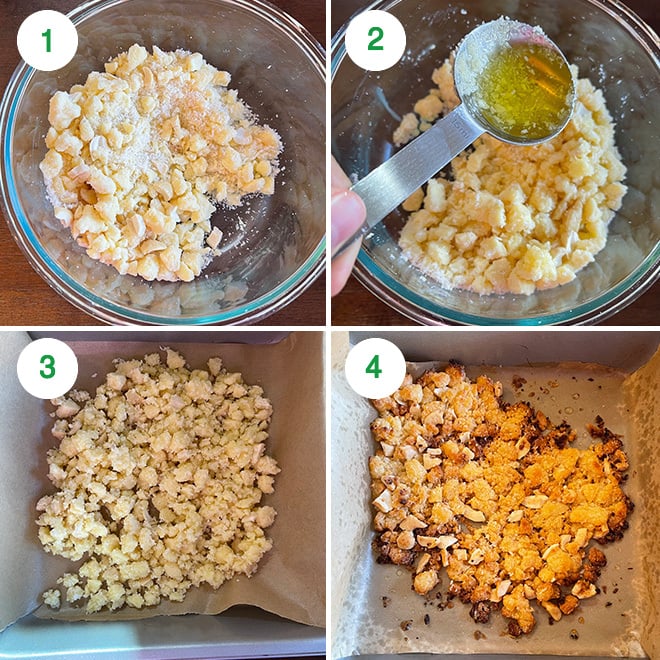
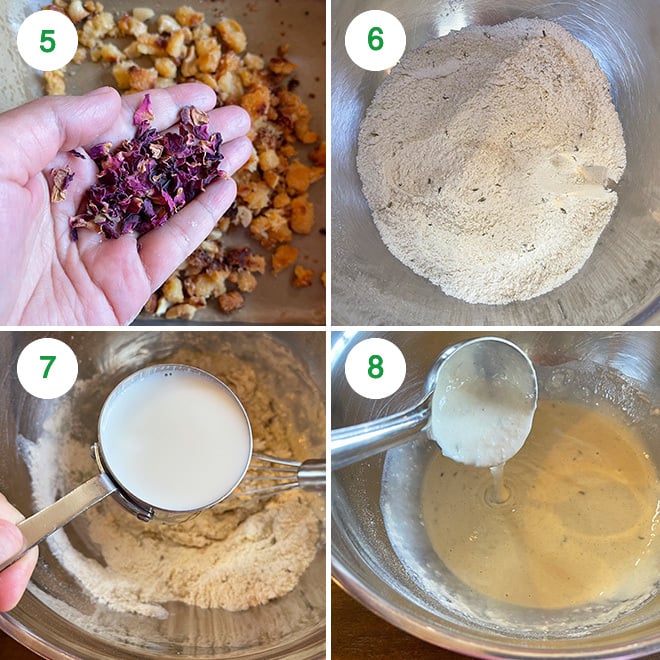
5- Let the crumble cool down a little and then add dried rose petals to it and mix. Set this aside.
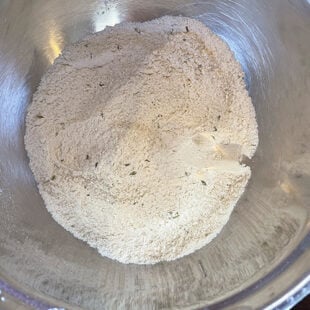
6- Now, start working on the malpua batter. To a large bowl add flour, milk powder, desiccated coconut, cardamom powder, crushed fennel seeds, baking soda, pinch of salt and sugar. Mix it altogether using a wire whisk.
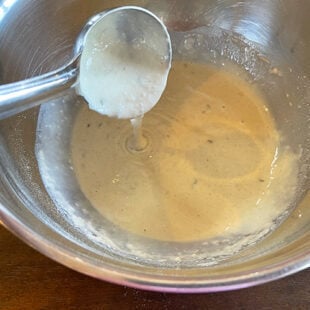
7- Now, start adding warm milk to the bowl slowly and mix to a form a smooth batter.
8- The batter should be of pouring consistency, neither too thick nor thin. Let this rest for 10 minutes while you make the sugar syrup.
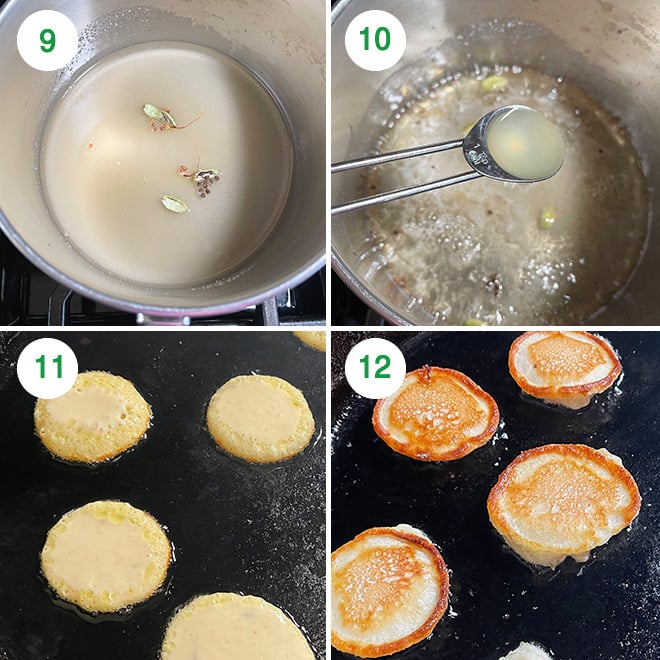
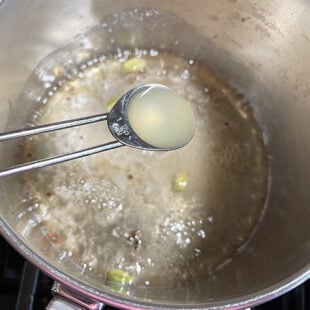
9- To make the sugar syrup, add sugar and water to a pan on medium heat. Add green 2 green cardamom pods and few saffron strands.
10- Let the sugar melt and then boil the syrup until it becomes sticky for around 2 to 3 minutes only (not looking for any string consistency here). Add lemon juice (helps in preventing crystallization of sugar syrup), stir and turn off heat.
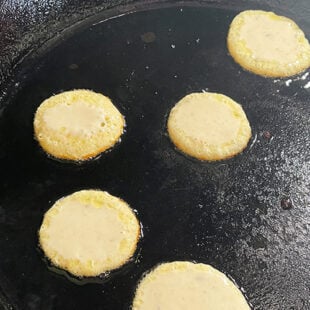
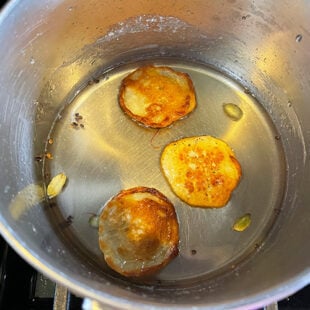
11- To fry the malpua, heat ghee in a pan/skillet on medium heat and let it melt. Once ghee is hot, add a tablespoon of batter into the hot ghee to make mini malpua. You can also use a round cookie cutter and drop the batter with in to make even round shapes.
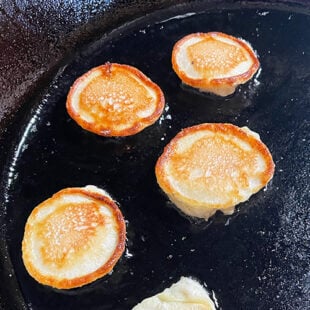
12- Fry for a minute until it turns golden brown, then flip and cook the other side as well, another 1-2 minutes until that turns golden brown as well.
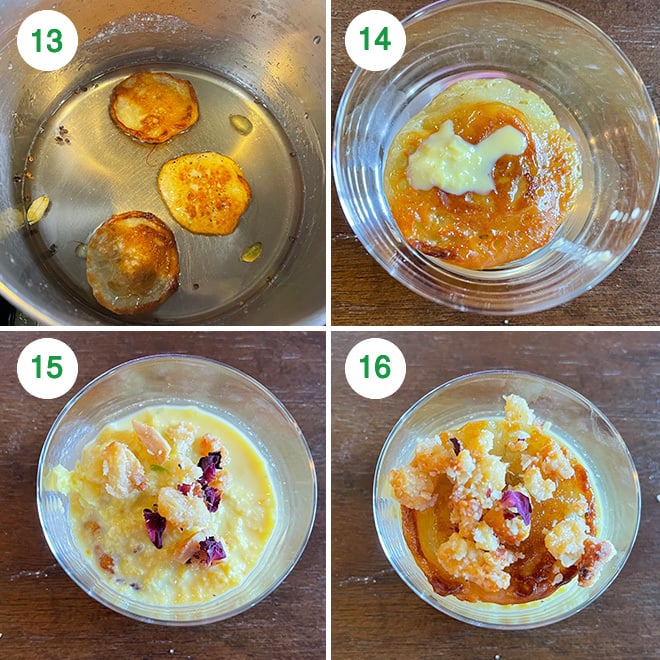
13- Transfer fried malpua in the warm sugar syrup. Soak each side for 30 seconds and then remove on plate lined with parchment paper.
Remember the sugar syrup must be warm when you add the malpua to it so you can turn the heat to lowest setting for a minute before adding the malpua to it if it has become cold. Fry and dip all the malpua in the sugar syrup similarly until all the batter is finished.
I got around 30 mini malpua from this batter.
14- To assemble the jars, place one mini malpua at the bottom of the glass.
15&16- Top with 1 to 2 tablespoons of prepared rabdi, followed by 1/2 to 1 teaspoon of the crumble. Then place another mini malpua on top and top with more gujiya crumble.
Decorate with edible silver leaves (chandi ka vark) is desired. You can serve these Malpua Rabdi Bites immediately at room temperature.
If you’ve tried this Malpua Rabdi Bites Recipe then don’t forget to rate the recipe! You can also follow me on Facebook and Instagram to see what’s latest in my kitchen!
Malpua Rabdi Bites with Gujiya Crumble
Ingredients
Gujiya Crumble
- 100 grams khoya, also known as mawa (dried milk solids), around 1 cup crumbled khoya
- 1 tablespoon chopped cashews
- 1.5 tablespoons desiccated coconut powder, unsweetened
- 1.5 tablespoons granulated white sugar
- 1.5 tablespoons ghee
- 1/2 tablespoon dried rose petals
Mini Malpua
- 1 cup all purpose flour, 130 grams
- 1/4 cup milk powder, 25 grams, I recommend Nestle NIDO brand
- 2 tablespoons desiccated coconut powder, unsweetened, 12 grams
- 1/2 teaspoon cardamom powder
- 1 teaspoon fennel seeds, slightly crushed
- 1/8 teaspoon baking soda
- pinch salt
- 1 tablespoon sugar
- 1 cup milk, warm, 240 ml + 1-2 tablespoons as needed
- 3-4 tablespoons ghee, for frying the malpua
Sugar syrup for malpua
- 1/2 cup granulated white sugar, 100 grams
- 1/4 cup water, 2 oz/60 ml
- 2 green cardamom
- few saffron strands
- 1 teaspoon lemon juice
2 cups rabdi
edible silver leaves (chandi ka vark), to decorate, optional
Instructions
- To a bowl add crumbled khoya, chopped cashews, desiccated coconut powder and sugar. Mix it well. Then add melted ghee to it and mix.

- Transfer mixture to a baking pan lined with parchment paper. Bake at 400 F degrees for 10 to 12 minutes until crumble turns golden brown. Let the crumble cool down a little and then add dried rose petals to it and mix. Set this aside.
- Now, start working on the malpua batter. To a large bowl add flour, milk powder, desiccated coconut, cardamom powder, crushed fennel seeds, baking soda, pinch of salt and sugar. Mix it altogether using a wire whisk.
- Now, start adding warm milk to the bowl slowly and mix to a form a smooth batter.The batter should be of pouring consistency, neither too thick nor thin. Let this rest for 10 minutes while you make the sugar syrup.
- To make the sugar syrup, add sugar and water to a pan on medium heat. Add green 2 green cardamom pods and few saffron strands. Let the sugar melt and then boil the syrup until it becomes sticky for around 2 to 3 minutes only (not looking for any string consistency here). Add lemon juice (helps in preventing crystallization of sugar syrup), stir and turn off heat.
- To fry the malpua, heat ghee in a pan/skillet on medium heat and let it melt. Once ghee is hot, add a tablespoon of batter into the hot ghee to make mini malpua. You can also use a round cookie cutter and drop the batter with in it to make even round shapes.
- Fry for a minute until it turns golden brown, then flip and cook the other side as well, another 1-2 minutes until that side turns golden brown as well.
- Transfer fried malpua in the warm sugar syrup. Soak each side for 30 seconds and then remove on plate lined with parchment paper.Remember the sugar syrup must be warm when you add the malpua to it so you can turn the heat to lowest setting for a minute before adding the malpua to it if it has become cold. Fry and dip all the malpua in the sugar syrup similarly until all the batter is finished.I got around 30 mini malpua from this batter.
- To assemble the jars, place one mini malpua at the bottom of the glass. Top with 1 to 2 tablespoons of prepared rabdi, followed by 1/2 to 1 teaspoon of the crumble. Then place another mini malpua on top and top with more gujiya crumble. You can decorate with edible silver (chandi ka vark) leaves on top. Serve these Malpua Rabdi Bites immediately at room temperature.

Notes
- I have used 4 oz glasses to serve this dessert and with this size glass it will make around 13 to 15 servings. If you use a bigger glass, the serving size will be less.
- Please read the tips in the post if you want to make this in advance for a party. Definitely have rabdi ready on hand before you start assembling this dessert.
Nutrition
Nutrition information is automatically calculated, so should only be used as an approximation.
 Your feedback is valuable!Please share your comments, ratings, and any suggestions or adaptations below to help us improve and make our recipes more successful.


Hi Manali
Instead of assembling into the shot glasses if I want to assemble in one big dish is it possible
Thanks
yes sure why not, it will just be a little bit messier to serve.
Hi Manali, this seems to be really great recipe. Can i assemble them in advance and keep it in refrigerator or do i need to serve as soon as its assembled?
the rabdi might become too thick that’s my only concern if you keep it in the fridge for a long
Such a lovely fusion. Can I make malpuas in advance as well?
you can, warm them up in microwave
Hi Manali. Nice recipe. I will definitely going to make on holi. But I don’t have oven. So how I bake khoya crumble. Can you suggest an alternative. Thanks
toast in a pan in stead of baking, should work! or you can bake in kadai like people bake cakes in kadai.