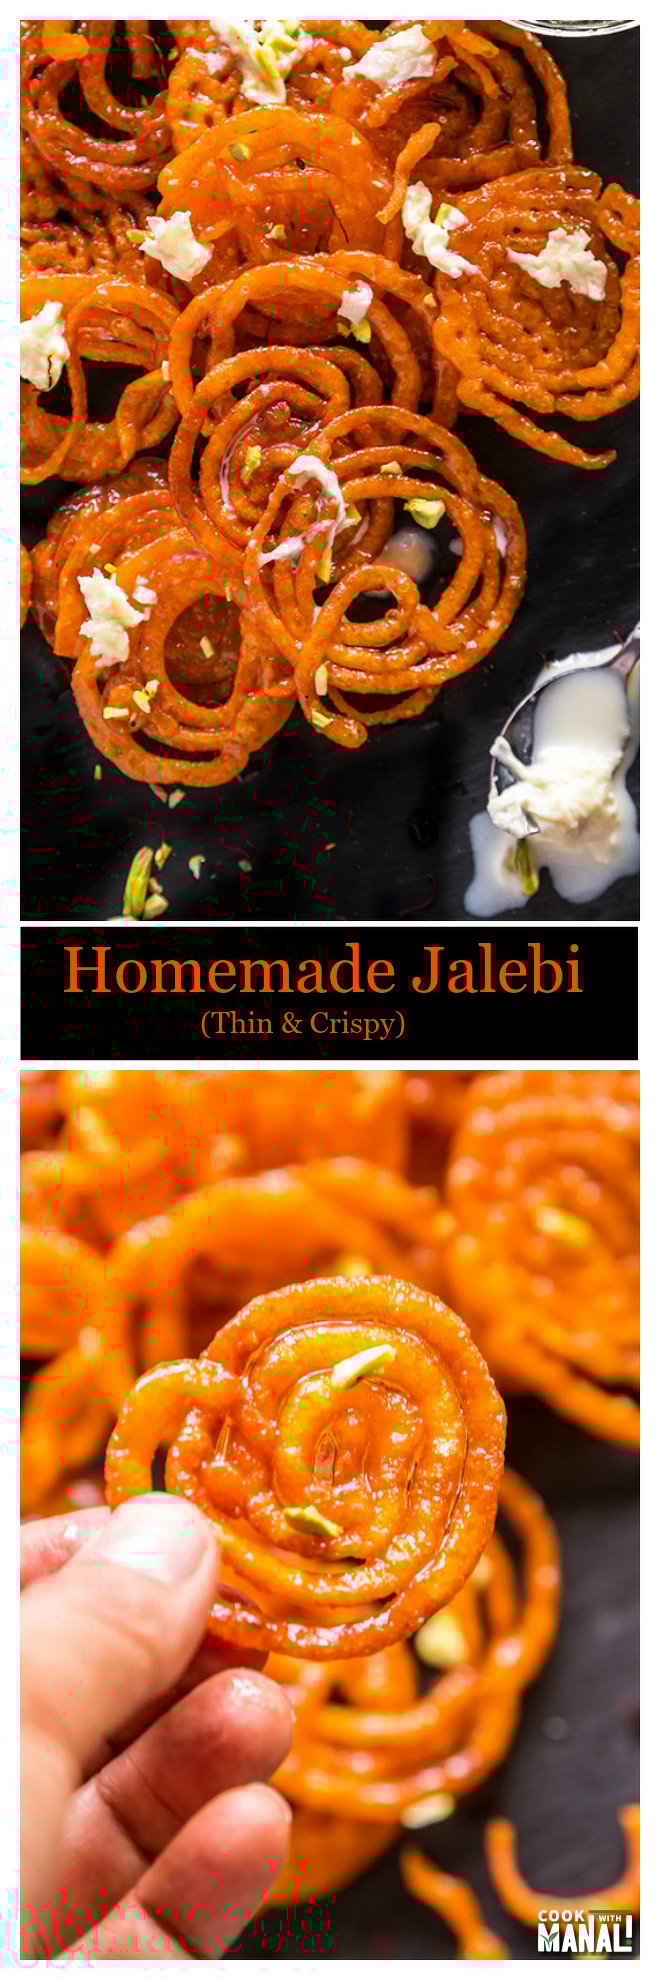
Crispy Homemade Jalebi
Oct 23, 2016, Updated Jan 02, 2018
Crispy Homemade Jalebi - Traditional spiral shaped Indian sweet made with flour and dipped in sugar syrup for a special treat!
This post may contain affiliate links. Please read our disclosure policy.
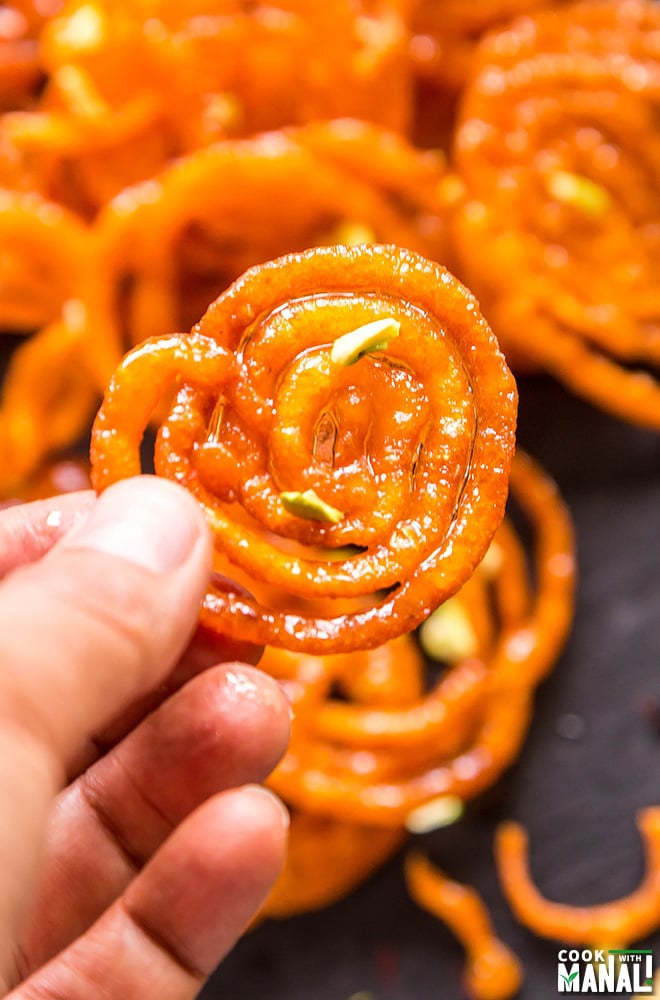
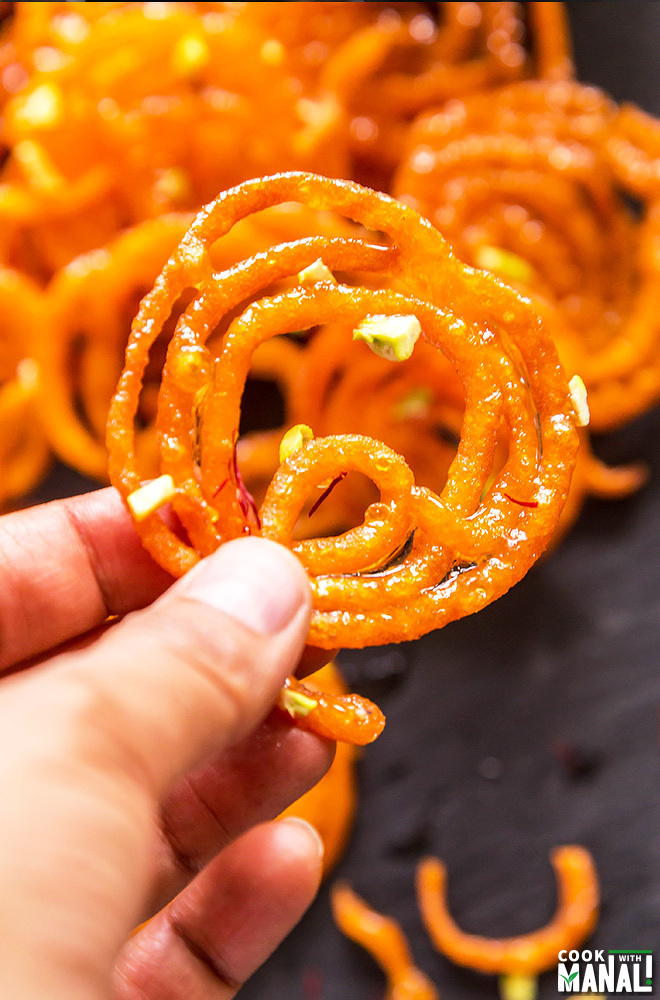
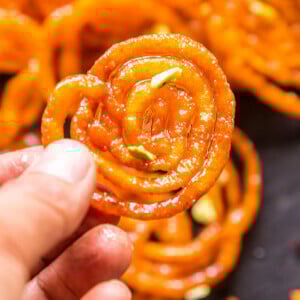
Thin & Crispy Homemade Jalebi made the traditional way. These will stay crispy for hours and are best enjoyed with rabri or milk!
Some sweets bring back so many memories. Jalebi is really right up there as far as my food memories are concerned. When I was little, our everyday Sunday breakfast was fixed – jalebi with milk or rabri. My dad loves thin and crispy jalebi and there was this little sweet shop in the little town that we lived then and every Sunday dad would go there at 8 am in the morning and bring back hot and delicious jalebis for all of us. Those were the best jalebis I have ever had.
Jalebi still remains a very popular breakfast dish in North India. It’s funny because jalebi is a sweet but people so often eat it as a special breakfast on weekends or on festivals. I mean of course it’s a sweet so it’s eaten as a dessert but a lot of time people also relish it for breakfast. Also jalebi reminds of this advertisement which used to air back in the 90s in India (and I am sure every kid of that era must have seen this advertisement for a vegetable oil company) where a little kids gets angry with his parents and leaves the house but he returns back once his grandfather mentions that his mom made jalebi for breakfast! See the effect of homemade jalebi! It’s an adorable ad by the way!
With Diwali being just few days away, I wanted to share traditional homemade jalebi recipe with you guys. This recipe makes thin and crispy jalebis, just the way my dad likes it (and me too!). Jalebi can be made in a number of ways, the instant version is quite popular in which there’s no fermentation required. But if you ask me, there’s nothing like jalebi made the traditional way. The fermentation gives jablebis that little sourness, which is so characteristic of this Indian sweet. I have made instant jalebis before and the traditional ones are my clear favorite!
Jalebi is a spiral shaped traditional Indian sweet made with flour basically mixed with little chickpea flour and yogurt (even though adding yogurt is not absolutely essential). The batter is fermented and then deep fried and dipped in sugar syrup. People often get confused between two Indian sweets – jalebi and imarti. They look somewhat similar but in reality quite different. Imarti is made from lentils and is less common of the two. Jalebi is like everywhere! Like I said before, this recipe makes thin and crispy jalebis since that is what I love. For thicker jalebi, use a wider tip – I just used a squeeze bottle with a small tip.
So to make homemade jalebi here’s what you need to keep in mind.
1. Consistency of the batter: It should be flowing consistency but not super thin or thick. If the batter is dispersing in the oil as you pipe it, maybe it’s too thin and you need to add some flour to it. If you are not able to pipe it, add little water but always remember to add 1/2-1 teaspoon at a time and then check and see if you have achieved the desired consistency.
2. Temperature of the oil: when you pipe the jalebi batter, make sure the oil is at low heat. Too high and batter will be all over in oil as you try to make the jalebi shape. So keep temperature low when you pipe the batter in hot oil. Increase the heat once piped and then fry till crisp.
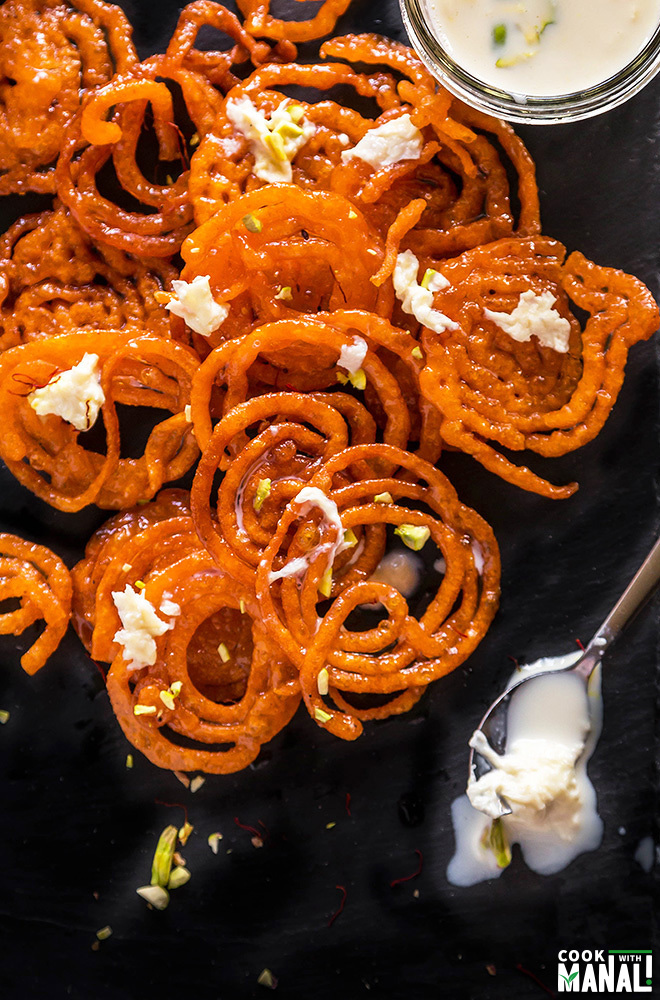
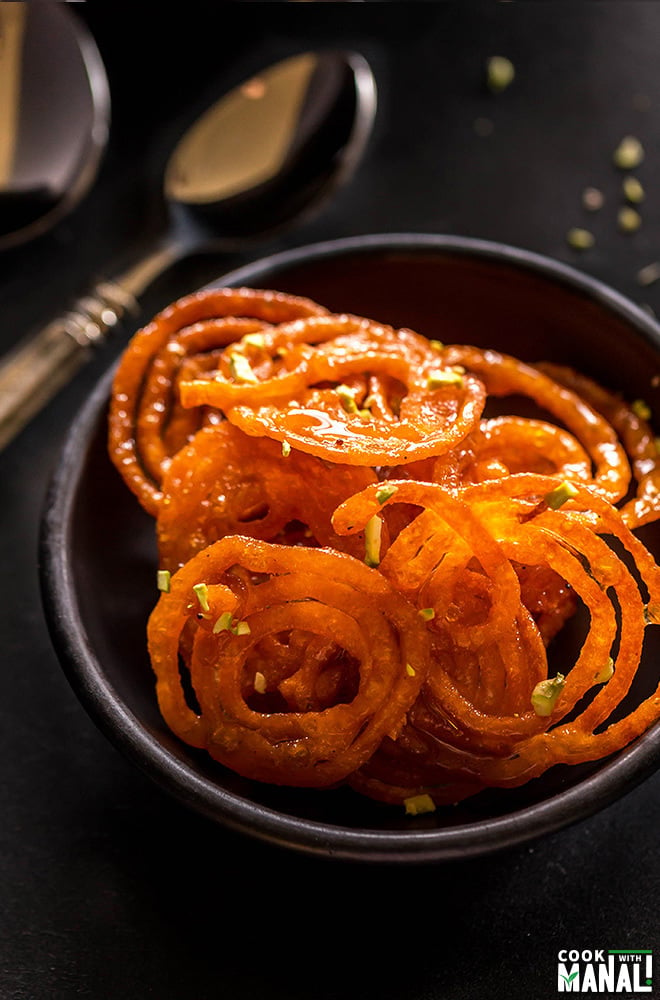
Jalebi is often enjoyed with rabri (which is thickened milk) and the combination is simply amazing! It also tastes great with milk. Hot homemade jalebi with milk for breakfast, yes give me! Hope you guys enjoy this special treat! These jalebis would stay crispy for hours, so you can easily make them in advance.
Method
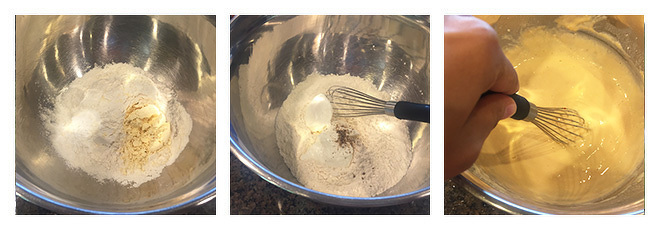
In a large bowl mix together flour (maida), chickpea flour (besan), baking powder and baking soda.
Add yogurt, cardamom powder and mix
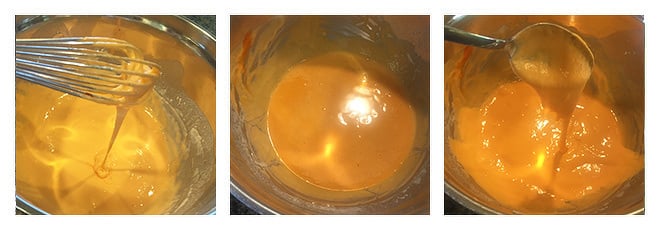
Add food color (if using) and water to form a flowing consistency batter.
The batter should not be too thick or thin. You may need up to 3/4 water depending on quality of maida and besan.
Cover the batter and let the batter sit for 10-12 hours to ferment. Mine took 24 hours because I live in a cold place. You see small bubbles on top of the batter once it has fermented.
In morning, whisk the batter a little. You may need to add little water [around 1 tablespoon] if batter looks too thick at this point.
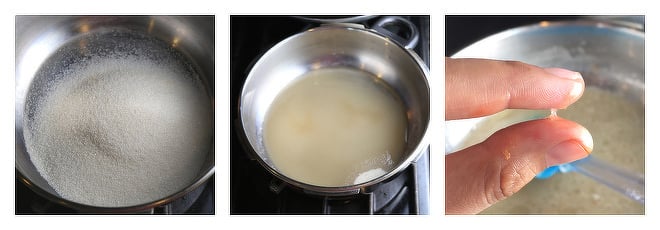
Meanwhile add sugar to a pan.
Add water and mix with sugar and let it all come to a boil. Once it comes to a boil, add cardamom powder, saffron strand and lemon juice.
Let it simmer till syrup becomes sticky and form a one string consistency (see picture below – basically place a drop of syrup in between your thumb and index finger and then when you move fingers away from each other, it should form a single thread). If you can’t get consistency, just make it sticky. Keep the syrup warm while you make the jalebis.
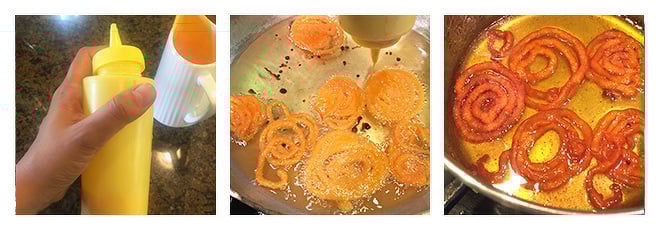
Transfer jalebi batter into a squeeze bottle. The one I used had a very small tip hence the thin jalebis. Meanwhile heat oil or ghee in a pan or kadai. I used a combination of the two. Keep heat to medium-low.
Squeeze batter in hot oil, making spiral motion from inside to outside. Remember to keep at low heat else you won’t be able to form the shape. If the batter is dispersing in the oil, maybe it’s too thin and you need to add some flour to it. Once you have made the spiral shape with the batter, increase the heat to medium-high.
Fry till crisp from both sides. Remove from oil and immediately dip in warm sugar syrup, few seconds on each side is good enough.
Remove jalebis from the sugar syrup and transfer to a serving plate. Enjoy homemade jalebi with milk or rabri. You may garnish with some nuts on top!
* The prep time includes the fermentation time of at least 12 hours or more depending on how cold it is where you live. Like I mentioned before, I kept my batter for fermentation for 24 hours.
Crispy Homemade Jalebi
Ingredients
jalebi
- 1 cup all purpose flour also known as maida
- 1 tablespoon chickpea flour also known as besan
- 1/4 teaspoon cardamom powder
- 1/4 teaspoon baking powder
- pinch of baking soda
- 3 tablespoons yogurt
- orange food color optional
- water as needed - around 1/2 cup + 2-3 tablespoons
- oil or ghee to fry jalebi
sugar syrup
- 1 cup sugar
- 1/2 cup water
- 1/4 teaspoon cardamom powder
- few saffron strands
- 1/2 teaspoon lemon juice
Instructions
- In a large bowl mix together flour (maida), chickpea flour (besan), baking powder and baking soda.
- Add yogurt, cardamom powder and mix
- Add food color (if using) and water to form a flowing consistency batter.
- The batter should not be too thick or thin. You may need up to 3/4 water depending on quality of maida and besan.
- Cover the batter and let the batter sit for 10-12 hours to ferment. Mine took 24 hours because I live in a cold place. You see small bubbles on top of the batter once it has fermented.
- In morning, whisk the batter a little. You may need to add little water [around 1 tablespoon] if batter looks too thick at this point.
- Meanwhile add sugar to a pan. Add water and mix with sugar and let it all come to a boil.
- Once it comes to a boil, add cardamom powder, saffron strand and lemon juice.
- Let it simmer till syrup becomes sticky and form a one string consistency. Basically place a drop of syrup in between your thumb and index finger and then when you move fingers away from each other, it should form a single thread.
- If you can't get consistency, just make it sticky. Keep the syrup warm while you make the jalebis.
- Transfer jalebi batter into a squeeze bottle. The one I used had a very small tip hence the thin jalebis.
- Meanwhile heat oil or ghee in a pan or kadai. I used a combination of the two. Keep heat to medium-low.
- Squeeze batter in hot oil, making spiral motion from inside to outside. Remember to keep at low heat else you won't be able to form the shape. If the batter is dispersing in the oil, maybe it's too thin and you need to add some flour to it. Once you have made the spiral shape with the batter, increase the heat to medium-high.
- Fry till crisp from both sides. Remove from oil and immediately dip in warm sugar syrup, few seconds on each side is good enough.
- Remove jalebis from the sugar syrup and transfer to a serving plate. Enjoy homemade jalebi with milk or rabri. You may garnish with some nuts on top!
Nutrition
Nutrition information is automatically calculated, so should only be used as an approximation.
Homemade Jalebi