How to Make Paneer
May 11, 2019, Updated Jan 16, 2020
Step by step instructions on how to make paneer at home. Making homemade paneer is easier than you think! It tastes so much better than store bought.
This post may contain affiliate links. Please read our disclosure policy.
Step by step instructions on how to make Paneer (Indian Cottage Cheese) at home!
Making paneer at home is easier than you think!
Paneer, the most famous Indian vegetable which actually is not a vegetable yet 5 out of the 10 options on the vegetarian menu in an Indian restaurant will have paneer on it.
If you love Indian food, then I am sure you must be very well aware of paneer. I have a lot of paneer recipes on the blog and be assured that there will be more in the future.
What is Paneer?
Paneer is Indian cottage cheese made by curdling the milk.
You can either curdle the milk with vinegar or lemon juice. You can also use yogurt.
Once the milk is curdled, you collect the cheese in a muslin cloth and then let it set until it’s firm.
And that’s about it! Seriously, it’s that easy to make paneer at home.
Paneer is used in a number of curries in India, the popular ones being palak paneer, kadai paneer, matar paneer.
Why to Make Paneer at Home?
But you do get paneer in stores so why should you bother making it at home?
In India, we go get good paneer from outside. It’s fresh and tasty however it’s totally a different story in the US.
We get paneer here at Indian grocery stores and I do buy it sometimes when I am in a rush or have to cook for a large batch.
But more often that not, I prefer making paneer at home. And you should be doing the same! Because making paneer at home has several advantages.
✓ its fresh and free of preservatives
✓ you can make organic paneer at home using organic milk
✓ not to forget homemade paneer is soft & super delicious
I hope I have convinced you to make paneer at home now!
How to Make Paneer
As I mentioned before, you only need 2 things to make paneer.
✓ Milk: use whole milk to get best results. You can make paneer using 2% milk also but if you want nice paneer cubes, I recommend using whole milk.
✓ Curdling agent: which can either be vinegar or lemon juice or yogurt. I always use vinegar when I want firm block of paneer.
However, if I am curdling the milk to make paneer (chena) to make sweets like rasmalai, then I use lemon juice or yogurt. They give softer paneer which is preferred for desserts.
Tip: If you want creamier paneer, add some heavy cream(around ¼ cup per liter of milk) to the milk while you are boiling it.
The basic process is pretty simple, you boil the milk and then add the curdling agent until the milk begin to separates.
Then use a muslin cloth to drain the water and collect the paneer. You then need to let it set and for that you have to apply pressure on the freshly prepared paneer.
These days you can find paneer press online. But an easy way to do it is to apply pressure using a heavy object.
Few things that you can use- mortar & pestle, heavy books, can of beans, cast iron pan.
I hope you guys find this guide on how to make paneer useful! Let me know if you try it out.
Method
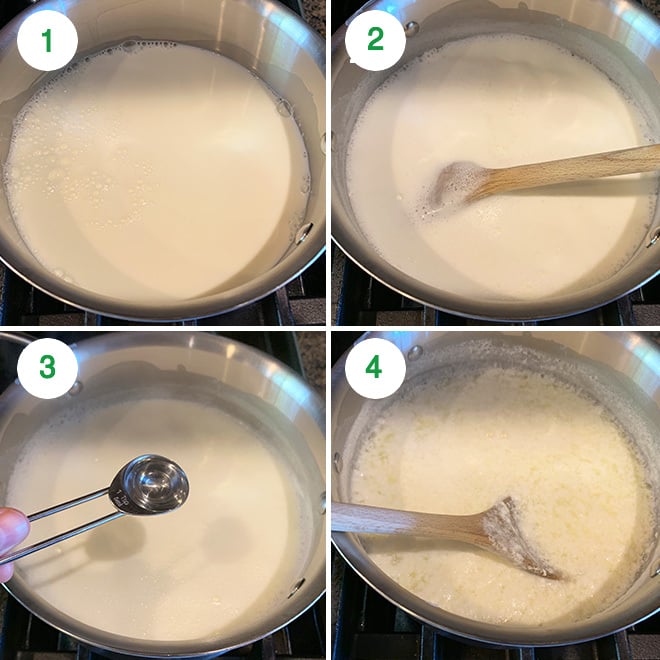
1- Add milk to a heavy bottom pan on medium heat.
2- Let the milk come to a boil, stir often so that it doesn’t stick to the bottom of the pan.
3- Once the milk has come to a boil, turn off the heat and start adding vinegar (or lemon juice), little at a time.
4- At one point, the milk will curdle and you will see the whey separate. At that point, stop adding the curdling agent and wait for 5 minutes so that the milk curdles completely.
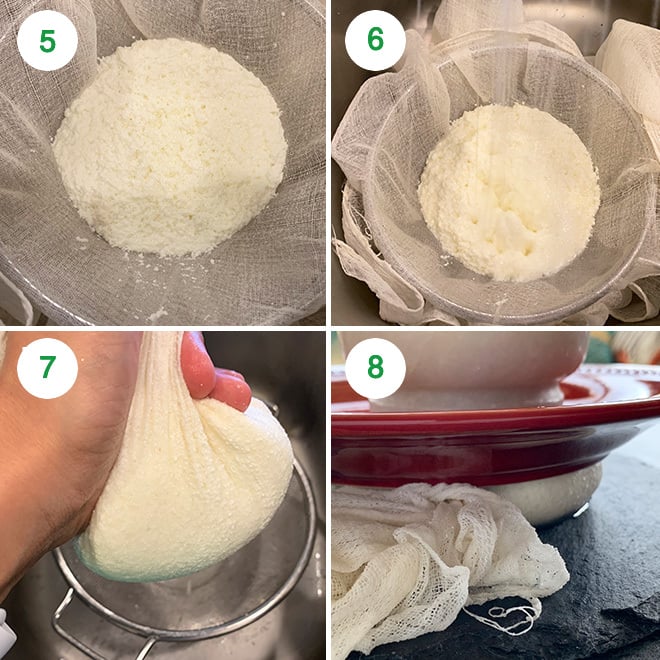
5- Drain the curdled milk into a muslin cloth.
6- Rinse the paneer with cold water so that the final paneer doesn’t have any taste of vinegar.
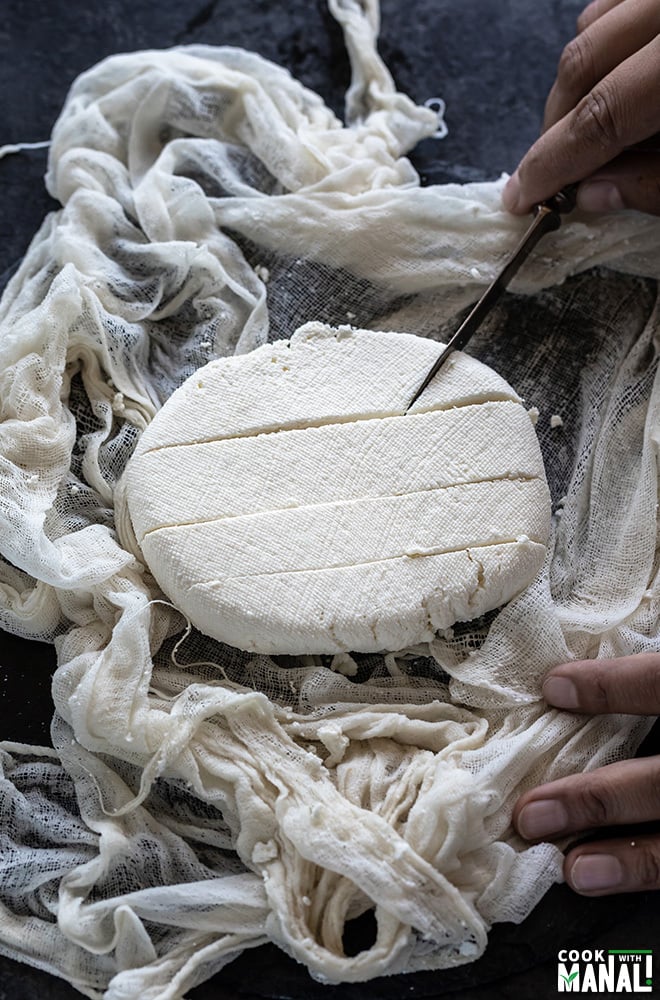
7- Bring the ends of muslin cloth together and squeeze as much water as you can.
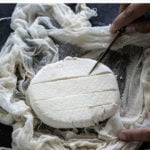
8- Then flatten the paneer (wrapped inside the muslin cloth) and place it on a flat surface. Then place a heavy object on top for it to set.
I placed a plate and then placed mortar & pestle on top. Leave it undisturbed for 1 to 2 hours.
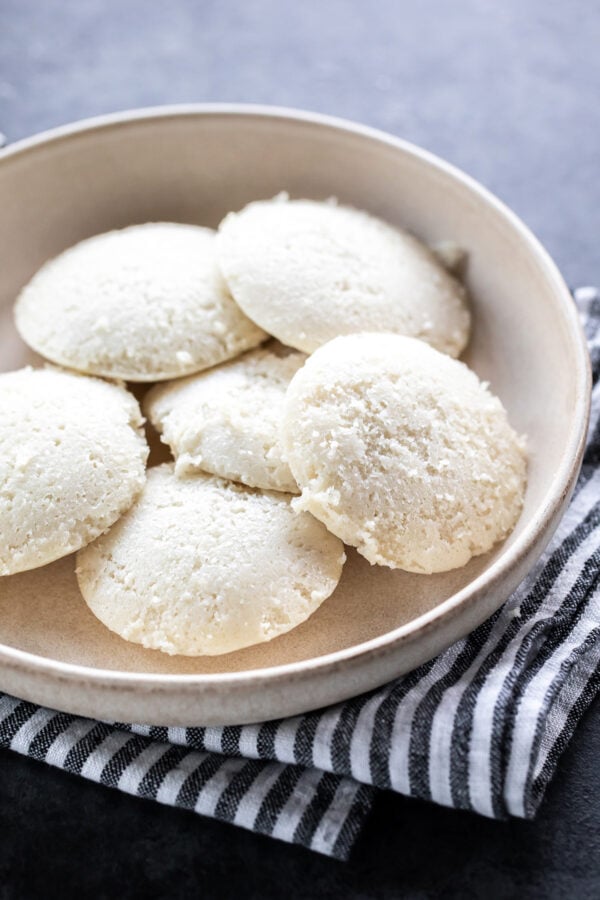
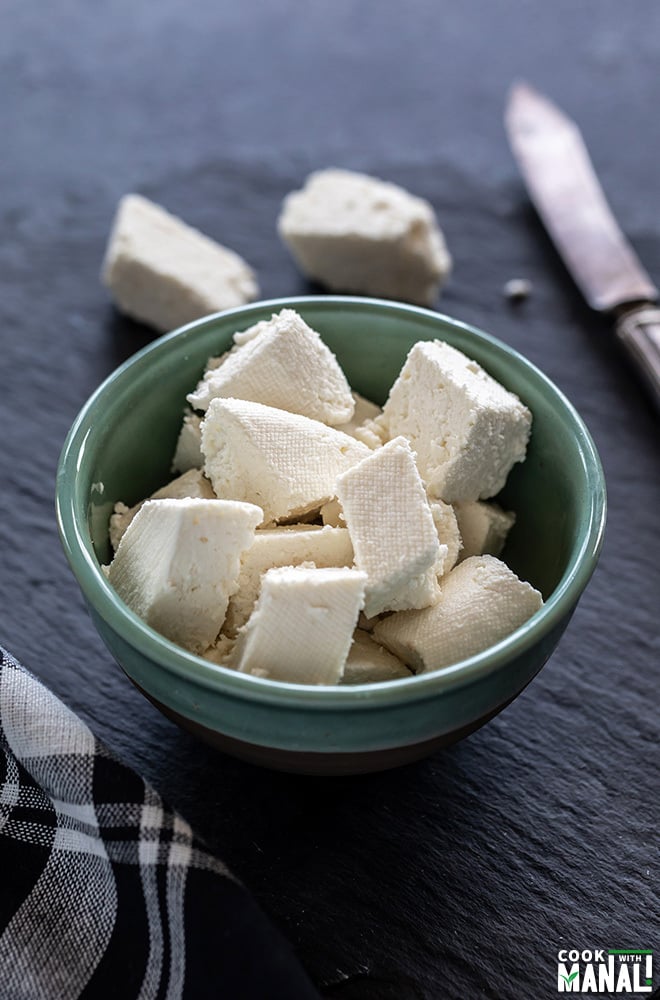
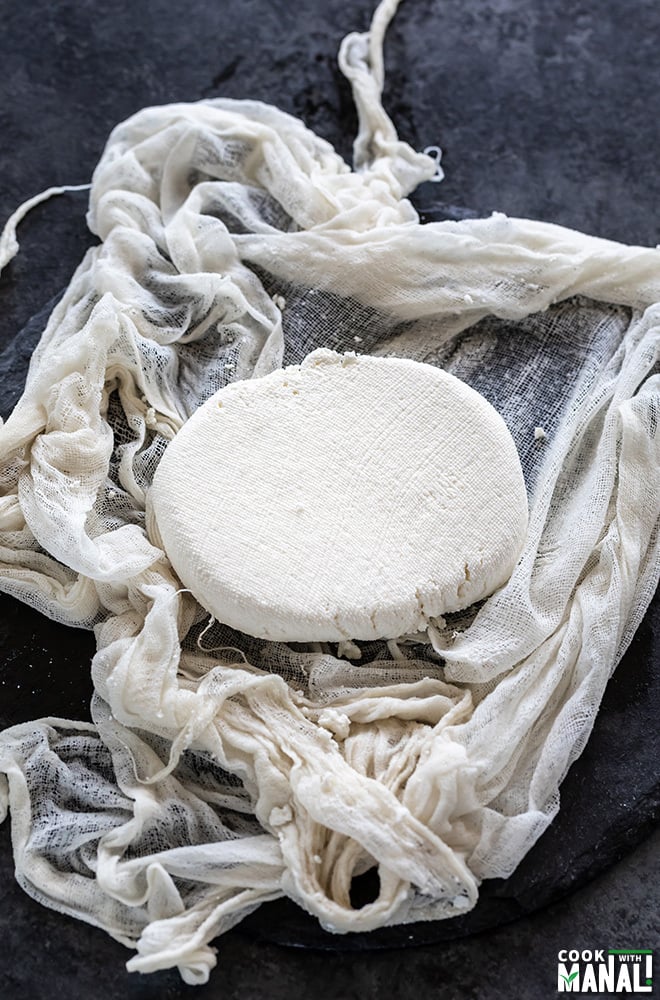
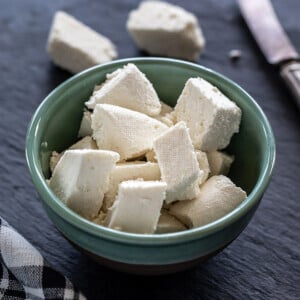
Once the paneer is set, remove it carefully from the muslin cloth and cut into cubes.
Use paneer in any of your favorite recipes like this butter paneer! Yum!
If you’ve tried How to Make Paneer Recipe then don’t forget to rate the recipe! You can also follow me on Facebook, Instagram to see what’s latest in my kitchen!
This post has been updated from the recipe archives, first published in 2013.
How to Make Paneer
Ingredients
- 1 liter whole milk
- 1-1.5 tablespoons white vinegar or lemon juice
Instructions
- Add milk to a heavy bottom pan on medium heat.
- Let the milk come to a boil, stir often so that it doesn’t stick to the bottom of the pan.
- Once the milk has come to a boil, turn off the heat and start adding vinegar (or lemon juice), little at a time.
- At one point, the milk will curdle and you will see the whey separate. At that point, stop adding the curdling agent and wait for 5 minutes so that the milk curdles completely.
- Drain the curdled milk into a muslin cloth. Rinse the paneer with cold water so that the final paneer doesn’t have any taste of vinegar.
- Bring the ends of muslin cloth together and squeeze as much water as you can.
- Then flatten the paneer (wrapped inside the muslin cloth) and place it on a flat surface. Then place a heavy object on top for it to set. I placed a plate and then placed mortar & pestle on top. Leave it undisturbed for 1 to 2 hours.
- Once the paneer is set, remove it carefully from the muslin cloth and cut into cubes. Use paneer in any of your favorite recipes.
Notes
- I prefer using vinegar to curdle the milk as I feel it results in a more solid block of paneer.
- Start by adding only 1 teaspoon of the curdling agent. Add 1 more teaspoon only if the milk doesn’t curdle and add the remaining 1/2 teaspoon only if it still doesn’t curdle.
- For creamier paneer, add 1/4 cup heavy cream to the milk while boiling it.
Nutrition
Nutrition information is automatically calculated, so should only be used as an approximation.