Step by step instructions on how to make Paneer (Indian Cottage Cheese) at home!
Making paneer at home is easier than you think!
Paneer, the most famous Indian vegetable which actually is not a vegetable yet 5 out of the 10 options on the vegetarian menu in an Indian restaurant will have paneer on it.
If you love Indian food, then I am sure you must be very well aware of paneer. I have a lot of paneer recipes on the blog and be assured that there will be more in the future.
What is Paneer?
Paneer is Indian cottage cheese made by curdling the milk.
You can either curdle the milk with vinegar or lemon juice. You can also use yogurt.
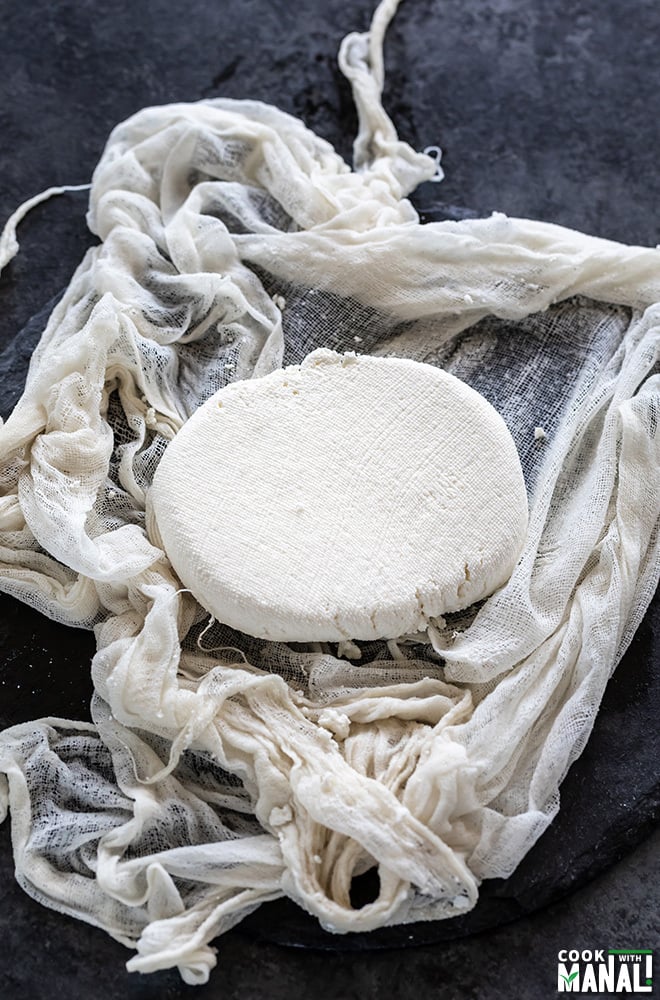
Once the milk is curdled, you collect the cheese in a muslin cloth and then let it set until it’s firm.
And that’s about it! Seriously, it’s that easy to make paneer at home.
Paneer is used in a number of curries in India, the popular ones being palak paneer, kadai paneer, matar paneer.
Why to Make Paneer at Home?
But you do get paneer in stores so why should you bother making it at home?
In India, we go get good paneer from outside. It’s fresh and tasty however it’s totally a different story in the US.
We get paneer here at Indian grocery stores and I do buy it sometimes when I am in a rush or have to cook for a large batch.
But more often that not, I prefer making paneer at home. And you should be doing the same! Because making paneer at home has several advantages.
✓ its fresh and free of preservatives
✓ you can make organic paneer at home using organic milk
✓ not to forget homemade paneer is soft & super delicious
I hope I have convinced you to make paneer at home now!
How to Make Paneer
As I mentioned before, you only need 2 things to make paneer.
✓ Milk: use whole milk to get best results. You can make paneer using 2% milk also but if you want nice paneer cubes, I recommend using whole milk.
✓ Curdling agent: which can either be vinegar or lemon juice or yogurt. I always use vinegar when I want firm block of paneer.
However, if I am curdling the milk to make paneer (chena) to make sweets like rasmalai, then I use lemon juice or yogurt. They give softer paneer which is preferred for desserts.
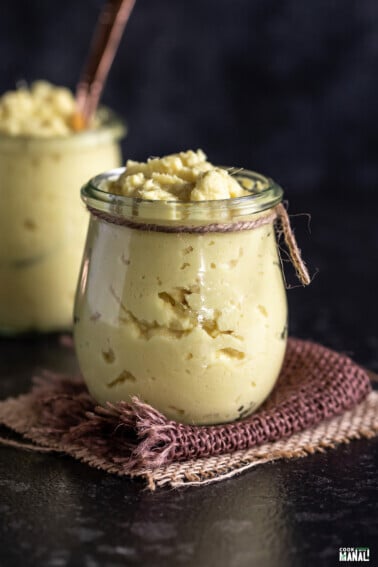
Tip: If you want creamier paneer, add some heavy cream(around ¼ cup per liter of milk) to the milk while you are boiling it.
The basic process is pretty simple, you boil the milk and then add the curdling agent until the milk begin to separates.
Then use a muslin cloth to drain the water and collect the paneer. You then need to let it set and for that you have to apply pressure on the freshly prepared paneer.
These days you can find paneer press online. But an easy way to do it is to apply pressure using a heavy object.
Few things that you can use- mortar & pestle, heavy books, can of beans, cast iron pan.
I hope you guys find this guide on how to make paneer useful! Let me know if you try it out.
Method
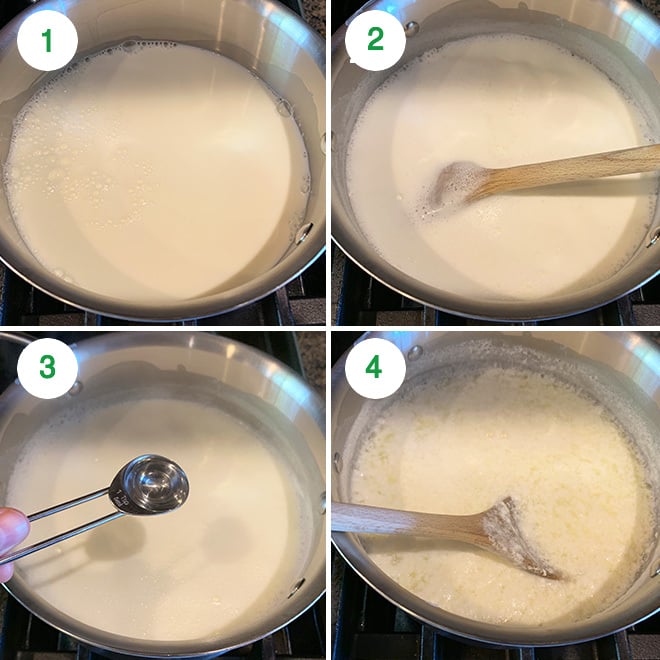
1- Add milk to a heavy bottom pan on medium heat.
2- Let the milk come to a boil, stir often so that it doesn’t stick to the bottom of the pan.
3- Once the milk has come to a boil, turn off the heat and start adding vinegar (or lemon juice), little at a time.
4- At one point, the milk will curdle and you will see the whey separate. At that point, stop adding the curdling agent and wait for 5 minutes so that the milk curdles completely.
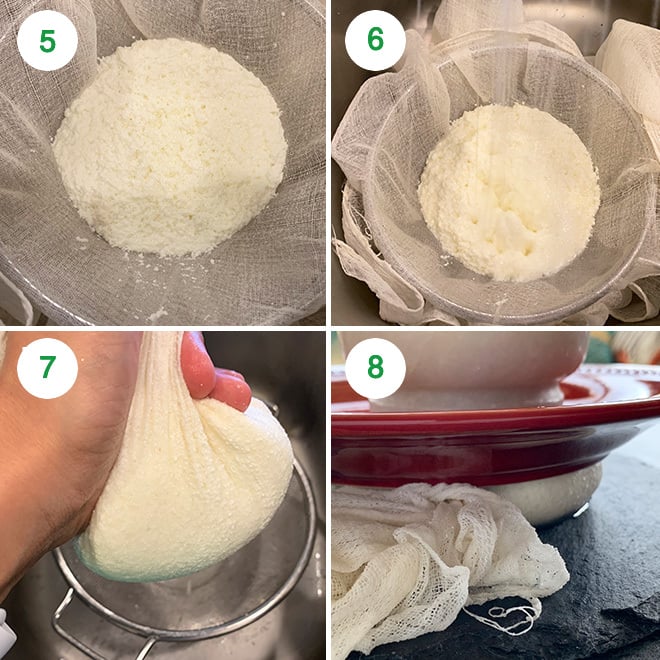
5- Drain the curdled milk into a muslin cloth.
6- Rinse the paneer with cold water so that the final paneer doesn’t have any taste of vinegar.
7- Bring the ends of muslin cloth together and squeeze as much water as you can.
8- Then flatten the paneer (wrapped inside the muslin cloth) and place it on a flat surface. Then place a heavy object on top for it to set.
I placed a plate and then placed mortar & pestle on top. Leave it undisturbed for 1 to 2 hours.
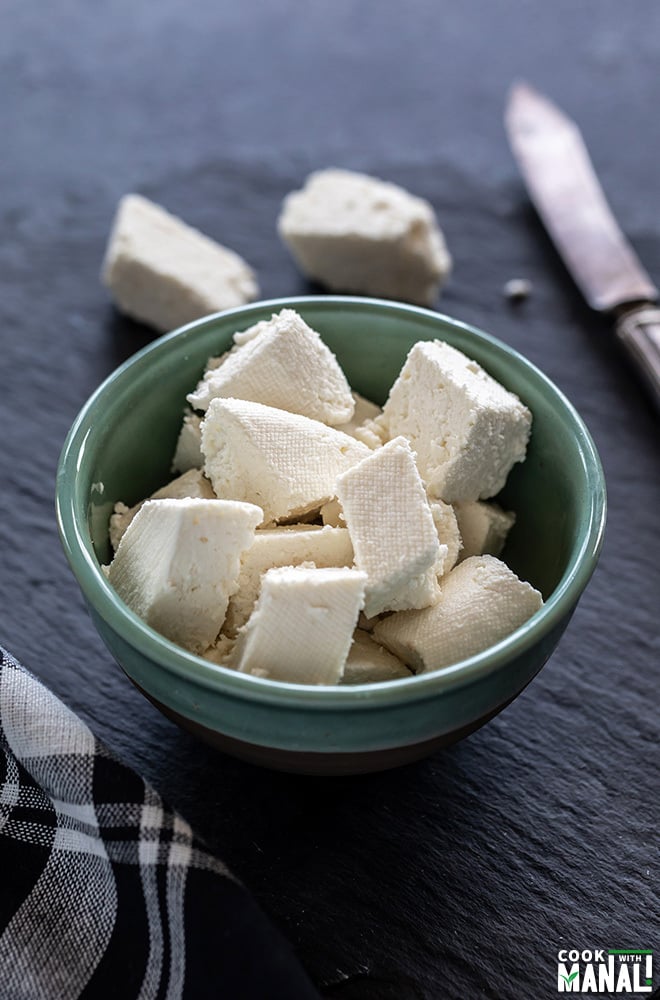
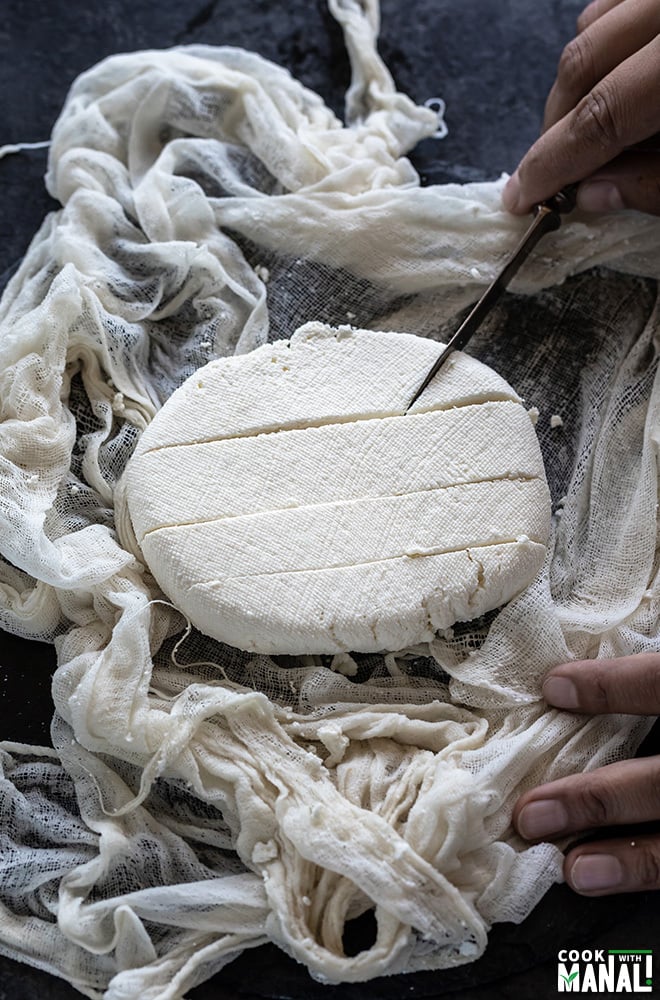
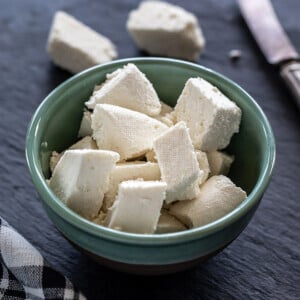
Once the paneer is set, remove it carefully from the muslin cloth and cut into cubes.
Use paneer in any of your favorite recipes like this butter paneer! Yum!
If you’ve tried How to Make Paneer Recipe then don’t forget to rate the recipe! You can also follow me on Facebook, Instagram to see what’s latest in my kitchen!
This post has been updated from the recipe archives, first published in 2013.
How to Make Paneer
Ingredients
- 1 liter whole milk
- 1-1.5 tablespoons white vinegar , or lemon juice
Instructions
- Add milk to a heavy bottom pan on medium heat.
- Let the milk come to a boil, stir often so that it doesn’t stick to the bottom of the pan.
- Once the milk has come to a boil, turn off the heat and start adding vinegar (or lemon juice), little at a time.
- At one point, the milk will curdle and you will see the whey separate. At that point, stop adding the curdling agent and wait for 5 minutes so that the milk curdles completely.
- Drain the curdled milk into a muslin cloth. Rinse the paneer with cold water so that the final paneer doesn’t have any taste of vinegar.
- Bring the ends of muslin cloth together and squeeze as much water as you can.
- Then flatten the paneer (wrapped inside the muslin cloth) and place it on a flat surface. Then place a heavy object on top for it to set. I placed a plate and then placed mortar & pestle on top. Leave it undisturbed for 1 to 2 hours.
- Once the paneer is set, remove it carefully from the muslin cloth and cut into cubes. Use paneer in any of your favorite recipes.
Notes
- I prefer using vinegar to curdle the milk as I feel it results in a more solid block of paneer.
- Start by adding only 1 teaspoon of the curdling agent. Add 1 more teaspoon only if the milk doesn’t curdle and add the remaining 1/2 teaspoon only if it still doesn’t curdle.
- For creamier paneer, add 1/4 cup heavy cream to the milk while boiling it.
Nutrition
Nutrition information is automatically calculated, so should only be used as an approximation.

Hi Manali, I used a gallon of milk plus cream, added lemon until the milk started cuddling, around 1.5 teaspoon and waited 5`10 minutes before transferring to a muslin cloth. While transferring I noticed the bottom part looked like milk and I have hardly any solids. Do you think only part of the milk cuddled? What would have if I just add half a cup lemon juice next time instead of going by teaspoons. Thanks.
every milk is different, sometimes a milk doesn’t curdle by the amount i Mentioned and in that can you keep adding more until you see the solids totally separate. Once you see the why, that’s when you know the milk has curdled completely.
I used Grade A pasteurized whole milk & after 40 minutes on medium heat with occasional stirring it was still not boiling. I moved the temperature from 5 to 5.5 and still the milk did not boil. Should I have gone longer??
Hmm I am not sure why the milk would not boil :O maybe try again because this sounds very strange
Hi Manali! Love all of your recipes! Do you know how many cups/grams of paneer this recipe yields for 2x?
Thank you!
depends on the type of milk. usually from cow’s milk you get around 150-160 grams of paneer
nice sharing with us. thanks for sharing.
I enjoy your recipes so much! I have a small observation to make- I make paneer in the microwave! So much easier than making it on the stove! I rinse out a large Pyrex jug and boil the (whole) milk in it. Usually takes about 8-9 minutes to boil a 1000ml milk in a 1000W microwave. The milk does not boil over. I then add upto 2 tablespoons of lemon juice which curdles the milk. I then drain the curds in a coffee paper lined strainer.
Thanks for sharing your recipe Rita!
Is it best to use raw milk?
yes it will give good results
After a few tries I did it. Love Indian food. So does my family. Great recipes 👍 thank you for sharing
thanks! glad to hear!
Manali!!!! Non so dove ho sbagliato!!!!😞😞😞😞
sorry I don’t understand?
Hi Manali.. I wish to try this, really sounds simple:-) One query – In the last step , can the paneer be placed inside the fridge along with the heavy object above it to set?
sure
Hi,can’t wait to give it a go! How much on average does this recipe make in grams?
around 200 grams
Made and now have it on a plate with a plate on top and a weight training weight on it. It was being a door stop, now a paneer weight; who knew gym weights had so many uses? Instructions were super easy to follow so a pleasant, unstressful, something new experience. I just hope it tastes nice?
I made planner yesterday it came out really good. I will freeze it
Use whole milk and just take your time. I also add 1 T cornstarch to the lukewarm milk…
Ooh why do you add corn starch?
Could you please recommend a non dairy milk I could make this with or would it just not work? I love paneer but as a vegan I would like to try to make my own. Thank you.
Louise, I am not sure if this will work with non-dairy milk, sorry I have never tried. I highly recommend using extra-firm tofu in place of paneer for Indian recipes with paneer.
Ok, thanks. I might try it anyway and I’ll let you know
since paneer is made by separating the milk fats from the whey, it’s doubtful that you’d be able to make it with any sort of milk that doesn’t contain some sort of fat
tofu can be made by coagulating freshly-made (never store-bought — not sure why!) hot soymilk with vinegar or lemon juice, just like paneer. you’ll just be making homemade tofu — which is delicious! — but I should mention that making soymilk is pretty messy, since it foams up massively to 3X its original volume as it nears the boiling point. have to stir it constantly and occasionally scoop out some foam. check out a guide for making tofu with vinegar or lemon juice to see how that’s done. soymilk contains enough fat and protein to do this; peanut milk is another option (since peanuts are closely related to soybeans and are legumes with fat, rather than nuts). other legumes and nuts will not work.
Thank you for sharing your knowledge!
Hi Manali
What is the shelve life of paneer?
it should keep for 2-3 days in fridge,
I have never had luck making paneer. I used whole milk from a chain store grocer, I tried using Costco milk too, it never worked!
I tried lemon juice, vinegar in each attempt.
I am thinking it’s the milk that is in question.
Can anyone recommended a particular brand that I can use to make paneer?
use whole milk! if you can find something from your local farm, even better 🙂
I’ve always had better luck with organic milk when making any sort of cheeses.
The milk cannot be ultra pasteurized. Pasteurized works, raw works, but NOT ultra pasteurized. The milk will be labeled.
Ultra pasteurized gives a much longer shelf life and is becoming the norm. Trader Joe’s carries pasteurized; locally Alpenrose Dairy does not ultra pasteurize.
Hi Manali
Can you guide how to wash and keep cheesecloth for reusing ?
I usually just wash it with dish soap only with warm water in the sink, squeeze all the water, let it air-dry and re-use. You can throw it in the laundry too probably on gentle cycle/delicates but I prefer hand wash
Hi Manali,
This recipe looks exciting! I am planning to make it with the butter paneer for a friend. How long does the paneer keep for? I am wondering if I can make it in advance. Thanks so much!
Anne
homemade fresh paneer is good for less time, I would say max 2 days.
Thanks for the quick reply! 🙂
Hi, I’m working on this paneer…2 litres for this the other 2 litres of the milk for yogurt.
Question. Between the two I have a lot of whey. Out of curiosity, what are you doing with all that whey?
people use it to knead dough for rotis/chapatis so that’s one option
My milk almost takes half cup vinegar..I’ve tried leaving it for sometime after it curdles a bit but it doesn’t help and I almost end up adding more and more vinegar to 2 ltr milk. is there something wrong I’m doing?
hmm maybe it’s just the milk. that’s a whole lot of vinegar for curdling 2 liters of milk. Why not try lemon juice? maybe that works better with the milk you have
Hye manali!! These measurements are just perfect and very much accurate !!
One day i ran out of lemons, then i tried 3 methods –
Making paneer using vinegar
Using citric acid
And finally sour curd
And referred you recipe measurements, it turned out amazing !! thank you so much !!
Hello! Thank you for the recipe! I am going to make a recipe that calls for 8 ounces (approx. 225 grams) of paneer and I was wondering – How much milk do I need to use to yield that much cheese?
try around 2 liters milk
No review yet, but sounds easy. I make ricotta cheese all the time and somewhat similar. Question – can you freeze any leftover?
Hmm I see several reviews, please check the comments. Yes you can freeze paneer
It turned out great! A must try. I did it with vinegar.
Will long life cream or milk work in this recipe? I have fresh milk but only long life cream. Thank you!
I am sorry I don’t know what long life cream is. Paneer is made with regular cow’s milk so that’s all you need for this recipe
Hi
I read your recipe . My mother made the same paneer wid full fat milk like 6% fat. And yours i guess is 3 % . So after paneer is made could u pls tell me the roughly fat content in paneer made from 1 litre 6 % fat milk.
Thanks
I am sorry I don’t know the answer to that
My first time making cheese, and this recipe was so easy to follow and result is wonderful. I would hardly consider this the same food as store bought paneer. No hint of rubberiness here! I will now use it to make matar paneer. I also saved the whey and added to a bean soup I made.
awesome! 🙂
Can I use apple cider vinegar
should be okay, haven’t tried
Hi..i dont have a muslin cloth.. what do i do?
use a colander if you have that
Hi!
Love your recipes. Made paneer tonight with whole milk, cream added, using vinegar to curdle. I’m not totally sure how much vinegar I used because the Notes section referred to adding teaspoons, while the Ingredients section referred to adding tablespoons. In the end I think I did at least 1 tablespoon. I pressed for 2+ hrs with cast iron skillet.
Paneer tastes good but is quite soft. I suspect it will disintegrate when I add it to curry. Do you think I should’ve boiled the milk longer? Or added more vinegar? Is there something to look for to know you’ve achieved the right consistency before straining it?
Thank you!!
tablespoon is correct, the note is only about adding the curdling agent slowly, 1 teaspoon as a time. You added the right amount. Homemade paneer is always softer than what you get in stores since it’s preservative free. But it should not disintegrate . Try adding some heavy cream to the milk next time, that might result in a more firm block of paneer. There’s no right consistency, once the whey separates, that’s when you strain.
So easy! I’m going to make malai kofta and saag paneer. Thank you for the recipe!
How long can you store this paneer ? How do you suggest storing ?
3-4 days, keep submerged in water and change the water every day, keep refrigerated.
Hi Manali
Thanks for this. Been trying to make paneer at home for some time and have achieved the best results thanks to your recipe. I do have a few queries though :).
I made 2 batches. First using vinegar which turned out fine but a bit too firm. The 2nd batch I used lemon to curdle, which was much softer and to my liking but was tangy.
Though I rinsed the paneer made with vinegar before setting it, I didn’t rinse off the paneer made with lemon. So my questions are:
Would rinsing help to remove the tangy flavour if I use lemons?
I had boiled 2 litres of milk and had to squeeze 2 lemons to get it to curdle properly. Is that too much lemon juice?
Would it have helped if I would have stirred the milk after squeezing 1 lemon? Because it started to curdle after 1 lemon but after 5 minutes I realised it had not curdled completely. So does it help to stir when adding the curdling agent (lemon/vinegar/yoghurt) or should one not stir the milk at all at this stage?
Do lemon and yoghurt give the same softness and consistency to the paneer?
Lastly can I use Greek yoghurt to curdle?
Sorry for so many questions ?.
Hope to hear from you.
Thanks
Vikram
1. Yes rinsing would help remove lemon flavor.
2. There’s no thing like too much lemon juice or vinegar, you stop at the point where milk curdles- simple rule.
3. I usually stir as I squeeze the lemon juice/vinegar. It distributes the juice throughout the milk.
4. Lemon and yogurt both result in similar softness. I usually use yogurt when making rasgullas because then you don’t have to rinse the chena.
5. I wouldn’t recommend greek yogurt, it might lead to super soft chena. Maybe use it while making chena for sweets but not when making paneer.
thanks so much for your response .. will keep your points in mind .. next recipe i’m going to try of yours is the punjabi chana .. sounds and looks yum 🙂
Hello Manali, I tried my 1st paneer and it was a failure. I used 1.75L of 3.25% milk with 0.25L of 18% cream. After boiling, I added white vinegar until it curdled. I rinsed it 3 times and pressed it in the refrigerator for 3.5 hours. There was around 10 lbs of weight on top. However when it was cubed and cooked in a curry (like I usually do with store bought paneer), it fell apart into little kernels. Please advise. Thank you.
Hi Ian, looks like the paneer had to be pressed more. First drain it in a cheesecloth and squeeze as much water as you can and then press with a heavy object like a iron skillet. Since you added cream, you should have got a nice firm block. Try again and see! having said that homemade paneer is not as firm as store bought usually since there’s no added preservative but nonetheless it shouldn’t have fell apart into kernels.
Hi Ian , when you press the paneer don’t keep it in refrigerator . Press is at room temperature for an hour . Then take it out of cloth and keep in ice cold water for half an hour. And while making curry don’t stir vigorously.
Hi Manali – I was wondering how to do you usually store your paneer and how long does it keep?
fresh paneer is best kept in a bowl with fresh water. It should be submerged in that water. Keep the bowl refrigerated. Should be okay for 3-4 days. You can change the water everyday to keep it fresh.
Tried making paneer (found on a different site) for mutar paneer (used your recipe). The flavor was very good, thank you for your recipe, but the paneer was too soft; it didn’t hold its shape in the sauce. I made it with lemon juice and pressed it with a plate in the fridge overnight. I’d like to try again. What is the most critical factor to getting firm paneer? Using vinegar? Or pressing with something heavier?
Using a vinegar definitely helps and pressing with a heavy object. Put a cast iron skillet like thing on top of the paneer and use vinegar to curdle the milk.
Just made this tonight and 1.5 tablespoons of vinegar was not enough to separate the milk, it took closer to 4T.
Hi Tanya, it often depends on the type of milk being used. So yes it may vary
Hi! I had a quick question. In both steps 3 and 4, you write that we should turn off the heat. Could you please clarify at what stage I should actually turn it off? Just got an insanely large bag of spinach and I can’t wait to make some palak paneer!
at step 3, let me fix it. Thanks for letting me know.
Never hesitate to make a recipe because you don’t have a specific tool many years I used a linen towel to squeeze veggies whatever nothing like the original press a heavy cast iron pan don’t have that a gallon of water,sorry I get side track love the cheese your recipe easiest , I always salt and use a little cream
Hi Manali,
Love your cooking style and tips. What is the alternative if I do not have a Muslin cloth for making paneer?
Thanks
hmm you could use a colander to drain all the water and then use any cloth and try to set it, muslin or cheese cloth works best though…also you can use a tofu press like this https://www.amazon.com/Mangocore-Maker-Cheese-Pressing-Kitchen/dp/B01HTKIO3I/ref=sr_1_7?keywords=tofu+press&qid=1574134157&sr=8-7
Can you drink that curdled milk if paneer is made from fresh milk ?
Yes, the water which remains after removal of paneer can be consumed. If fact it’s healthy!
Thanks manali for easy recipe wanted to make paneer masala but bcz of not having panner at home i wanted how to make paneer in easy way and faster thanks to you for your recipe. Keep posting more easy ideas that we can get easily at home
you are welcome!
will try to make this recipe at home .very easy method.. Thank you so much dear.
Keep posting more videos .
Hi
The paneer stuck onto the cloth. What could be the problem? Can one use milk that is just going sour?
yes you can use milk that’s going sour to make paneer…not sure why paneer stuck to the cloth…if you use a muslin/cheese cloth that shouldn’t happen
Manali, you are my saving grace! My colleague gave me her recipe for making paneer, but I left the company, and now I’ve lost the recipe. Do you think I can make paneer using skim milk, or does it have to be whole milk?
Hello Karin! Sorry for the late reply, I am on vacation hence the delayed response. You can make paneer from skim milk (I have tried it) but really to get those perfect cubes of paneer, you would need whole milk. The one from skim milk is perfect for scrambled paneer this in this recipe – https://www.cookwithmanali.com/paneer-bhurji/ Hope this helps!
Hi Manali
Thanks for the lovely recipe..
Just wanted to have an idea .. how much paneer can be made with a litre of milk?
Hi Payal! I have mentioned that in the recipe, around 200-225 grams 🙂
Thanks for asking, i didn’t see that in the recipe
Never tried paneer at home…….you really made it so perfectly.Useful clicks.Must bookmark this
recipe.
I want to try to make panner. We love Hindu Food.
Hi Carolina! Please try it n let me know how it turns out !:)