Learn all the tips and tricks to make soft roti at home.
This everyday Indian flatbread was a staple growing up, one that I ate every single day.
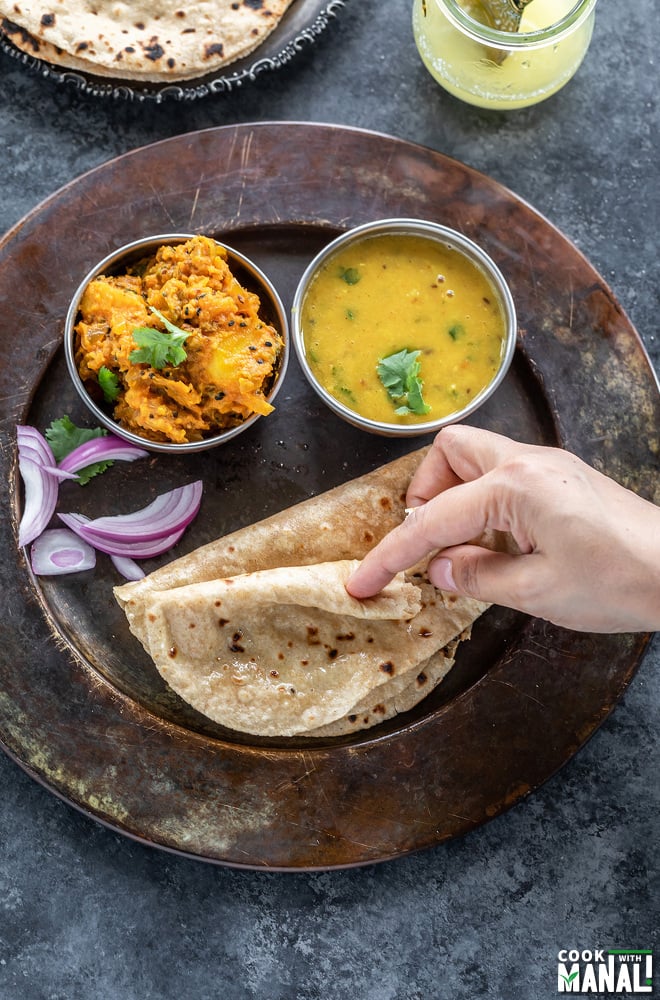
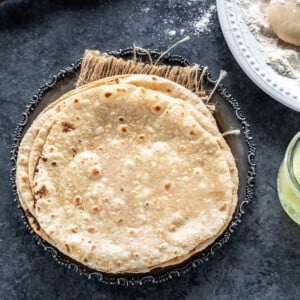
Roti is made of whole wheat flour and nothing else really and is eaten in India with dal and curries.
Roti is an integral part of Indian cuisine, the north Indian cuisine especially.
I was born and raised in north India and grew up eating it everyday of my life.
Roti, dal and rice were always on the table in my house for literally every meal.
It took me several years to learn to how to make a good roti. Trust me, it’s a skill which needs a lot of practice.
I learnt so much cooking but this was something that took time. Now, after making years I am confident enough to make rotis and make them several times every week.
What is Roti?
In simple words, roti is a flatbread made with wholemeal wheat flour. It is known as “atta” in hindi.
Atta is also used to make other breads like paratha and puris in India on a daily basis.
Roti is simplest bread that is made everyday in Indian households. It is made with only 2 ingredients- atta (the wheat flour) and water.
Some people add salt, some add oil but in my house it was always made with these 2 ingredients only.
Like I said, it is the simplest form of bread.
It is known by different names in different parts of the country and sometimes there’s also a difference in the way you cook it.
Roti/Phulka/Chapati/Rotli are more or less the same thing.
They might have some difference in their thickness (like rotli in Gujarat is very thin while my North-Indian version is slightly thicker) and the way they are cooked but more or less they are same.
You need a rolling pin and a rolling board to make this flatbread. We call it chakla (the board) and belan (the rolling pin) in hindi.
Is roti vegan? Yes, if you don’t apply ghee on the roti after it’s cooked, then it is vegan.
My mom never applied any ghee on roti, I guess it’s just not a tradition to have ghee on roti in eastern Uttar Pradesh (where I am from).
On the other hand, Sarvesh never ate roti without ghee! He’s a punjabi and ghee is must on rotis for him.
If you want to keep it vegan, simply skip the ghee or use vegan butter.
Is roti gluten-free? The traditional roti is not gluten-free since it is made of wheat.
How is Roti Cooked
So this will vary in different parts of the country.
At my home, it was first rolled and cooked on tawa until cooked slightly and then put on direct flame until it puffs.
But at a lot of people I know (including my mother-in-law), cook it all on the tawa.
She simply uses a cloth to puff the roti directly on the tawa. Both ways are fine, it’s just what you are used to.
I usually puff it directly on flame since I like the taste better that way or maybe it’s because my tastes buds are just more used to that taste of the bread cooked on direct flame.

Tips to make soft rotis
One of the biggest challenges that I faced when I first started making rotis was that they never turned out soft.
Sometimes, they would be so hard that they could crack like a wafer. Not kidding!
Over the years and hundred of roti later, I can now make good rotis. I tried everything from adding milk to yogurt and what not but eventually realized that you don’t need any of these.
It’s a skill which comes with practice. The more you make it, the better you will get. Each step right from making the dough, kneading it, to rolling the roti is important and has an effect on the final outcome.
I am sharing you some of the things that I have learned in my roti making journey! 🙂
The dough needs to be soft and pliable– now, I know this can get confusing. But you have to knead a soft dough.
If the dough feels too tight- add more water, start by adding 1-2 teaspoons at a time and add more as needed.
If the dough feels too wet/sticky- add more flour.
It should be smooth and when you press the dough with your fingers, it should leave an impression.
Knead with warm water- not a really big deal but it definitely helps if you use warm water to knead the dough.
You can even add some oil to the dough. I don’t do it though but some swear by it.
Knead the dough with the knuckles on your fingers- stretch the dough, knead using the knuckles, then fold and knead again.
Keep doing this until your dough is smooth and pliable.
Let the dough rest for 20 to 30 minutes- now this is really important. After you knead the dough, cover it with a damp cloth or a damp paper towel and let it rest for 20 to 30 minutes.
The makes the rolling easier, the rotis so much better.
Roll each dough ball to a smooth ball, round and no cracks- to roll a good roti, start with making sure that dough that you are going to roll is round and smooth.
If you start with a nice round and smooth dough, your chances of making a good roti will increase. Once the ball is round, then press it lightly between your palms to make it little flat.
Roll evenly using a rolling pin– ah! the toughest thing to do and this definitely comes with practice.
You have to apply equal pressure while rolling the roti and once you master it, the roti will automatically move as you roll.
Move the rolling pin all the way through the rolled roti so that it rolls evenly from all sides. Comes with practice so definitely don’t worry if you can’t do it in the first go.
Tawa should be hot before you add the rolled roti– this is one mistake that I did when I started making rotis and paratha. My tawa wouldn’t be hot enough and I would add the rolled roti to it.
The roti will take more time to cook since the tawa was not hot and that would result in a hard over-cooked roti.
So, make sure sure the tawa is heated well on medium-high heat before you put the roti on it.
Dust the dry flour (atta) from the rolled roti before putting it on the hot tawa– it makes your roti less dry and more soft.
Apply ghee once done- to add to the flavor and also to keep them soft, brush them with ghee once cooked.
Why my roti didn’t puff?
The most frustrating part of this entire roti making process happens when it doesn’t puff.
Even after making it for many years, I still have rotis which won’t puff.
The biggest reason is that it wasn’t rolled evenly. If it’s rolled too thin, to the point where edges are almost tearing apart (and the center of the roti is thick), then the roti won’t puff.
Make sure that its thickness is same throughout, that’s a good roti which will puff.
It also won’t puff if the dough was too tight/hard.
Frequently Asked Questions
How to store roti? If I am sending them with my husband to work, I always put an aluminium foil first, then a paper towel and then place the roti on top.
If you just roll them in an aluminium foil or paper towel, they will become soggy.
I store them the same way in the refrigerator with two layers.
How to re-heat roti? You can microwave them, just cover them with a damp cloth and microwave for 30 seconds.
You can sprinkle some water on the roti before heating them up.
Can you freeze these? Yes, you can freeze them. Just let it come down to room temperature.
Then place a parchment paper between each roti and make a stack. Then transfer the entire stack into a freezer bag and freeze.
Which brand of atta is the best? I use Sujata Gold atta and find it the best for rotis. You can use the brand that you like.
Method
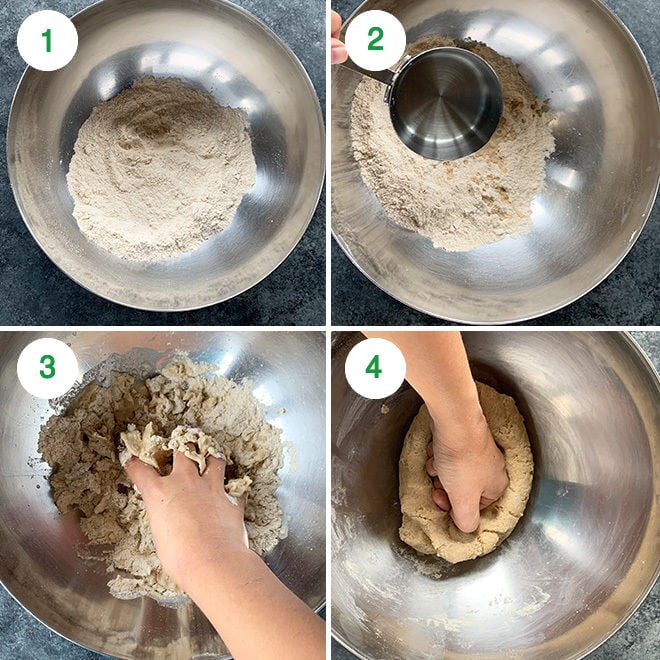
1- Take 2 cups (270 grams) atta in a large bowl. Usually a round flat plate with shallow edges called paraat is used but I just had a round mixing bowl so that’s what I used.
You can add little oil if you like here, I did not add any.
2- Start adding water, little by little.
3- As you add water, mix with your hands and bring the dough together. I needed around 3/4 cup (180 ml) +1 tablespoon (15 ml) water here. You may need more or less water depending on the kind of flour.
4- Once the dough comes together, start kneading the dough. Knead with the knuckles of your finger, applying pressure.
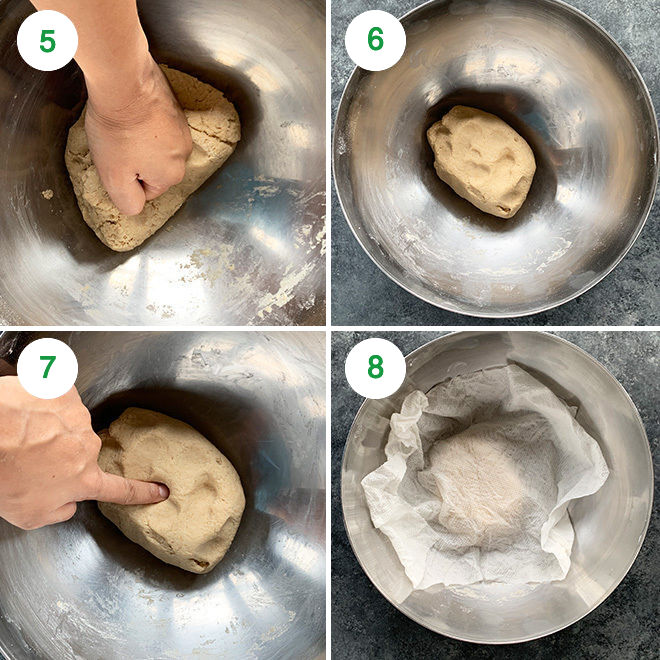
5- Fold the dough using your palms and knead again applying pressure with your knuckles.
6- Keep kneading until the dough feels soft and pliable. If it feels hard/tight, add little water and knead again. If it feels too sticky/soft, add some dry flour and mix.
7- Once done, the dough should be smooth. Press the dough with your fingers, it should leave an impression.
8- Cover the dough with a damp cloth or paper towel for 20 to 30 minutes.
I placed my paper towel under tap water and then squeezed all the water from it and used that damp paper towel to cover the cloth.
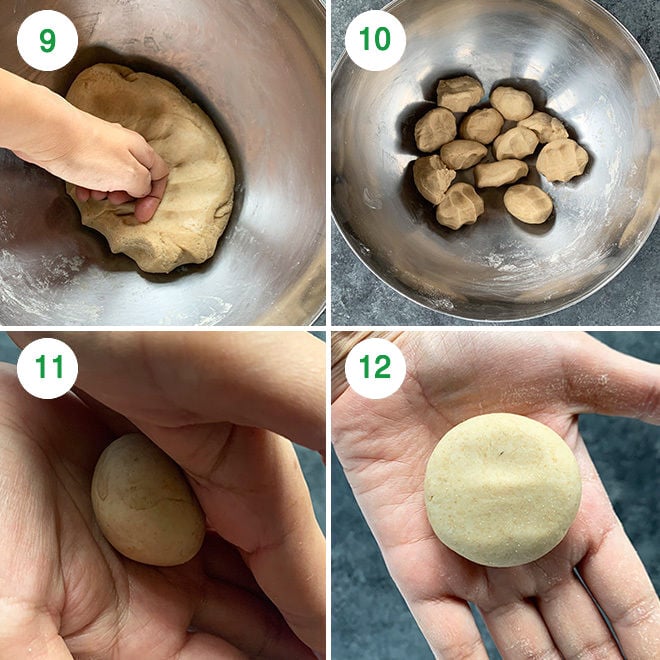
9- After the dough has rested, give it a quick knead again.
10- Divide the dough into 12 equal parts, each weighing around 35 to 37 grams.
11- Start working with one ball, while keep the remaining dough balls covered with a damp cloth so that they don’t dry out. Take one of the balls and press it between your fingers to make it smooth.
Then roll it between your palms to make it round and smooth. There should be no cracks.
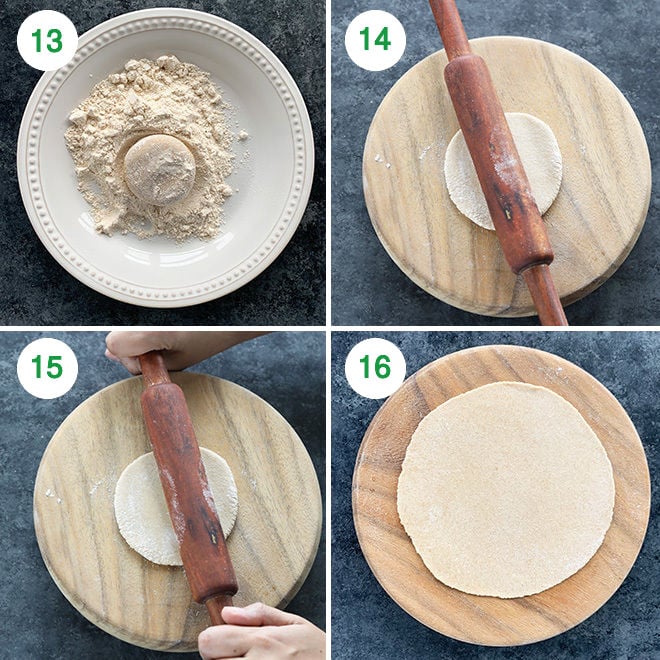
12- Press the round dough ball and flatten it slightly.
13- Now take around 1/4 cup atta in a plate for dusting the roti while rolling it. Dip the prepared dough ball into the dry flour and dust it from all sides.
14- Then start rolling the roti, using a rolling board and rolling pin.
15- Move the rolling pin lengthwise across the dough applying gentle pressure as you roll. If you are rolling it correctly, the dough will move in circular motion on its own and the roti will roll evenly. This comes with practice.
You can also roll and then take the dough and move it a little with your hands and roll again.
You will have to dip the roti in dry flour several time while rolling the roti. Anytime the dough starts sticking to the rolling pin, dip the roti into the atta from both sides and then continue rolling.
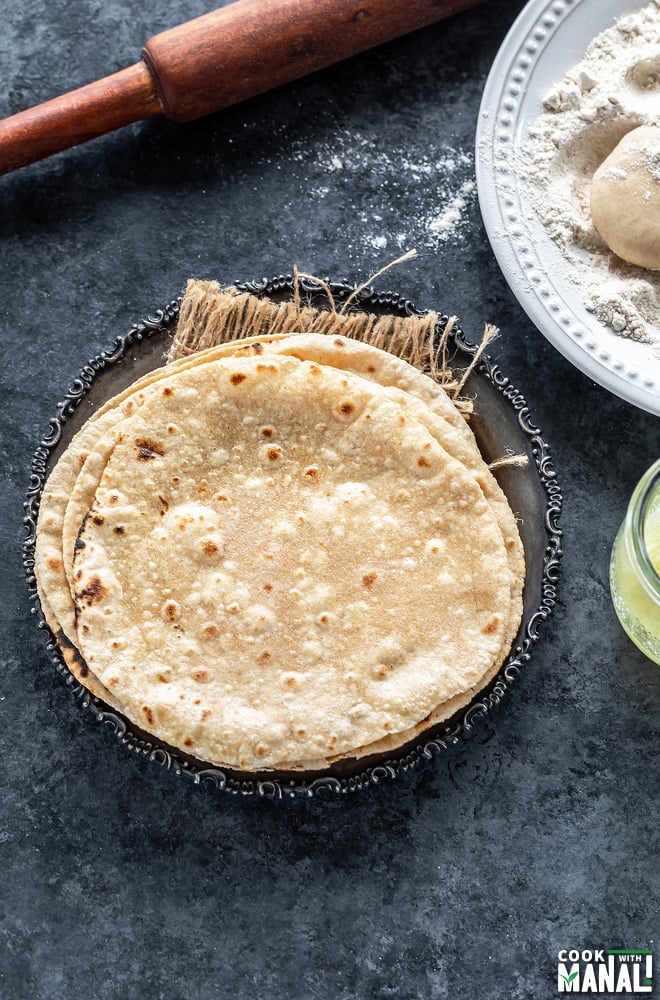
16- Roll it thin until you have a 5 to 6 inch diameter circular roti.
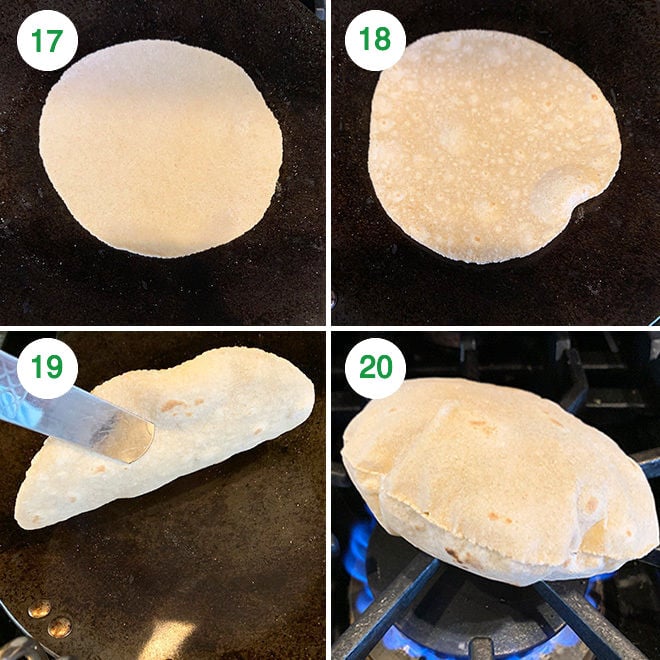
17- Heat the tawa (skillet) on medium-high heat. Make sure the tawa is hot enough before you place the roti on the tawa.
Dust excess flour off the rolled roti and place it on the hot tawa.
18- Let it cook for 15-30 seconds until you see some bubbles on top side. At this point flip the roti, you don’t want the first side to cook too much.
19- Now, let the other side cook more than the first side around 30 seconds more. Use a tong to see how much it has cooked from the second side now. If you see brown spots all over, means it has cooked enough.
20- Now, remove the roti from the tawa using a tong and place it directly on flame with the first side (which was little less cooked) directly on the flame.
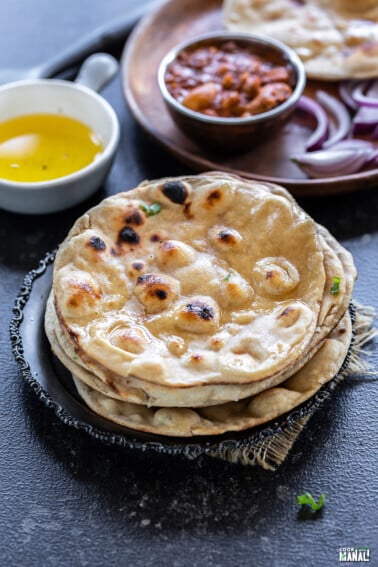
The roti if rolled evenly will puff up, flip with a tong to cook the other side as well. The roti is done when it has brown spots, don’t burn it.
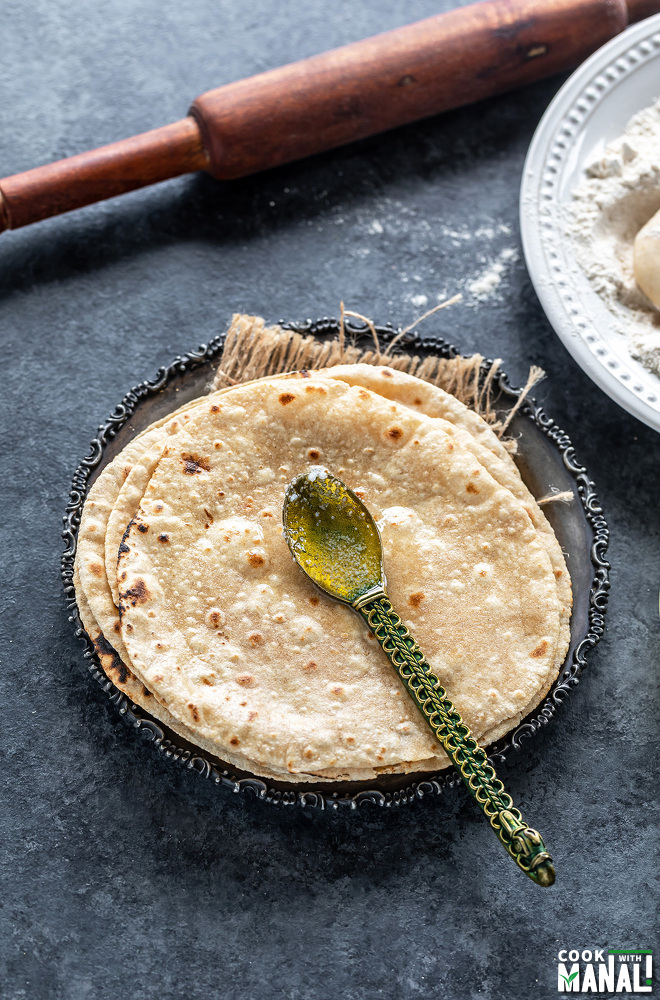
Apply ghee on the rotis immediately. Make all the roti/phulka similarly.
What if you have an induction top and can’t puff the roti on flame.
No worries, here’s how you can make chapati (or roti whatever you call it) on tawa without putting it directly on flame to puff.
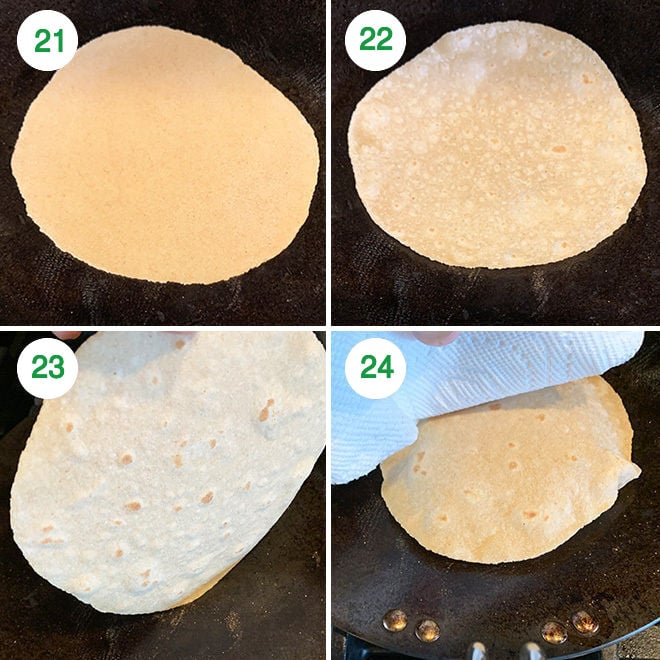
21- Roll the roti as usual and place it on the hot tawa.
22- Let it cook for 30 seconds until you see some bubbles on top. At this point flip the roti. You don’t want the first side to cook a lot.
23- Now, let the other cook side until it has nice brown spots (so it should cook more than the first side).
24- Now flip again (with the first side now at the bottom), press the roti with a paper cloth, any cotton cloth or spatula. It will puff up.
Flip again to cook the other side some more. Remove from tawa and brush with ghee.
The rotis are best enjoyed warm! Serve then with dal like dal tadka and simple Indian stir-fry like bhindi masala or aloo palak.
If you’ve tried this Roti Recipe then don’t forget to rate the recipe! You can also follow me on Facebook and Instagram to see what’s latest in my kitchen!
Roti Recipe - How to Make Roti/Chapati
Ingredients
- 2 cups atta, whole wheat flour, 270 grams + 1/4 cup for rolling the roti
- 1-2 teaspoons oil, optional, 5-10 ml
- water, as needed to knead a soft dough, I used around 3/4 cup (180 ml) + 1 tablespoon (15 ml)
- ghee, to brush the rotis
Instructions
Knead the dough
- Take 2 cups (270 grams) atta in a large bowl. Usually a round flat plate with shallow edges called paraat is used but I just had a round mixing bowl so that's what I used.You can add little oil if you like here, I did not add any.
- Start adding water, little by little. As you add water, mix with your hands and bring the dough together. I needed around 3/4 cup (180 ml) +1 tablespoon (15 ml) water here. You may need more or less water depending on the kind of flour.
- Once the dough comes together, start kneading the dough. Knead with the knuckles of your finger, applying pressure.
- Fold the dough using your palms and knead again applying pressure with your knuckles.Keep kneading until the dough feels soft and pliable. If it feels hard/tight, add little water and knead again. If it feels too sticky/soft, add some dry flour and mix.
- Once done, the dough should be smooth. Press the dough with your fingers, it should leave an impression.
- Cover the dough with a damp cloth or paper towel for 20 to 30 minutes.I placed my paper towel under tap water and then squeezed all the water from it and used that damp paper towel to cover the cloth.
Roll the roti
- After the dough has rested, give it a quick knead again.Divide the dough into 12 equal parts, each weighing around 35 to 37 grams.
- Start working with one ball, while keep the remaining dough balls covered with a damp cloth so that they don't dry out.
- Take one of the balls and press it between your fingers to make it smooth. Then roll it between your palms to make it round and smooth. There should be no cracks. Press the round dough ball and flatten it slightly.
- Now take around 1/4 cup atta in a plate for dusting the roti while rolling it. Dip the prepared dough ball into the dry flour and dust it from all sides.
- Then start rolling the roti, using a rolling board and rolling pin.Move the rolling pin lengthwise across the dough applying gentle pressure as you roll. If you are rolling it correctly, the dough will move in circular motion on its own and the roti will roll evenly. This comes with practice.
- You can also roll a little and then take the roti and move it a little with your hands and roll again. Roll it thin until you have a 5 to 6 inch diameter circular roti.You will have to dip the roti in dry flour several time while rolling the roti. Anytime the dough starts sticking to the rolling pin, dip the roti into the atta from both sides and then continue rolling.
Cook the roti
- Heat the tawa (skillet) on medium-high heat. Make sure the tawa is hot enough before you place the roti on the tawa.Dust excess flour off the rolled roti and place it on the hot tawa.
- Let it cook for 15-30 seconds until you see some bubbles on top side. At this point flip the roti, you don't want the first side to cook too much.Now, let the other side cook more than the first side, around 30 seconds more. Use a tong to see how much it has cooked from the second side now. If you see brown spots all over, means it has cooked enough.
- Now, remove the roti from the tawa using a tong and place it directly on flame with the first side (which was little less cooked) directly on the flame.The roti if rolled evenly will puff up, flip with a tong to cook the other side as well. The roti is done when it has brown spots, don't burn it.
- Apply ghee on the rotis immediately. Make all the roti/phulka similarly. Serve warm.
Making Roti/Chapati on Induction top (without puffing on flame)
- here's how you can make chapati (or roti whatever you call it) on tawa without putting it directly on flame to puff.Roll the roti as usual and place it on the hot tawa. Let it cook for 30 seconds until you see some bubbles on top. At this point flip the roti. You don't want the first side to cook a lot.
- Now, let the other side cook until it has nice brown spots (so it should cook more than the first side). Now flip again (with the first side now at the bottom), press the roti with a paper cloth, any cotton cloth or spatula. It will puff up.
Flip again to cook the other side some more. Remove from tawa and brush with ghee.
Notes
Nutrition
Nutrition information is automatically calculated, so should only be used as an approximation.