With this step-by-step samosa recipe, you will be able to make the perfect crispy and flaky samosa right in your kitchen. These potato samosas are filled with a spicy potato filling and are also vegan. I grew up in India, eating a lot of samosas, there were street vendors selling samosa at literally every corner of my hometown.
Whenever we had guests over for evening chai, my mom would always make onion pakora and order samosa from the street vendor. Honestly, we didn’t make too many samosas at home growing up, because literally they were available everywhere but once I moved to the US and started missing the samosas I enjoyed in India, is when I got into learning the tips and tricks behind making the perfect samosa.
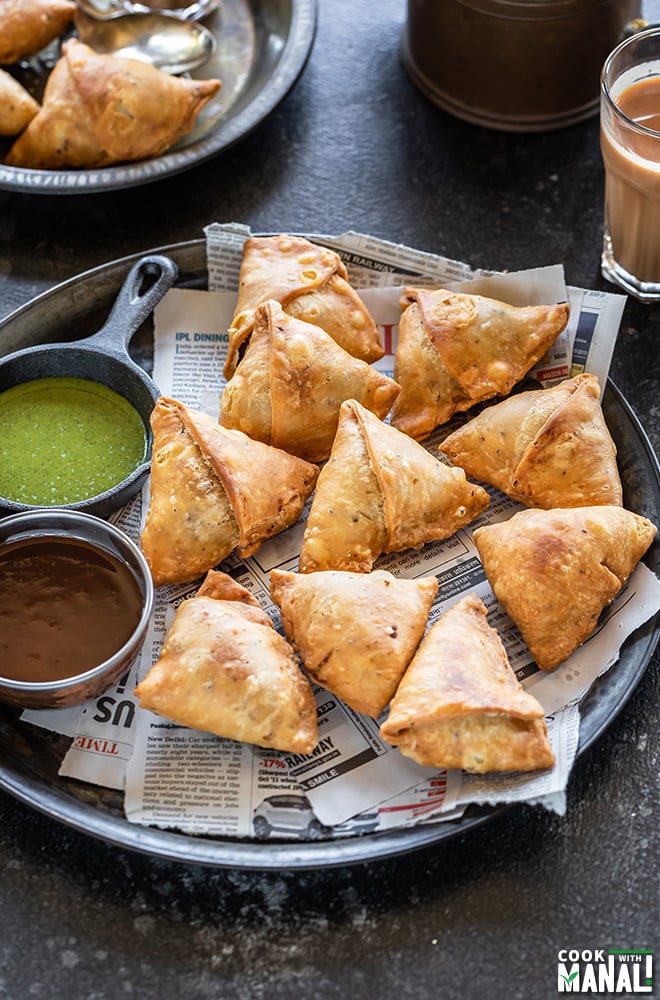
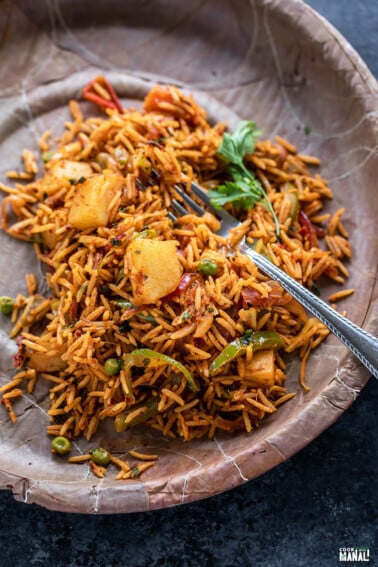
A lot of Indian snacks are often deep fried like pakora, kachori, and of course samosa! I love traditional deep-fried samosa; nothing beats munching on a good crispy samosa on a rainy evening with a cup of chai. But over the years, I have also baked samosas in the oven, and even air fried them. However, I always keep coming back to this traditional samosa recipe simply because there’s nothing quite like it. And as a bonus, you can also make a spicy and flavorful samosa chaat with it.
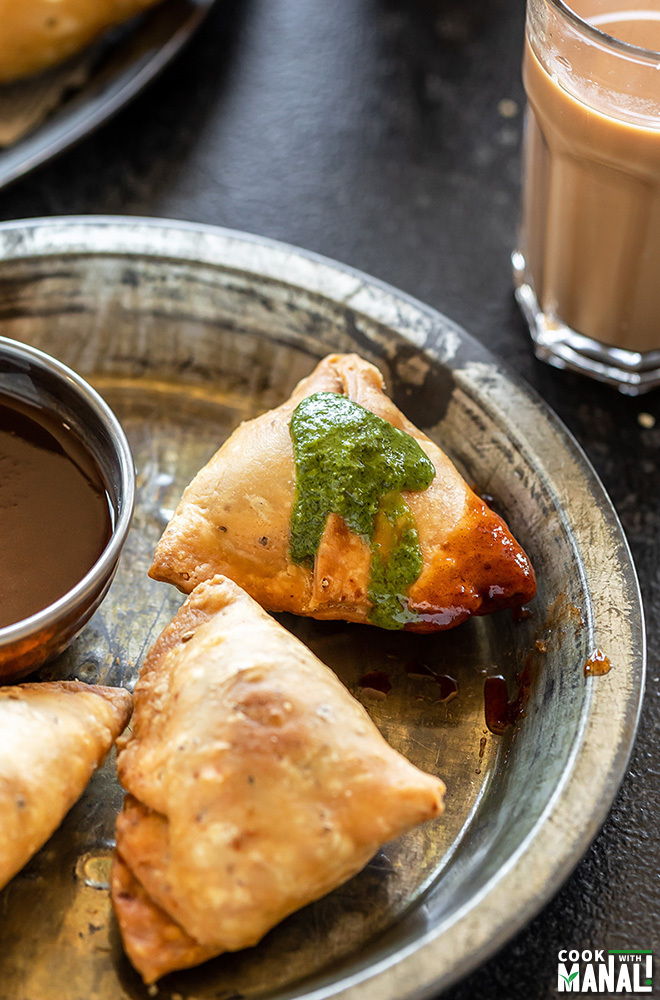
I like adding peas to my samosa, if you don’t like it, you may skip it. But what you can’t skip is dunking hot samosa into sweet and sour tamarind chutney (that’s my favorite)!

Why my samosa recipe works!
Over the years, I have played around with this recipe and experimented several times to come up with an easy, foolproof recipe. I also learnt a few tricks from a street vendor during one of my India trips where he was gracious enough to share his knowledge with me. This is one of those treats that you should make for special occasions or over a weekend when you want to have some fun in the kitchen because it does take some time to put it all together.
Fry the samosa on low heat – the most important thing first- always fry the samosa on low heat that way they will turn crisp.
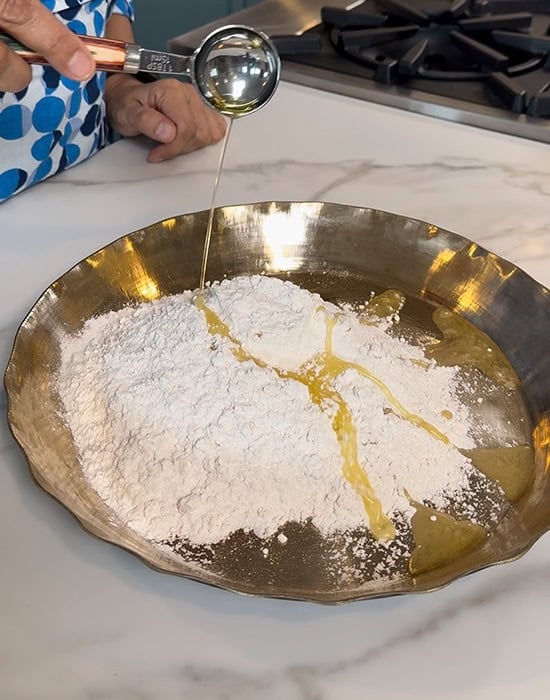
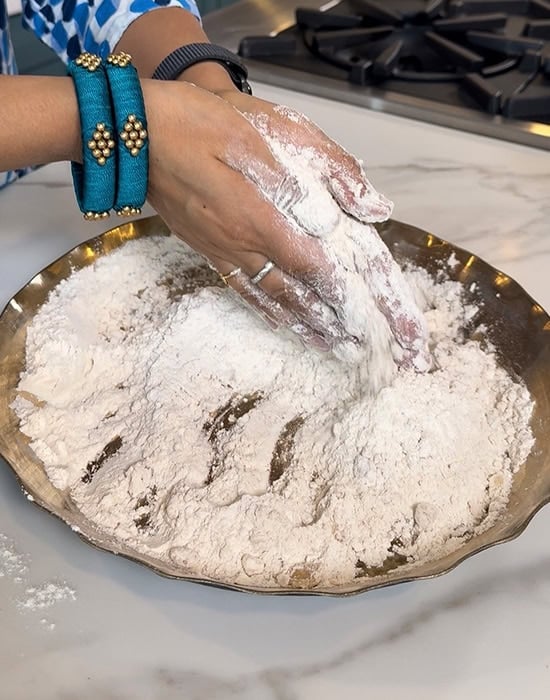
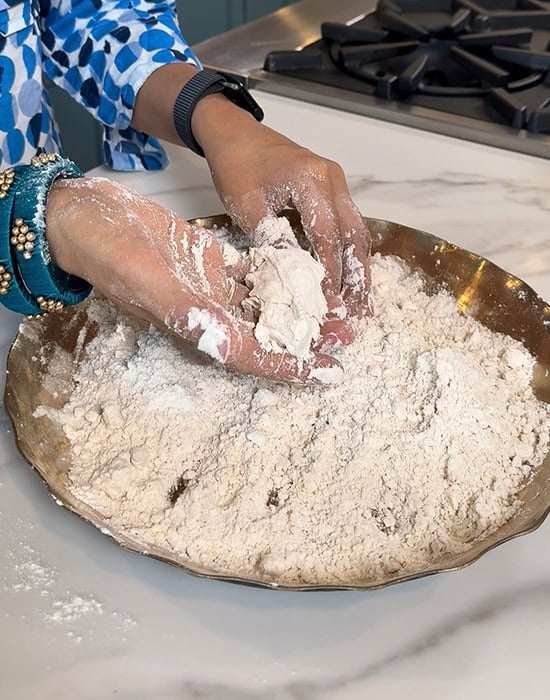
Mixing the oil with flour is important– rub the oil with the flour using your fingers for a good 3 to 4 minutes, this incorporates the oil well into the flour and makes the dough flaky.
Don’t overwork the dough– you only need to bring the dough together. If you overwork it, and knead it a lot, the samosas will turn out hard.
Dough should be stiff– in my experience and multiples rounds of recipe testing, a soft dough will not give crispy samosa.
Let the dough rest for around 40 minutes– always remember to let the dough rest for at least 30 to 40 minutes before you start making the samosa. A relaxed dough is much easier to work with.
Roll the dough evenly and roll it thin–roll the dough thin for that crunchy samosa with thin edges- ideally around 1/16-inch or less and roll it evenly.
Do not use any flour while rolling the samosa, you can apply little oil on your rolling pin.
And that’s how you will end up with the perfectly crispy and flaky samosas!

Troubleshooting common Samosa problems
Why is My Samosa Not Crispy?
This happens when you fry the samosa in hot oil. You need to fry the samosa on low heat always, around 285-300 F degrees. Once the outer coating becomes firm, you can then increase the heat to medium at fry at 320-350 F degrees.
Another reason is that your dough wasn’t stiff enough. The dough should be pliable but stiff, it should not be soft like roti dough. It’s your dough is soft, you samosa will be soft as well.
Samosa isn’t flaky enough
The way to fix this problem is to make sure that the oil is well incorporated into the flour. Rub the flour with oil using your fingers for 2 minutes and they will be flaky/khasta (as we say in hindi).
Samosa crust has bubbles on top
This happens from dropping them in hot oil, drop the samosa in oil on low heat. That will prevent the formation of bubbles.
How to Make Samosa (from scratch)
- Start making the dough first
After adding the oil, rub the oil with your fingers into the flour, this is an important step for flaky samosa.
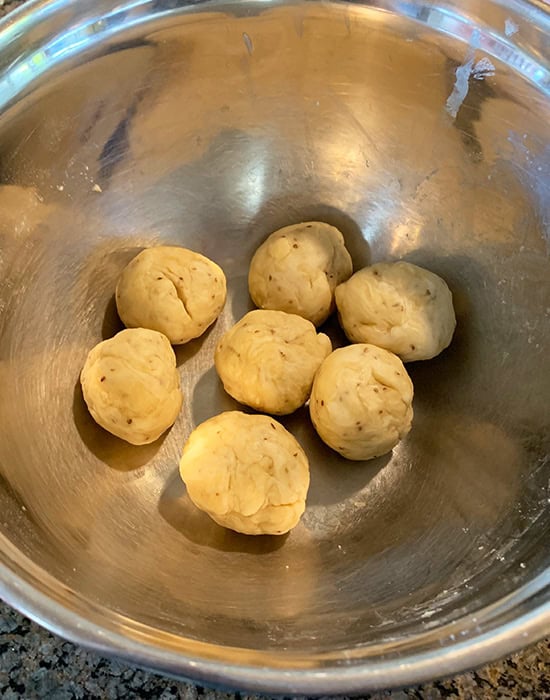
- Make a stiff dough
The samosa dough should not be soft. And once you knead it to a stiff dough, cover it with a cloth and let the dough rest for 30-40 minutes.


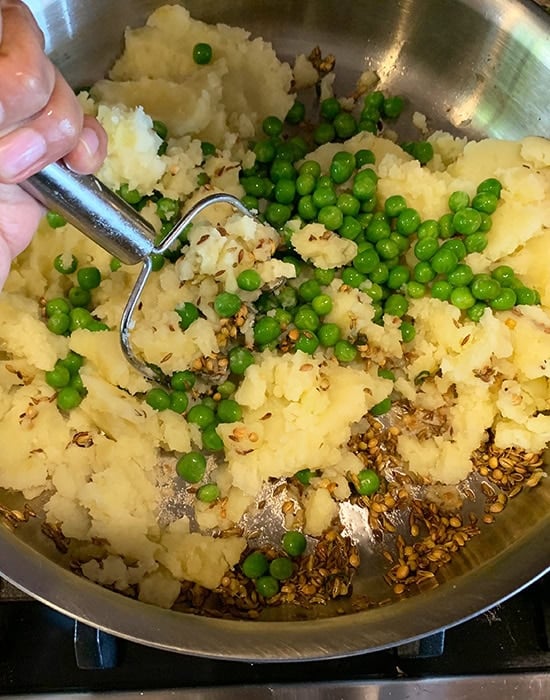
- Start working on the filling
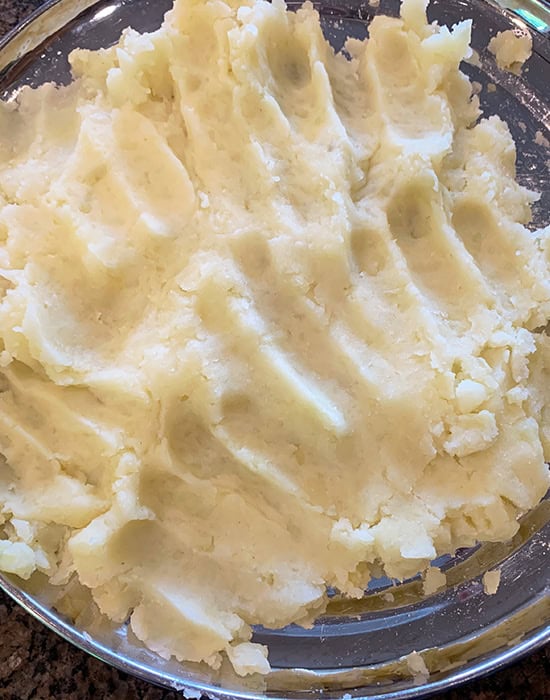
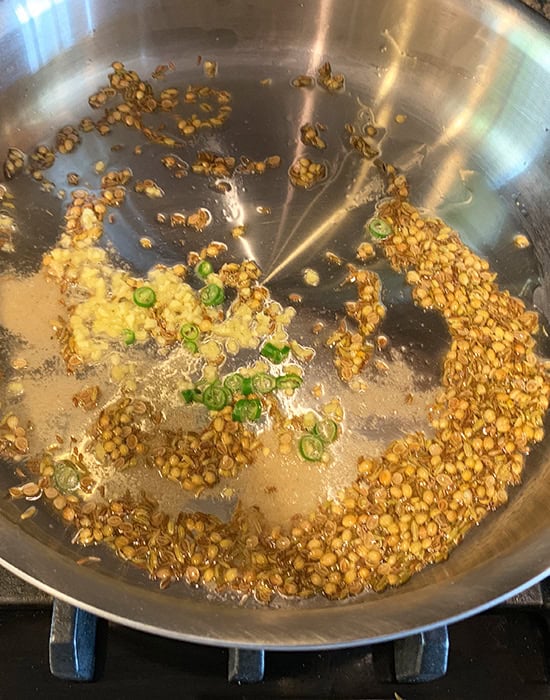
First boil the potatoes and then mash them. Then start working on the samosa filling, first crackle the cumin seeds, then add crushed coriander seeds, ginger and chopped green chili.
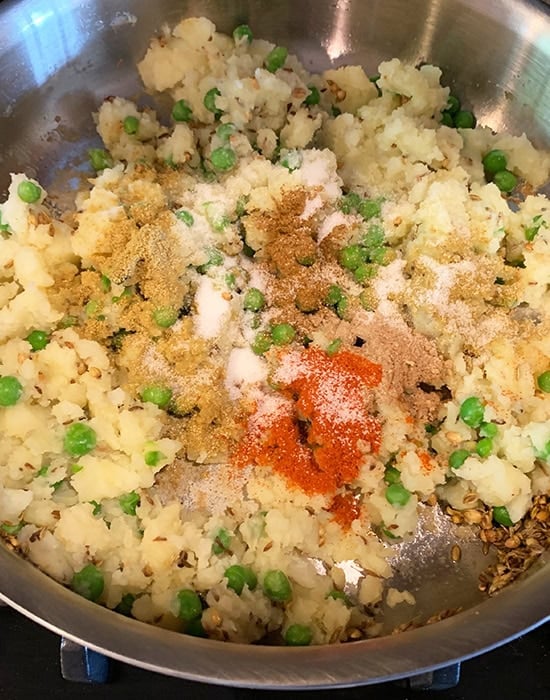
- Dry spices, potatoes and peas = perfect samosa filling
Once the seeds crackle, then add the mashed potatoes along with green peas and ground spices like chili powder, coriander powder, amchur, and garam masala.
- Start shaping the samosa
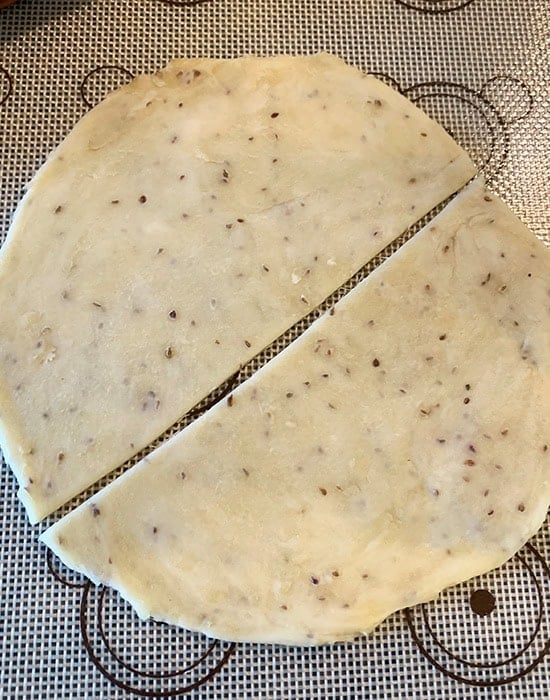
Divide the prepared dough into 7 equal parts of 58-60 grams each. Then roll each ball into a circle (start with 1 dough ball) and cut into half. You are going to make samosas with each half.
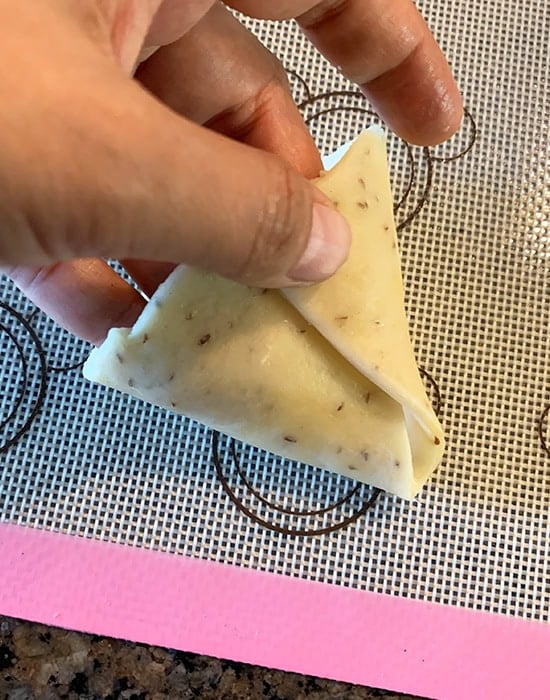
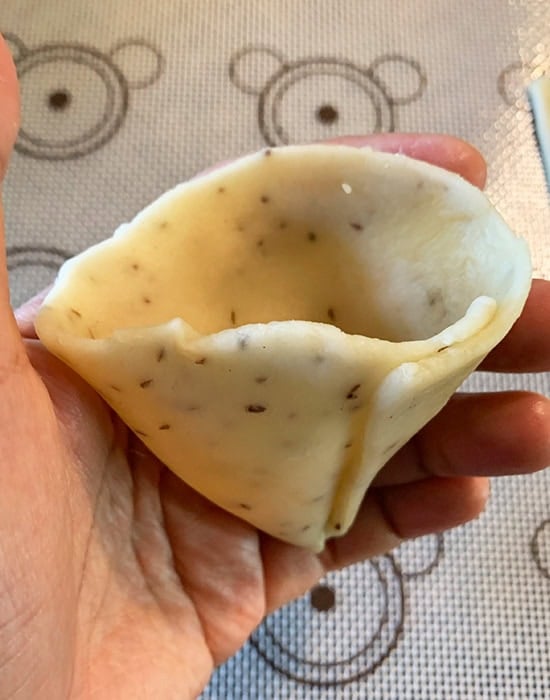
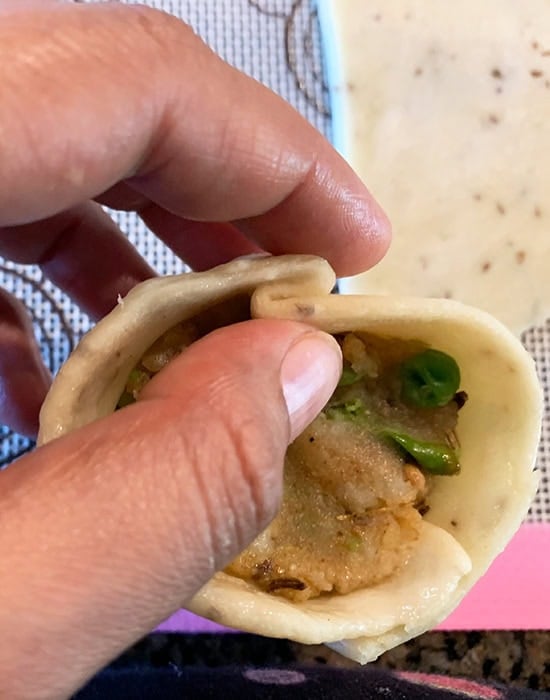
- First roll and shape into a cone shape
Apply water to seal the edges and then fold as shown in the pictures by bringing the two edges of the flat side together. Pinch and seal to bake a cone.

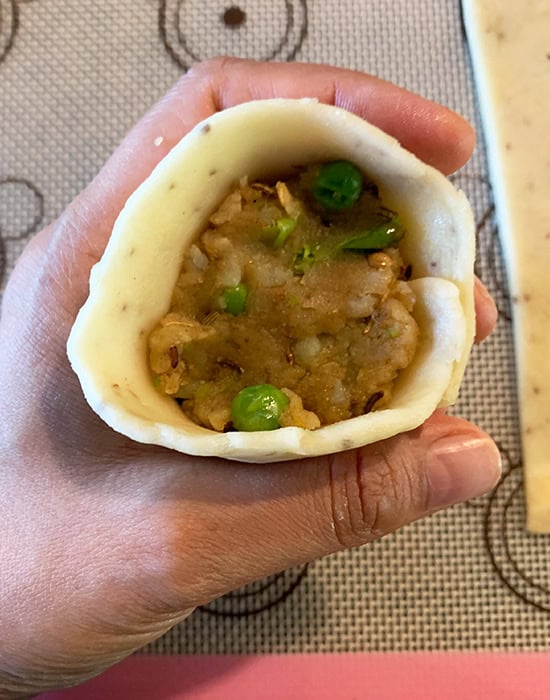
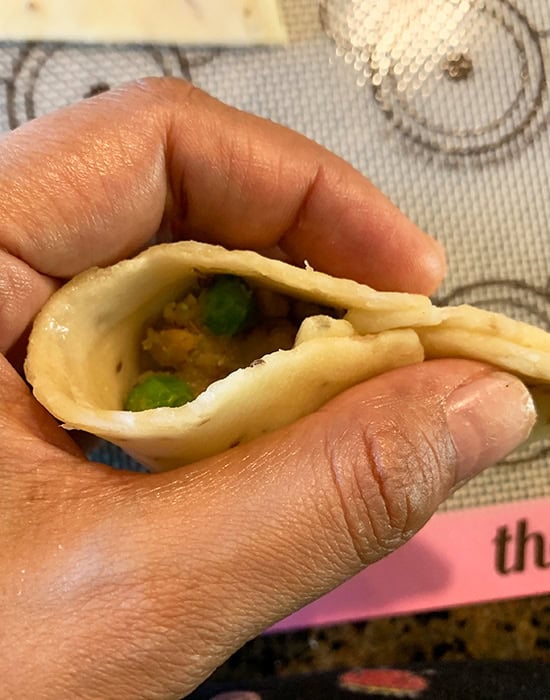
- The filling goes in next!
Fill the samosa now with the prepared filling but do not overfill.
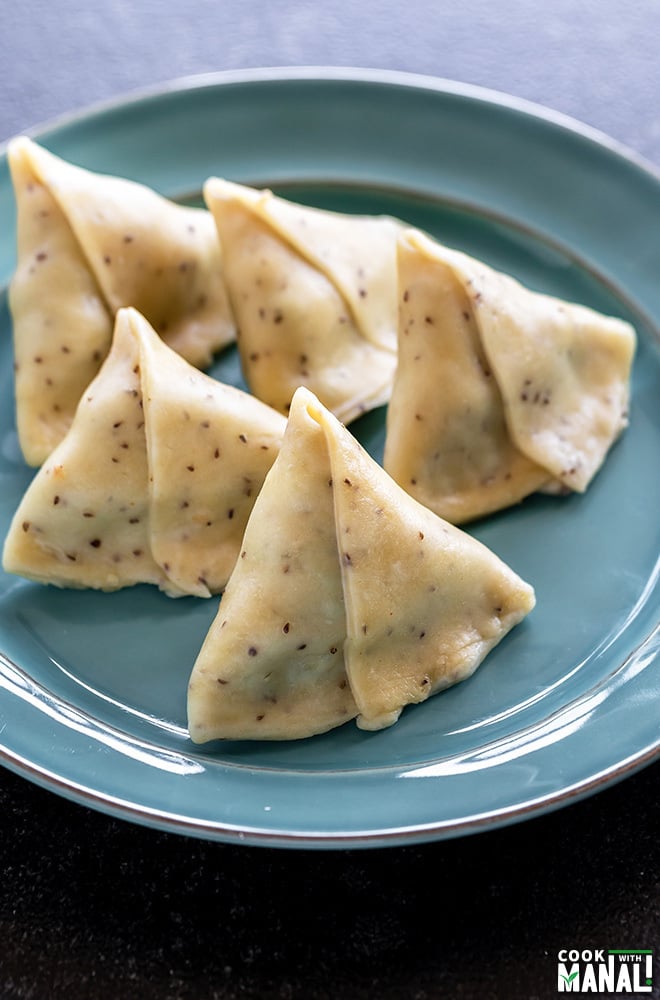
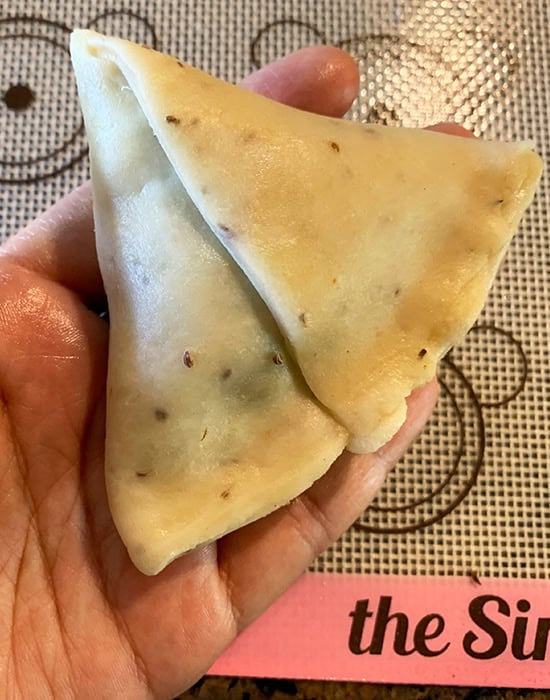
- Seal the samosas well so that they don’t open during drying
And make all the samosas similarly. Keep them covered with a cloth to prevent them from drying.
I like using a paste of water and flour to seal the samosa, it makes sure the samosas don’t open in hot oil during frying
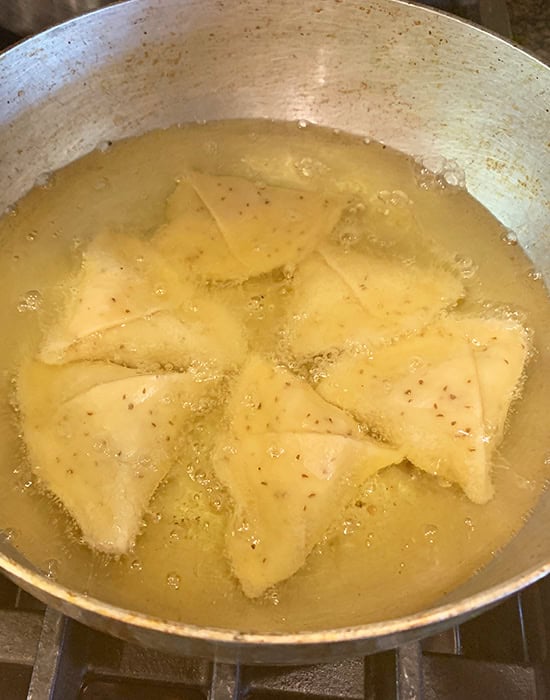
- Deep fry on low heat
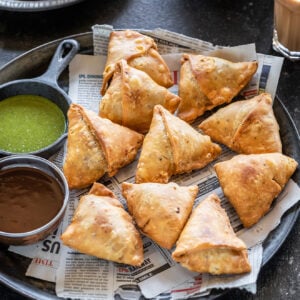
It is very important to fry on low heat for crispy samosa. Fry until they are crisp golden brown and enjoy with

Yes, you can bake the samosa
Line a large baking sheet with parchment paper and then place the samosa on it. Brush the samosas with oil and then bake at 350 F degrees for 30 to 35 minutes or until browned.
Yes, air frying also works!
If you want to air fry the samosas, you will make the entire recipe as is then preheat your air fryer according to manufacturer’s instructions. Place the samosa in a single layer (you might have to air fry them in batches) and brush them with little oil.
Air fry at 375 F degrees for 11 to 12 minutes, then turn them over, brush the other side with oil and air fry an additional 10 minutes until golden brown and crisp. This time may vary depending on the air fryer model.
And what to do with leftover samosa
If you have leftover samosas, you can use them in different ways. Like make, Samosa Chaat where you pair the samosas with chole and chutneys.
You can also make Samosa Sandwich, apply chutneys on bread and place a samosa in between. You can even put some sev on top and enjoy.
Homemade Samosa (Crispy & Flaky!)
Ingredients
Samosa Dough
- 2 cups all purpose flour (maida), 260 grams
- 1 teaspoon ajwain, carom seeds
- ¼ teaspoon salt
- 4 tablespoons + 1 teaspoon oil, 65 ml
- water, to knead the dough, around 6 tablespoons
Samosa Filling
- 3-4 medium potatoes, 500-550 grams
- 2 tablespoons oil, I used avocado oil
- 1 teaspoon cumin seeds
- 1 teaspoon fennel seeds
- 2 teaspoons coriander seeds, crushed
- 1 teaspoon finely chopped ginger
- 1 green chili, chopped
- ¼ teaspoon hing, asafoetida
- ½ cup +2 tablespoons green peas, I used frozen green peas which I soaked in warm water for 10-15 minutes before using
- 1 teaspoon coriander powder
- ½ teaspoon garam masala
- ½ teaspoon amchur, dried mango powder
- ¼ teaspoon red chili powder, or add more to taste
- ¾ teaspoon salt, or to taste
oil, for deep frying
Instructions
Make Samosa Dough
- Start by making the samosa dough. To a large bowl, add 2 cups flour (260 grams), 1 teaspoon ajwain and ¼ teaspoon salt. Mix well using a wire whisk or your hands. Add 4 tablespoons +1 teaspoon oil (65 ml) to the bowl and then start mixing the oil into the flour.
- Rub the flour with the oil using your fingers until the oil is well incorporated into the flour. Do this for 2 to 3 minutes, you don’t want to rush this step because this will make your dough crispy.Once the oil is incorporated, the mixture will resemble crumbs. Press some flour between your palm- it should form a shape (& not crumble) – that means oil is enough and well incorporated.
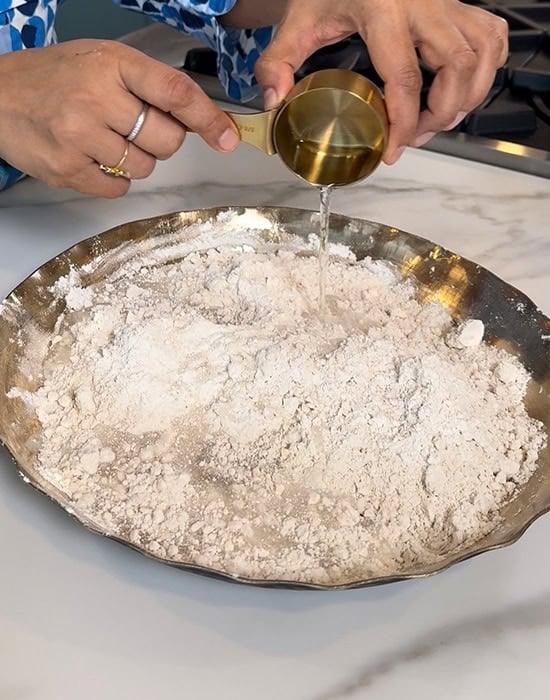
- Now, start adding water, little by little and mix to form a stiff dough. I used around 6 tablespoons water here, but it can vary. The dough needs to be stiff and not soft. Don’t knead the dough much.
- Cover the dough with a moist cloth and let the dough rest for 40 minutes. I usually soak a paper towel in water and then squeeze out all the water and then cover the dough with that. While the dough is resting, start working on the filling.
Make the potato filling
- Boil 4-5 medium potatoes (500-550 grams) until done- 8 to 9 whistles on high heat with natural pressure release if using stove-top pressure cooker or if using Instant Pot, add 1 cup water to the steel pot and then place a trivet inside, place the potatoes on top of the trivet and cook on high pressure for 12 minutes with natural pressure release.Once the potatoes are boiled, let them cool down a little and then carefully peel the skin of the potatoes and mash them using a potato masher. Set them aside.
- Now, heat 2 tablespoons oil in a pan on medium heat. Once the oil is hot, add 1 teaspoon cumin seeds, 1 teaspoon fennel seeds and 2 teaspoons coriander seeds (crushed using mortar pestle).Let the seeds sizzle for few seconds and then add 1 teaspoon chopped ginger, 1 green chili (chopped) and ¼ teaspoon hing. Cook for 1 minute.
- Add the boiled & mashed potatoes to the pan along with ½ cup + 2 tablespoons green peas to the pan. Turn heat to low-medium.Then add 1 teaspoon coriander powder, ½ teaspoon garam masala, ½ teaspoon amchur, ¼ teaspoon red chili powder (or to taste), and ¾ teaspoon salt (or to taste).
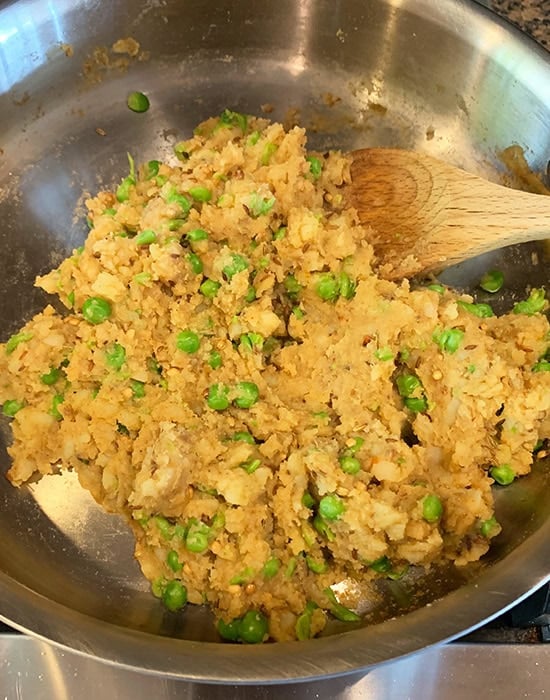
- Mix everything together using a spatula. I use my potato masher to combine the spices and seasonings well with the potatoes and peas.Once everything is well combined, remove the pan from heat and let the filling cool down a bit.
Shape & fry the Samosa
- Once the dough has rested, give it a quick knead and then divide the dough into 7 equal parts of around 58-60 grams each.Take one piece of dough and roll it into a thin circle, around 6 to 7 inches in diameter and 1/16 inch (or less) thickness, then cut the dough into two equal parts. Keep the remaining dough always covered with a moist cloth else the dough will dry out.
- Take one part of the cut circle and apply water on the straight edge/side. I usually mix some flour with water so that it forms a nice glue.Now bring the two ends of the straight edge together and pinch them to form a cone. Refer to step by step pictures in the post for a graphic representation which might be helpful. Pinch the pointed ends to make it a perfect cone shape.
- Fill the samosa with the prepared potato filling, around 1 to 2 tablespoons. Don’t overfill the samosa.Now again apply water all around the circumference of the cone as you must seal it. Pinch the opposite side (side opposite to where you pinched to form the cone) to form a plate (refer to step by step pictures in the post). Then pinch the edges and seal the samosa.
- Your samosa is now ready. Repeat with remaining dough and make all the samosas similarly. Always remember to keep the filled samosa covered with moist cloth while roll and fill the others.
- Now heat oil in a kadai on low heat (around 285-300 F). To check if oil is ready, drop a small piece of dough into the oil, it should take a few seconds to come up to the surface. That means the oil is ready. Or use a kitchen thermometer if you have one.
- Drop the shaped samosas into the oil. Fry on low heat. After around 10-12 minutes, the samosa will become firm and light brown in color. At this point, increase the heat to medium (around 350 F) and fry until it gets nicely browned.Don’t overcrowd the kadai/wok, fry 4-5 samosas at a time. And each batch will take around 15 to 20 minutes since we fry on low heat so be patient.
- Once you finish frying one batch, lower the heat again to low and wait until the temperature of the oil drops and then add the second batch. If you fry samosa on high heat, they will not get crispy and the dough will remain uncooked so regulating the oil temperature is crucial while making samosas.Fry all the samosa and then enjoy them hot with chutney!
Video
Notes
- Can I Use Whole Wheat Flour?
- How to Store and Re-heat Leftover Samosas
- How To Freeze Samosas
Nutrition
Nutrition information is automatically calculated, so should only be used as an approximation.

Hi Manali
Can you make this recipe using the air fryer
Yes! I would air fry at 360-370 F for 18 to 20 minutes total, flip once in betweem
Can I make the dough in advance and save it for a couple of days before assembling? We are batching a lot of these but want to not have to do it all at once. Thanks!
yes! you can even shape the samosa and keep them in the fridge for couple of days before frying, you can even freeze them (uncooked).
I cooked at home and its so delicious
Thanks for trying!
First-time samosa maker who loves to eat samosas, and I finally got around to trying to make them myself. I used your recipe as a reference, and they came out delicious! Thank you so much!
great, thanks for trying LAuren!
When you refer to low oil tempature and high temerater. what are these temperatures.
around 320 F
its highly detailed pray for me as am trying it out
haha hope it turned out well!