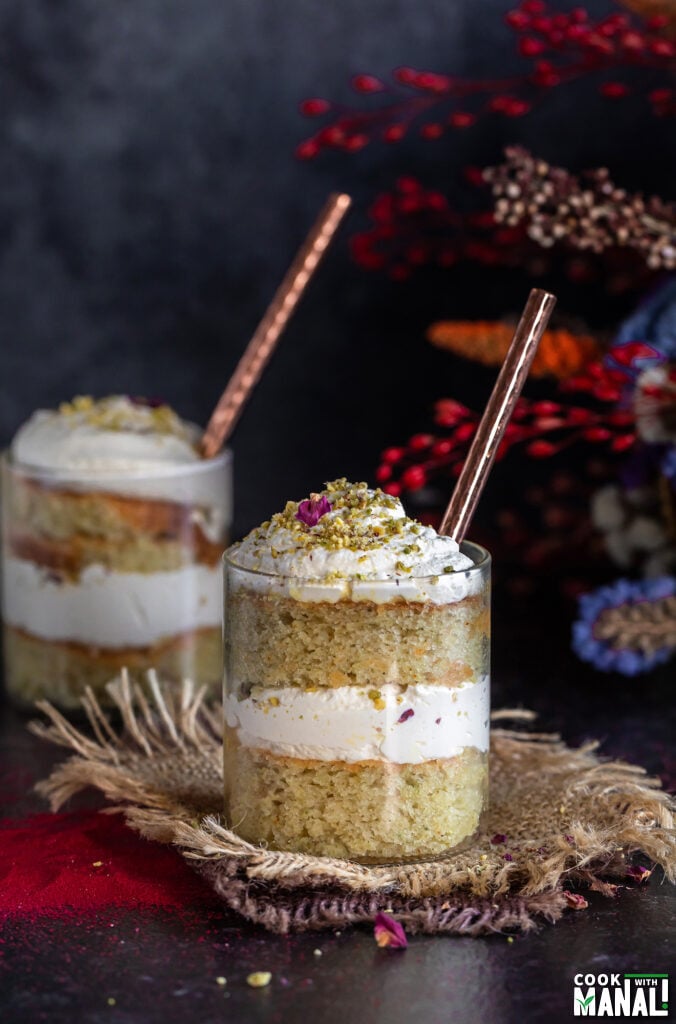
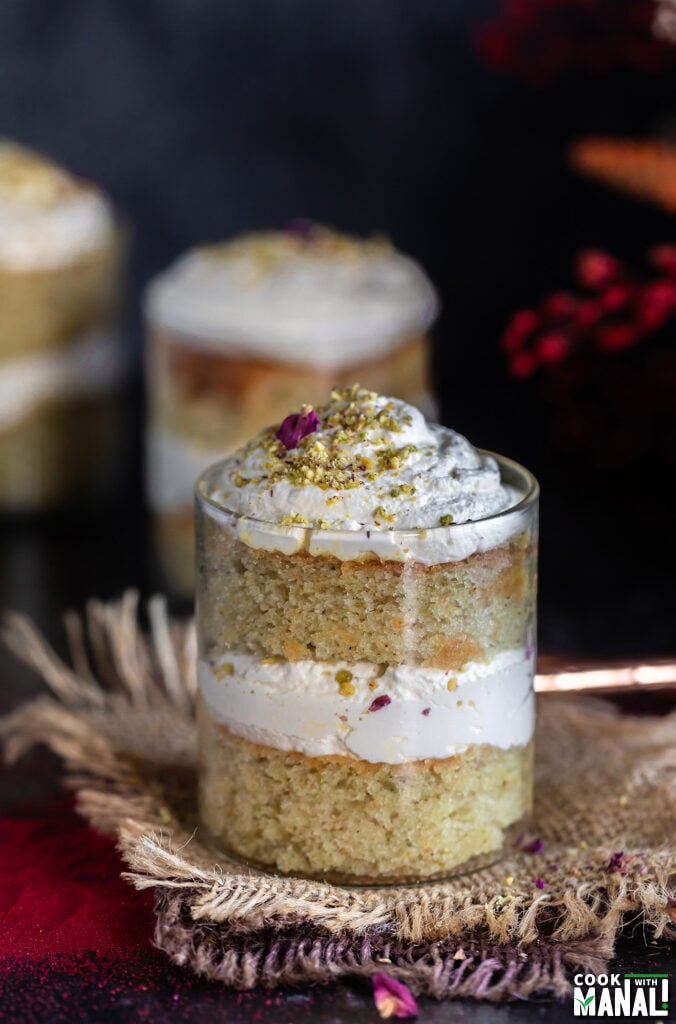
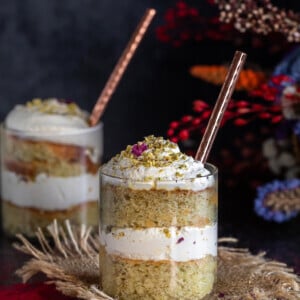
These Thandai Cake Jars have layers of eggless thandai cake, drizzled with thandai and topped with a thandai flavored whipped cream and crushed pistachios. It makes an indulgent dessert for Holi/Diwali or any other festivities.
Individual desserts which are pretty to look at and delicious to eat are my favorite to serve at festive parties. Whether it’s my Rasmalai Cake Jars, or Badam Halwa Jars, they are guaranteed to be a crowd pleaser.
Adding to that list are these Thandai Cake Jars. They are delicious, festive and so pretty to look at. These have a layer of eggless thandai cake, which I flavored with my homemade thandai powder. Then the cake is soaked with thandai and finally topped with a thandai flavored whipped cream. It’s lightly sweetened and makes just the perfect dessert for your Holi or Diwali party.
These Thandai Cake Jars:
If you are anything like me and love serving fusion desserts at your festive parties, then you are going to love these jars.
- are the ideal individual party dessert.
- can be made in advance hence making them perfect for parties.
- mixes the flavor of thandai with cake and cream making is suitable for Holi/Diwali.
- is egg-free so you can serve it to those who don’t eat eggs or have an egg allergy.
Make The Thandai Powder First
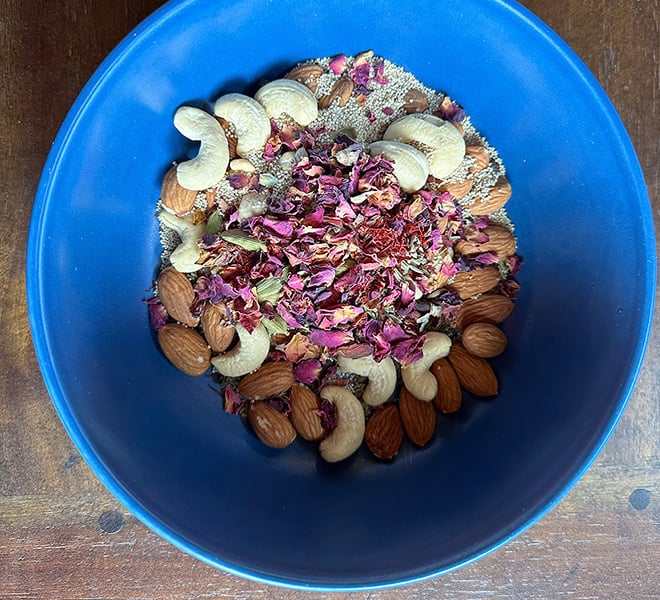
This recipe uses my homemade thandai powder. So, have that ready to go before you start making this recipe. It’s a good idea to make the thandai powder a few weeks before the festival and then use it in a number of recipes.
The powder is made with nuts like almond, cashews and spices like fennel, cardamom, saffron, peppercorn. There are also rose petals, melon seeds added to it. This power is super refreshing and versatile and I always keep a jar in my pantry.
Thandai Cake Jars- Step by Step Method
*Make sure you have the thandai powder ready to go before you start.
1- Preheat your oven to 350 F degrees. Line a 9 x 13-inch baking pan with parchment paper and spray it with a little oil spray and set it aside. In a large bowl, sift the following:
- 1 & 1/2 cups all purpose flour (195 grams)
- 2 tablespoons thandai powder (20 grams)
- 1 & 1/4 teaspoon baking powder
- 1/4 teaspoon baking soda
- 1/8 teaspoon salt
2- Mix the dry ingredients using a wire whisk and set it aside.
3- In another bowl, add the following:
- 1/2 cup plain yogurt (120 grams)
- 1 cup caster sugar (200 grams)
- 1/2 cup oil (120 ml), I used avocado oil
- 1/2 teaspoon vanilla extract
4- Mix for 3 to 4 minutes using a wire whisk until the sugar completely dissolves. The sugar needs to dissolve completely hence I like using caster sugar which mixes better than regular granulated sugar. You can also do this step using a stand mixer or hand mixer.

5- Add half of the dry ingredients now and mix using a spatula until combined.
6- Now, add 1/2 cup milk and mix using a whisk until it is well combined, and finally fold in the remaining half of the dry ingredients and mix until combined.
7- Do not overmix the batter, a few streaks of flour is okay.
8- Pour the batter into a 9 x 13-inch baking pan and spread it with a spatula. Bake the cake at 350 F degrees for 15 to 20 minutes or until a toothpick inserted in the center comes out clean. My cake was done around 18 minutes but every oven is different so keep an eye after 15 minutes. If using a 9-inch or 8-inch square pan for this recipe, the baking time will increase.

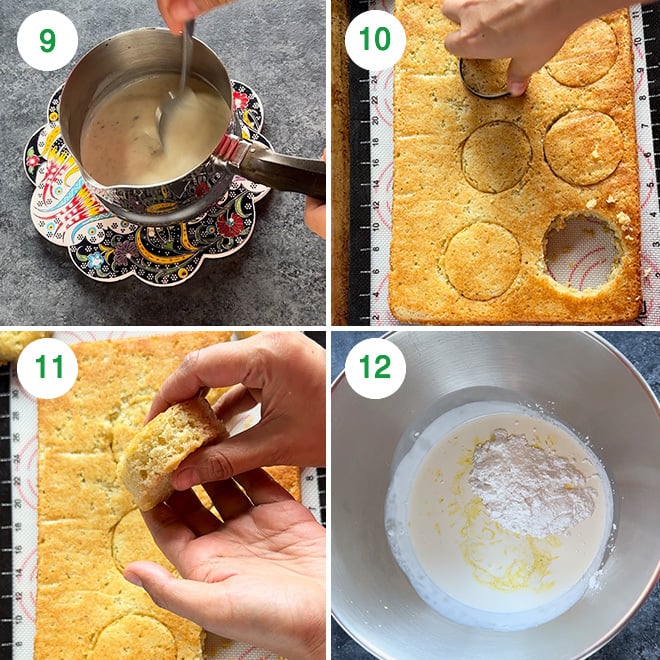
9- While the cake is baking, make 1 cup of thandai. Heat the milk in a pan on the stove-top for 10 minutes to thicken it up a little. You can skip this step if you want, this just makes the milk thicker/creamier. To warm milk, add 1 tablespoon thandai powder and 1-2 teaspoons sugar (to taste). Stir until everything is well combined and remove the pan from heat. Set this aside.
10- Once the cake is baked, take it out of the oven and let it cool down, then cut into rounds/circles. The size of the circle should be adjusted according to the jars that you will be using to make the thandai cake jars.
11- I cut them into rounds of 2 & 1/2 inches diameter using a cookie cutter.
12- Now, make the whipped cream. To the steel bowl of your stand mixer, add 2 cups heavy cream (480 ml/16 oz). Make sure the cream is chilled, you can also chill the bowl and whisk attachment before this step. To that add 3 tablespoons of the prepared thandai milk, and 2 to 3 tablespoons of powdered sugar.
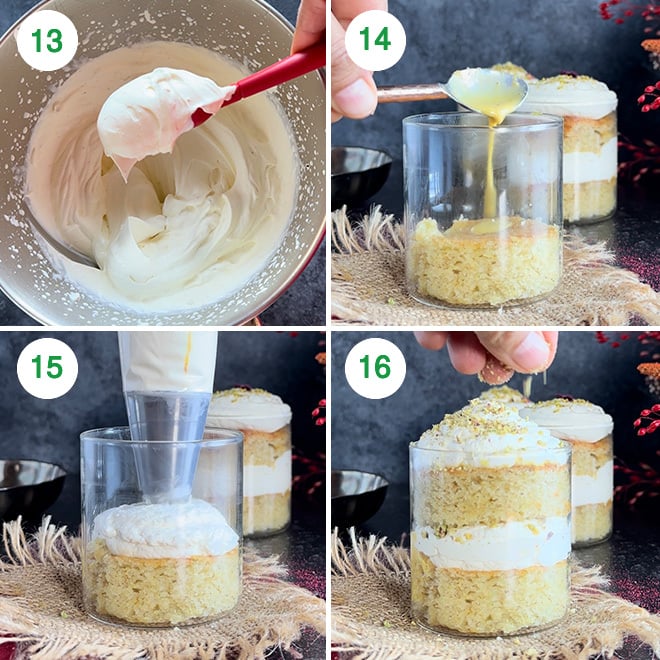
13- Beat using the wire whisk attachment on medium-high speed until it forms stiff peaks. Be careful to not overbeat else the cream will separate. You can also do this using a hand mixer or just a wire whisk.
14- Now, that all the components of the dessert are ready, it is time to assemble the jars. I have used 7 oz capacity cups here but you can use any size you want. Don’t make them too big though else it will be too much for individual serving.
Start by placing a cut cake round at the bottom of the jar. If you are using a small jar, you can even cut every cake round into 2 and use that. I just used them as such because my jar was big enough. Then drizzle 1 to 2 teaspoons of the prepared thandai milk on top of the cake. You basically want to cover the cake with the thandai.
15- Pipe some of the prepared whipped cream on top and then top with crushed pistachios.
16- Repeat the same layers- cake, thandai milk, whipped cream once more and finally garnish with more crushed pistachios and rose petals. Make all the jars similarly. Serve immediately!
Making In Advance
If you are planning to make this for your Holi or Diwali party, you can definitely make the entire thing in advance and refrigerate. I would recommend bringing it to room temperature for at least 30 minutes before serving.
You can also make parts of it in advance, like the cake and the thandai and the cream but assemble the jars just before your dinner/party.
Important Tips & Notes
- I have used 7 oz glass jars for layering these thandai cake jars. If you are using a smaller jar, you have 2 options. You can either just do a single layer of cake > thandai milk > thandai whipped cream or you can slice each cake round into 2 parts and then use them. So, you will have to use only 1 cake round that way in one jar and your cake layers will be thinner.
- This dessert is lightly sweetened. If you prefer it to be more sweet, add more sugar in the cake batter. You can also increase the amount of powdered sugar in the whipped cream. I used just 2 tablespoons and that made it on the less sweeter side. Keep in mind that the thandai milk that you can add to the whipped cream also has sugar in it.
- You can thicken the milk by boiling it for 10 to 15 minutes for a thicker thandai to drizzle over the cake. Or you can also use evaporated milk. Or you can totally skip this step and just add thandai powder to milk to make thandai. That will also work.
- If you don’t have caster sugar, you can use granulated white sugar. Just make sure to mix very well, the sugar needs to dissolve completely with the yogurt and oil mixture.
- The cake in this recipe is baked in a 9 x 13-inch pan. If you use a deeper pan like a 9-inch or a 8-inch square pan, the baking time will increase, it would take around 25 minutes.
More Desserts Using Thandai Powder
The thandai powder that I have used in this recipe is so versatile. I have used it in so many recipes. The Thandai Cookies are crispy, flavorful and so addictive while the White Chocolate Thandai Mousse is creamy and makes a stunning dessert especially when served in cute glasses!
The Thandai Coconut Ladoo are seriously addictive and the Paan Thandai Shots is something I can never have enough of! Add vanilla ice cream to make the paan shots even creamier.
If you’ve tried this Recipe then don’t forget to rate the recipe! You can also follow me on Facebook, Instagram to see what’s latest in my kitchen and on YouTube to watch my latest videos.
Thandai Cake Jars
Ingredients
For the Cake
- 1 & 1/2 cups all purpose flour, 195 grams
- 2 tablespoons thandai powder, 20 grams
- 1 & 1/4 teaspoon baking powder
- 1/4 teaspoon baking soda
- 1/8 teaspoon salt
- 1/2 cup yogurt, 120 grams, I used plain whole milk yogurt
- 1 cup caster sugar, 200 grams
- 1/2 cup oil, 120 ml, I used avocado oil
- 1/2 cup milk, 120 ml
- 1/2 teaspoon vanilla extract
Thandai
- 1 cup milk, I used whole milk
- 1-2 teaspoon sugar
- 1 tablespoon thandai powder
Thandai Whipped Cream
- 2 cups heavy cream, 480 ml/16 oz, cold
- 3 tablespoons thandai
- 2-3 tablespoons powdered sugar, to taste
crushed pistachios & dried rose petals, to decorate
Instructions
Make the cake
- In a bowl sift together flour, thandai powder, baking powder, baking soda and salt. Mix until well combined and set it aside. Line a 9 x 13-inch baking pan with parchment paper and preheat oven to 350 F degrees. Pre-heat your oven to 350 F degrees.
- Add the wet ingredients in another bowl- yogurt, caster sugar, oil and vanilla extract. Mix using a wire whisk for 3 to 4 minutes until the sugar completely dissolves.
- Now, add half of the dry ingredients into the wet ingredients and mix until combined. Then add the milk and mix. Add the remaining half of the dry ingredients and mix until combined. Do not overmix the batter. Pour the batter into a 9 x 13-inch cake pan and bake at 350 F degrees for 15 to 20 minutes or until a toothpick inserted in the center comes out clean. My cake was baked in around 18 minutes. Remove from oven and let it cool.
Prepare the thandai
- Boil 1 cup of milk in a pan. Once it comes to a boil. reduce the heat and let it cook for 10 to 15 minutes. This step is optional, you can skip this step if you want, this just makes the milk thicker/creamier. To the warm milk, add 1 tablespoon thandai powder and sugar to taste. Stir until everything is well combined and remove the pan from heat. Set this aside.
Make the whipped cream
- To the steel bowl of your stand mixer (or use your hand mixer), add cold heavy cream, 3 tablespoons of the prepared thandai and powdered sugar.
- Beat using the wire whisk attachment on medium-high speed until it forms stiff peaks. Be careful to not overbeat else the cream will separate.
Assemble the thandai cake jars
- Once the cake has cooled, cut it into rounds of around 2 & 1/2-inches diameter. You can cut them in any size, my servings jars were this size and hence I cut them accordingly. I have used 7 oz capacity cups here but you can use any size you want.
- Take a jar and place a cut round cake at the bottom, followed by 1-2 teaspoons of thandai. Then top with whipped cream and crushed pistachios. Repeat the layers with another cake layer, thandai and whipped cream. Top with crushed pistachios and rose petals. Make all the jars in the same way. Serve immediately!
Notes
- This recipe serves 6 when using 7-oz glasses. It will serve more if you use smaller glasses.
- The baking time will increase if using a 8 or 9-inch square pan.
Nutrition information is automatically calculated, so should only be used as an approximation.
 Your feedback is valuable!Please share your comments, ratings, and any suggestions or adaptations below to help us improve and make our recipes more successful.

Hi instead of oil can I use the same amount of butter?
you may
SUPERB AMAIZINGN